Do you know how to insert a table in Gmail compose? If not, then you have come to the right place. This article will show you how to easily insert a table into Gmail’s body.
You can insert tables in Gmail, but you cannot directly insert them in the compose section.
Table of Contents Show
How to Insert a Table in Gmail in Computer?
Copy And Paste the Table
If you want to insert a table into your Gmail, simply follow these steps:
- Open Google Sheets/Doc in one tab.
- Create a table in Google Sheets in another tab (You can find steps for creating a table in google Sheets at the bottom in the FAQ section).
3. Copy all the cells from Google Sheets.
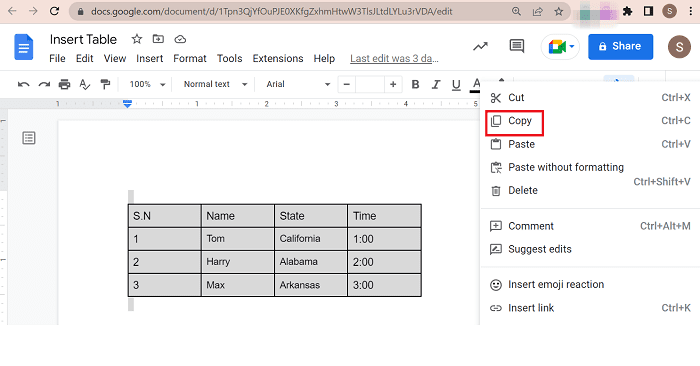
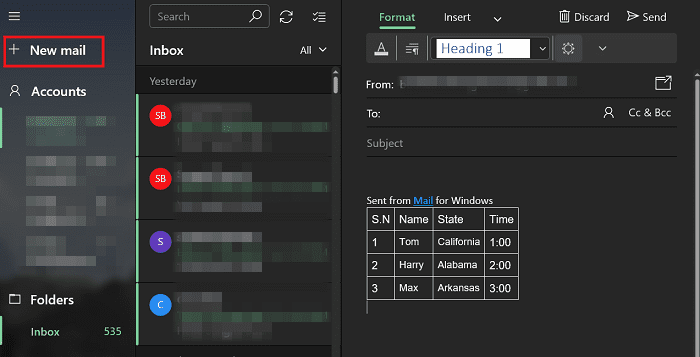
4. Then, return to the Gmail tab, create an email by clicking +New Mail, and compose your message.
5. Finally, paste it to the compose section.
Use A Google Chrome Extension
If you are using the Google Chrome browser, you can find one specialized tool, Gmail Tables by clouds. This will allow you to add/create tables.
This is a Chrome extension available to download for free in the Chrome Web store, just install this extension. After installing the extension, you will see a new button beside the Send button inside the insert option in your email composer window.
How to Install Gmail Tables by Clouds?
If you are not aware of how to install extensions then, go to Gmail Tables by cloudHQ on the Google extension page.
Then click Add to Chrome.
Or, you can follow these steps:
- Open the Chrome web Store.
2. In the search bar at the top left, type Gmail Tables by cloudHQ.

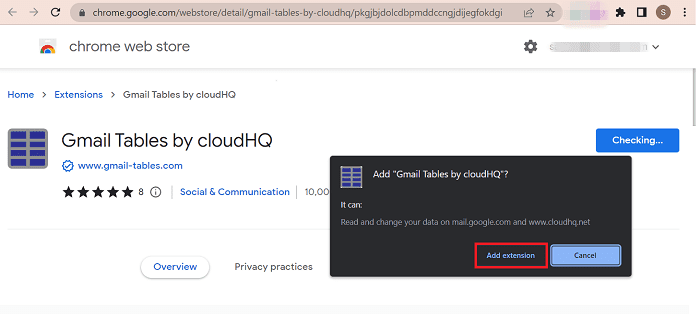
3. Click Add to Chrome.
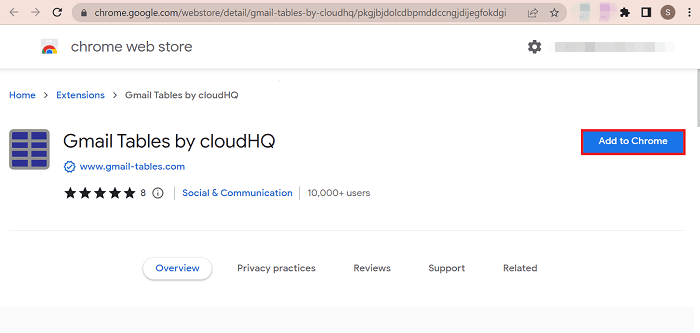
4. Then, click Add extension.
5. You will see ‘Gmail Tables by cloudHQ has been added to Chrome’ message appears in the pop-up window.
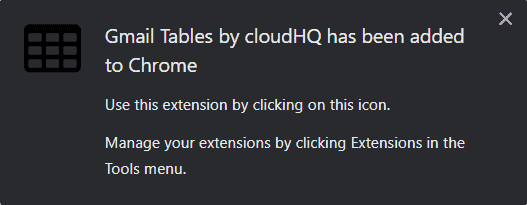
6. To manage the extension, click the extension icon to the right of the address bar.
![]()
7. Then, Pin/turn on the extension.
![]()
Follow the instructions below after the successful installation of the extension.
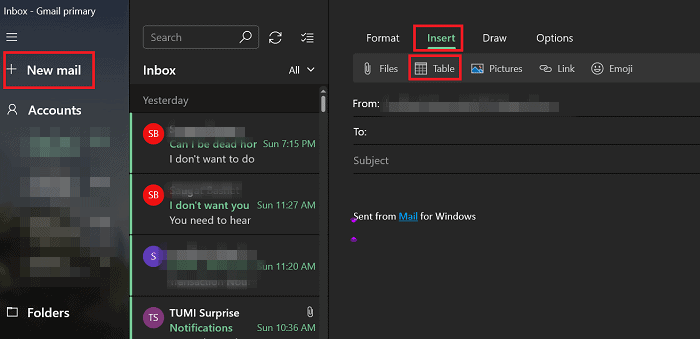
- Go to Gmail and click on Compose/+New Mail.
2. As soon as you install the extension, a new button will appear beside the files in your email composer window.
3. Click Insert > Table on the pop-up menu.
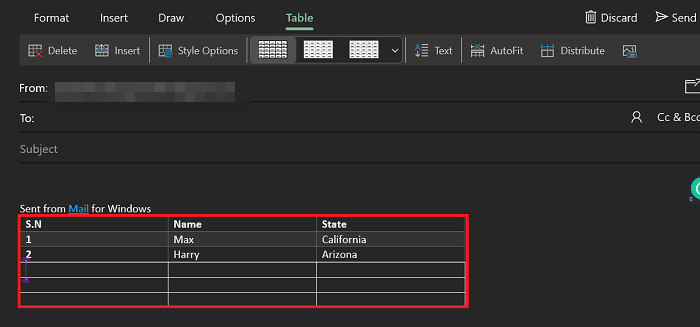
4. Specify the size of the table, and choose how many rows and columns you want to add.
5. Click on the OK button, and you can start typing in the entries. Also, you can easily add or remove rows/columns.
How to Insert Excel Table in Gmail (With Borders)?
If you want to insert tables with borders in Gmail then follow these steps.
- Paste the Excel table. It will get pasted without borders.
- Go to Home, and select the table, and you can easily add borders to the table just by clicking on the Borders icon at the top right bar. Select the options on the drop-down box menu. We select All Borders here, for example.
![]()
3. Select the table and copy it.
4. Next, open your Gmail app, and Tap Compose.
5. Then, paste the table into the compose email section as in earlier steps. You can see the table with borders in Gmail.
How to Insert Table in Gmail on Mobile(android/ios)?
Inserting a table in Gmail is also very simple for mobile phone users. Almost every step is similar to inserting a table in Computer. You need an app like Google Sheets to create a table. Here is how to do it.
- First, Open the Google Sheets app on your phone(android/IOS) and create a New spreadsheet by tapping the ‘+’ sign at the bottom right corner.
![]()
2. Enter the data you want in the spreadsheet.
3. After that, Select the cells you want to copy and Copy them.
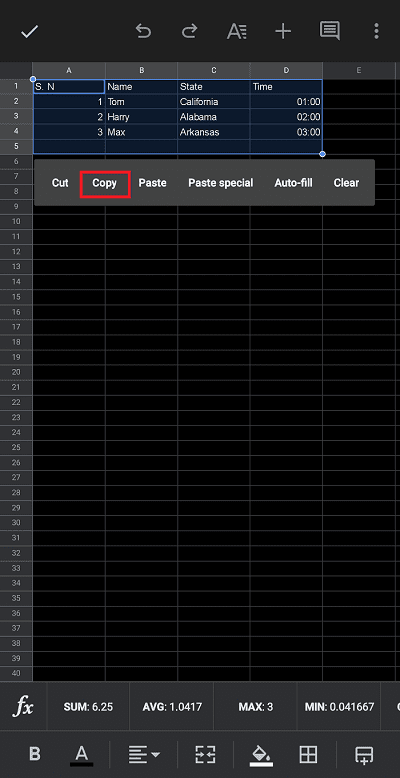
4. Next, open your Gmail app, and Tap Compose.

5. Then, paste the table into the compose email section. Once you do that, the table will be pasted into the Email section.

Frequently Asked Questions
How to Create a Table in Google Sheets?
If you don’t know how to create a table in google Sheets then don’t worry. Creating a table in Google Sheets is very easy and simple and takes no more than a few clicks. Here is the solution, follow the steps below.
- Go to insert on the menu bar.
2. Select Table.
3. You can see a pop-out box, and choose how many rows and columns you want to add.
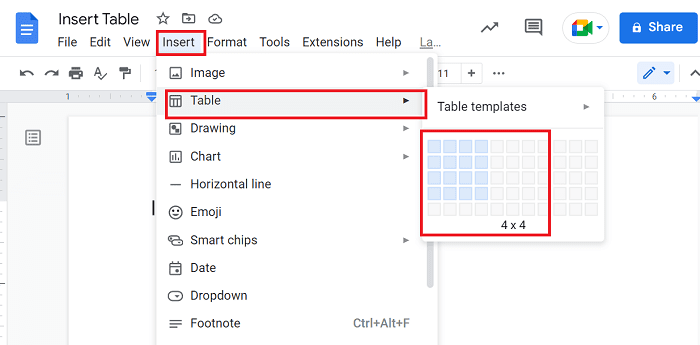
4. The table will be added to your document.
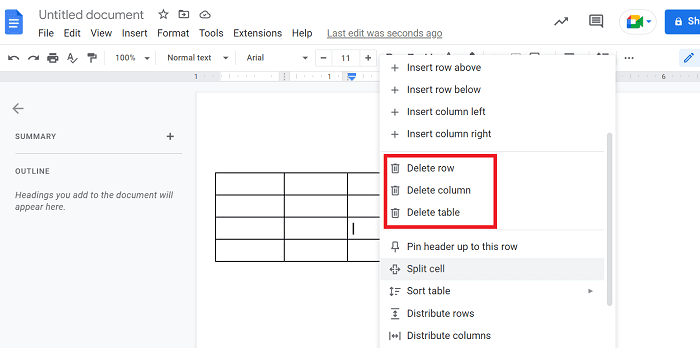
5. If you want to add or remove the rows and columns, go to the cells in the table where you want to either add or remove the rows or columns.
6. Right-click and Choose Delete row or Delete column or Delete Table as per your wish.
