Ethernet cables are a common way to connect devices to the internet, and they are typically more reliable and faster than their existing wireless counterpart.
However, there are times when an Ethernet cable may be connected to a device but has no internet access. This can be frustrating, especially if you rely on the internet for work or other important tasks.
In this article, we will discuss some easy fixes you can try if you are experiencing this problem. Before diving into the potential solutions, it’s essential to rule out any obvious problems.
Table of Contents Show
Causes of Ethernet Cable is Connected but no Internet Access
- The Ethernet cable itself is damaged or not properly connected to the device or router.
- There might be a faulty or damaged port.
- The device or router is not configured correctly or has a hardware failure.
- There is an issue with the Internet Service Provider (ISP) or the connection they are providing.
- There is a problem with the network configuration, such as incorrect IP addresses or DNS settings.
- There is a problem with the router or modem, such as a firmware issue or hardware failure.
- Faulty network drivers.
- Parental controls may be enabled for the device.
How to Check Whether the Problem is From the ISP Side?
You can confirm whether the issue is from the ISP side by connecting to the internet from the Wi-Fi of the same network to which your ethernet is connected. If the Wi-fi connection is providing you internet access but the ethernet connection doesn’t then there is no issue from the ISP side.
How to Fix Ethernet Cable is Connected but no Internet Access
We will be trying to look at these solutions in the order of the severity of our issue. Here are some steps you can try to troubleshoot the problem. Starting up from the most common solution:
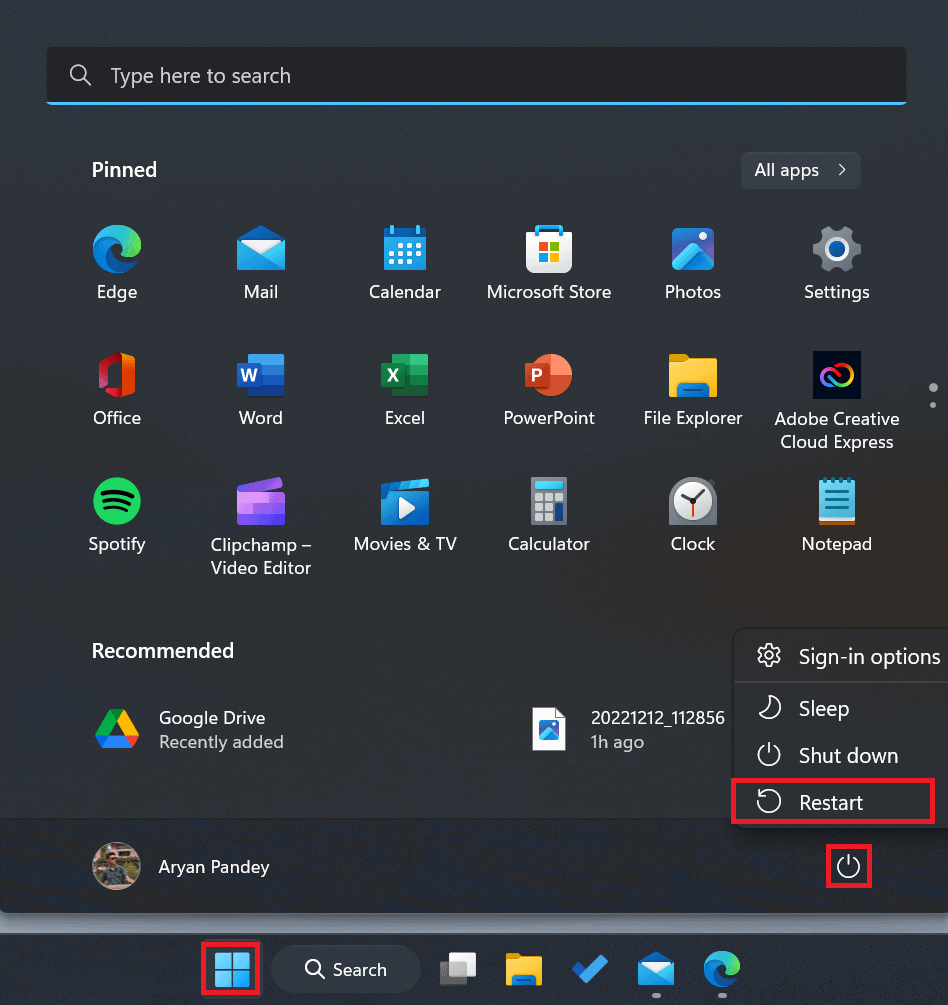
Restart Your PC
Restarting your PC can solve the majority of your existing internet issues on your laptop.
It is the most common way to solve internet issues. It reloads all the startup items and drivers from the beginning.
So, this means if you have a problem in any of them, it would most likely resolve in most cases.
Follow these steps:
1. Click on the Start menu at the bottom-left bottom-middle of your computer
OR,
Press the Windows key to open the Start.
2. Click on the Power button.
3. Select Restart and wait a few moments until your laptop reboots.
Restart Your Router
Sometimes, there may be bad configs or memory leaks on your router. This generally happens when your router is old and is working regularly for a long time.
Following these steps will allow your router to set up a new broadcasting channel. This results in proper signal reception on your laptop.
Follow these steps:
1. Unplug or turn off your router by pressing the power button beside the router.
2. Wait for about 15 seconds. During this interval, the router reconfigures itself to the initial stage of operation.
3. Plug on or power on your router.
Check for Any Physical Damages on the Ethernet Cable
Ethernet cables are an essential component of many computer networks, allowing devices to connect to the internet and communicate with one another.
However, these cables are prone to damage due to various factors such as wear and tear, accidental bending, and exposure to harsh environments. It is important to regularly inspect your Ethernet cables for any physical damages to ensure that your network is functioning properly and efficiently.
Here is the step-by-step guide to checking the condition of your ethernet cable:
- Visually inspect the cable: Look for any visible signs of damage such as frayed or exposed wires, cracks or breaks in the insulation, or bent or damaged connectors.
- Check the connectors: Make sure the connectors at each end of the cable are securely attached and not loose or damaged.
- Test the cable: Use a cable tester or a multimeter to test the continuity and connectivity of the cable. This can help identify any issues with the wire itself, such as broken or damaged wires.
- Check for interference: Look for any external factors that may be causing interference with the cable, such as nearby power cables or electrical equipment.
- Check the length of the cable: If the cable is too long, it may be prone to interference or signal loss. Make sure the cable is the appropriate length for your needs.
If you find any physical damage on the Ethernet cable, it is important to replace the cable as soon as possible to get rid of the issues.
Enable the Ethernet
In some cases, you may have disabled the ethernet option in the settings. In this case, you have to re-enable it again. To re-enable the internet settings, follow these steps:
- Press Win + R to open a Run dialog box.
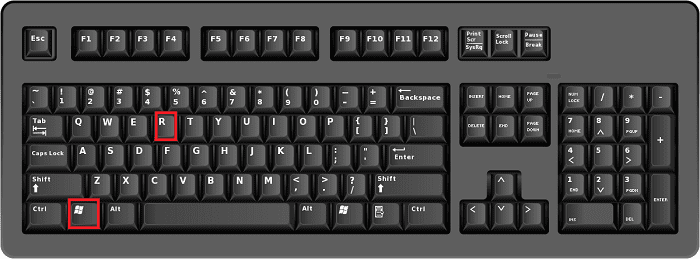
- Type the
control paneland hit Enter.
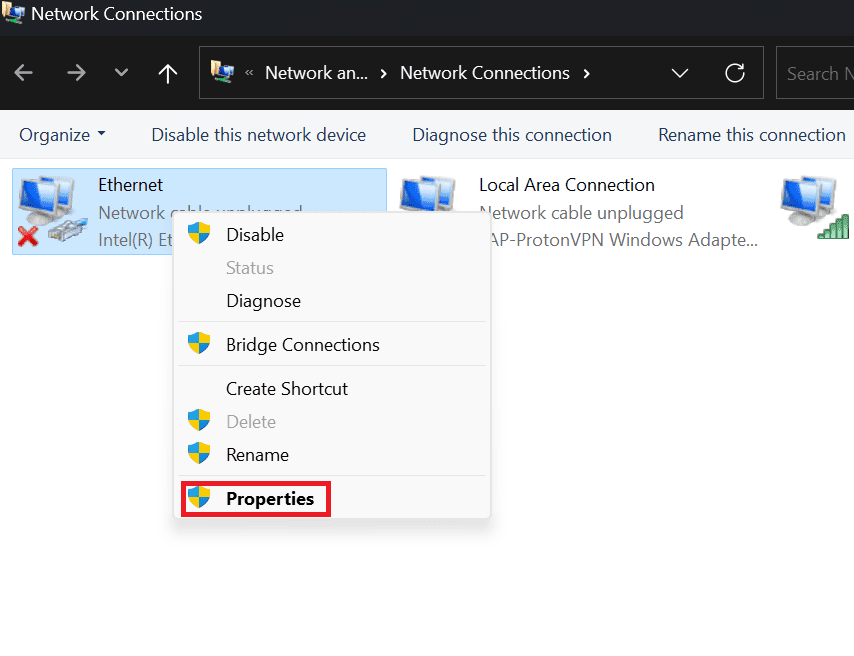
3. Click on View network status and tasks under Network and Internet.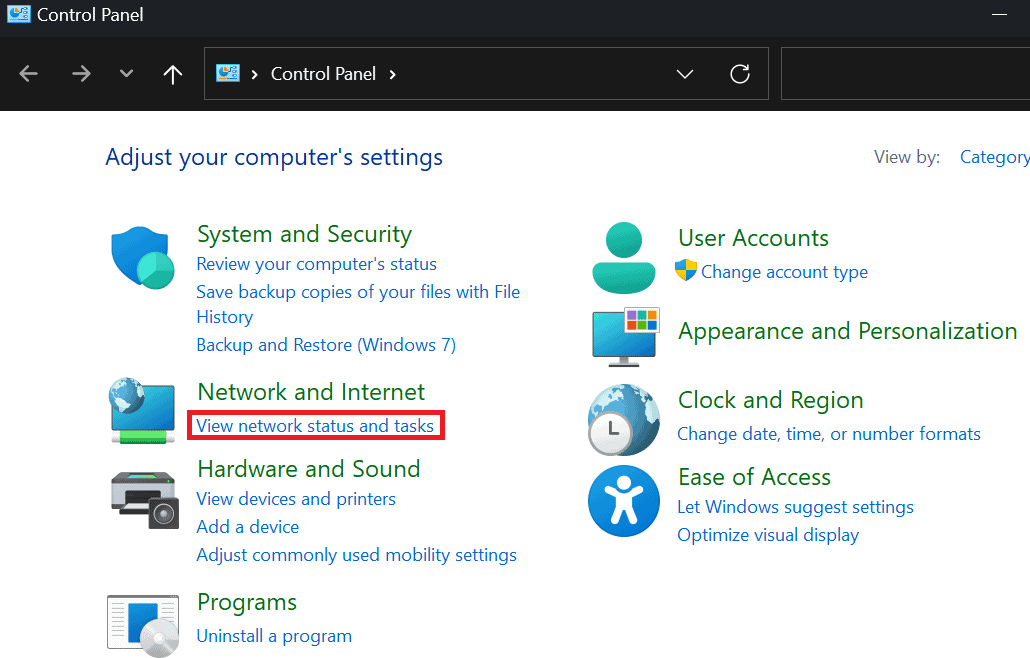
4. Click on Change adapter settings.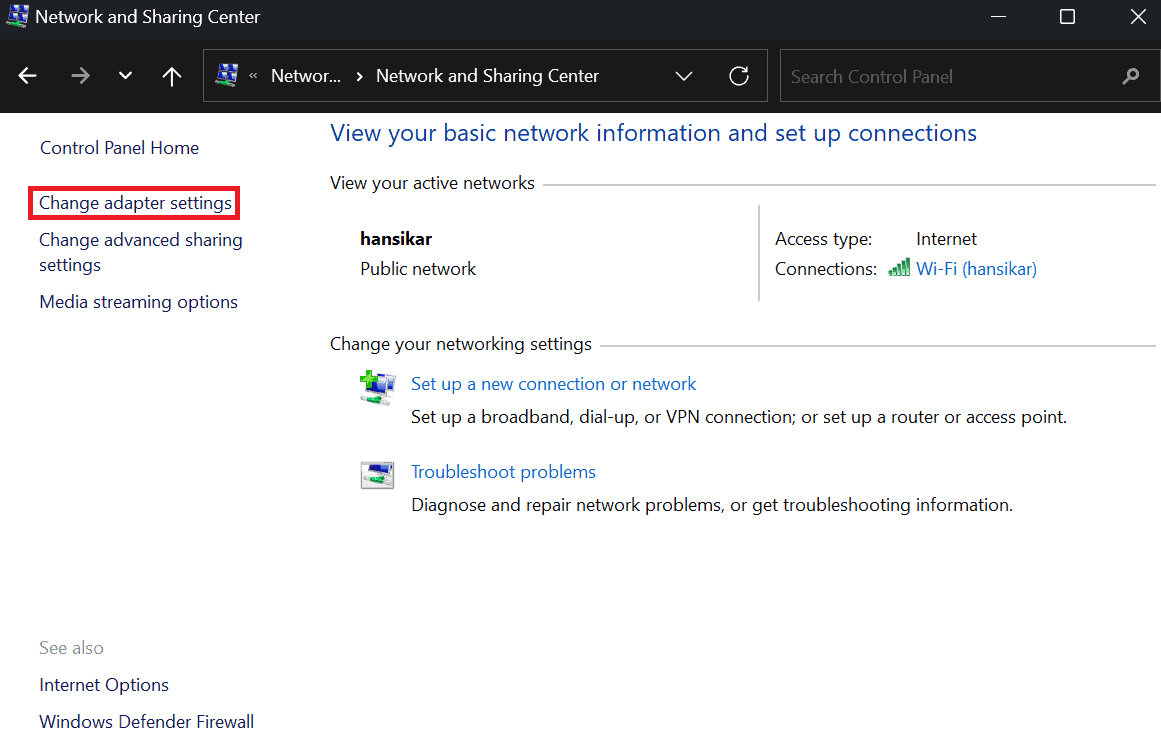
5. Right-click on the Ethernet option.
6. Click on the Enable option.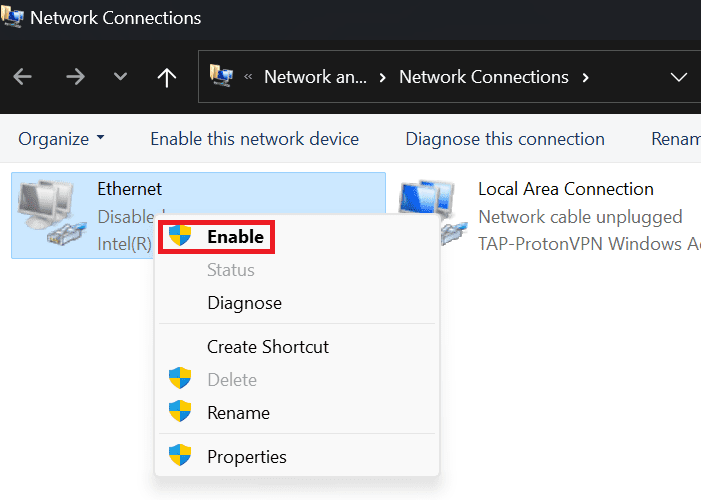
Reset Network Settings
If you’re experiencing issues with your internet connection through an ethernet cable, resetting your network settings may be a quick and effective solution.
Resetting your network settings can resolve a variety of issues, such as connectivity problems, slow internet speeds, and conflicts with network hardware.
To reset your network settings, follow these steps:
- Press the Win + R to open the Run box, type
cmdand then press Ctrl+Shift+Enter to open the elevated Command Prompt. - Type the following command and then press Enter. Wait for the command to execute before you type and use the next one.
ipconfig /release
ipconfig /flushdns
ipconfig /renew
netsh winsock reset
3. Restart the computer once you’re done and try reconnecting to the network.
Reset Your DNS Settings
Incorrect DNS configuration might also cause connection problems in Discord. Fortunately, there is an easy fix.
We need to use CMD to execute our commands to perform those actions. Additionally, you can use Custom DNS to get faster page response.
Cloudflare, Google DNS, Quad 9, and Comodo are good DNS to try out.
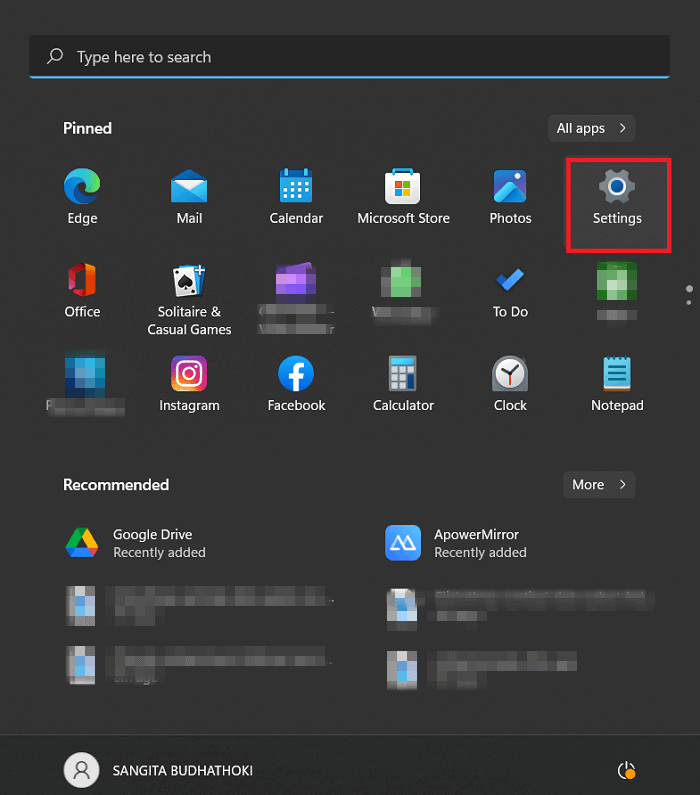
- Go to start menu and click on Settings.
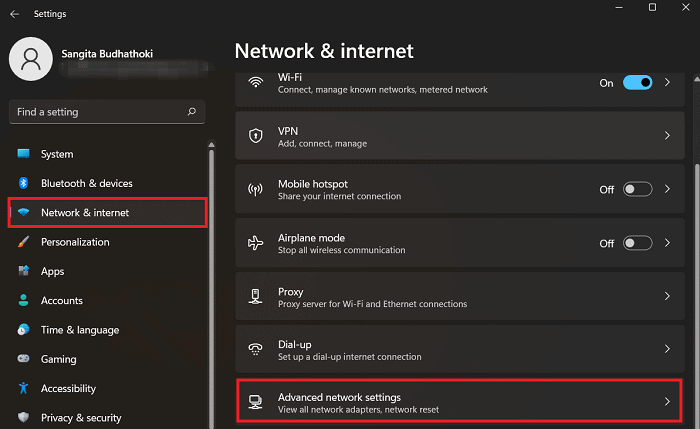
- Click on the Network & internet option.
- Click on the Advanced network settings.
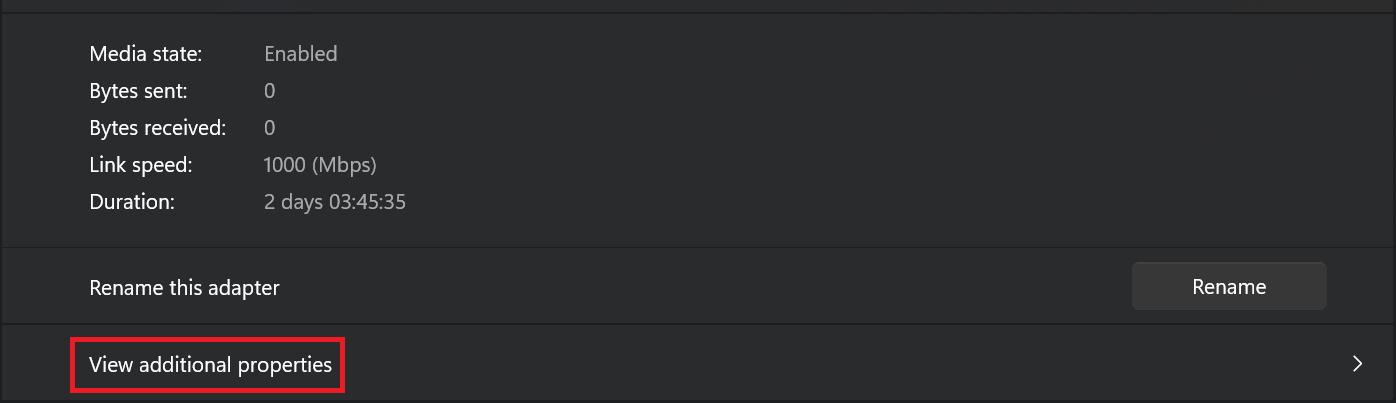
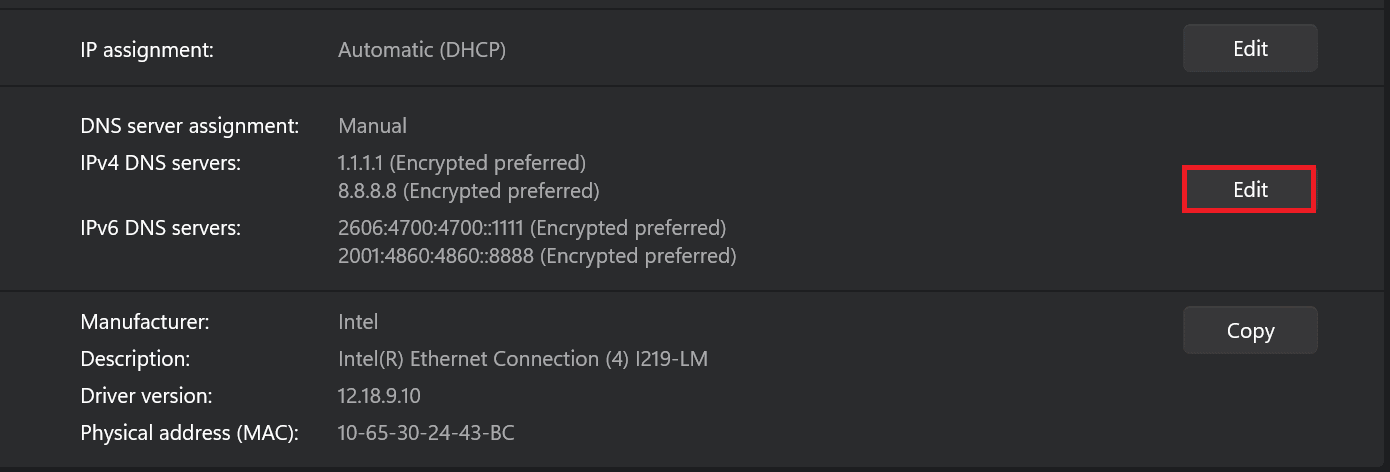
- Choose the network that you are using. Click on View additional properties.
- Click on Edit and then toggle the option to Manual.
- Type
1.1.1.1on the preferred DNS and8.8.8.8on the alternate DNS. Then, click on Save.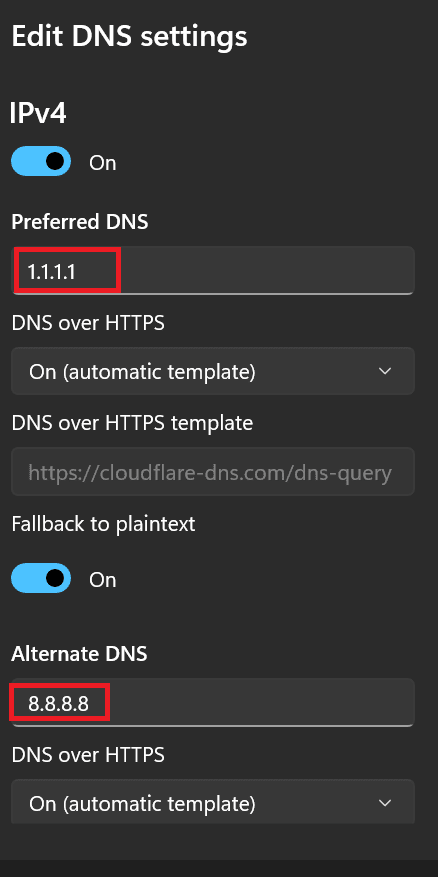
Update Your System Date and Time
The system date and time should be in the optimal settings in order to work the internet smoothly. The connection problem in the discord app might also be due to incorrect date and time settings.
To keep your system date and time in order follow these steps:
- Press Win + R on your keyboard.
- Type in
services.mscand hit Enter or click OK.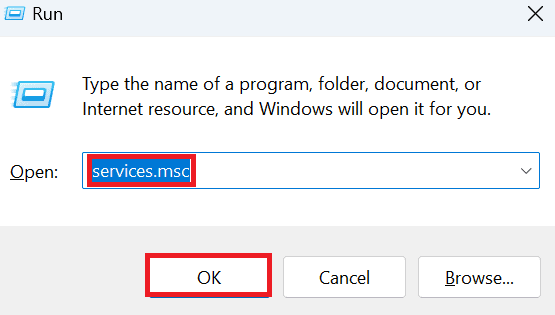
- Scroll down and locate until you find Windows Time service.
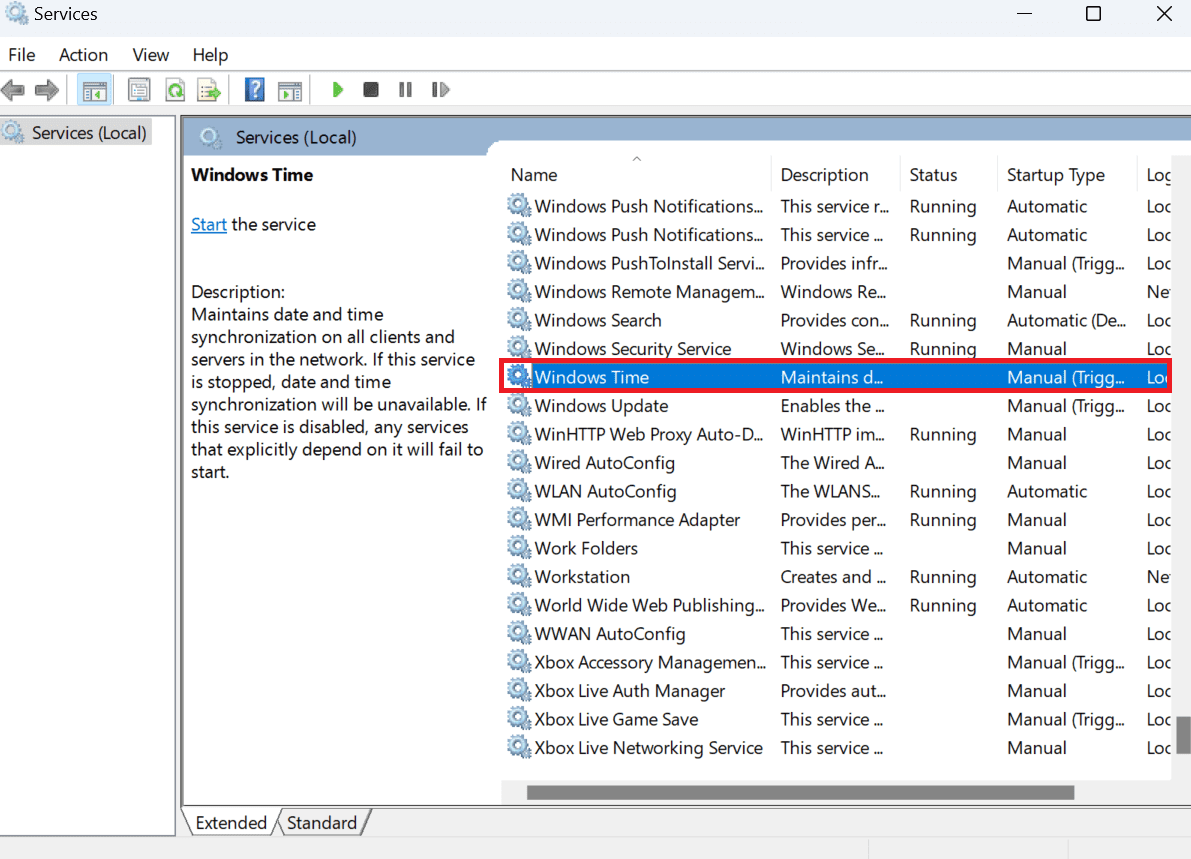
- Double-click on it to open its Properties.
- On Startup type, pick Automatic from the drop-down menu.
- Click Start and then select Apply.

Update Your Network Drivers
Network drivers are a crucial component of your computer’s operating system. They allow your computer to communicate with the network and access the internet.
An outdated ethernet driver may also be the reason for the above-mentioned issue.
It is important to regularly update your network drivers to ensure that your computer is able to connect to the internet and perform at its best.
To update your network drivers, follow these steps:
- Press Win + R to open a Run dialog box.
- Type
control paneland hit Enter.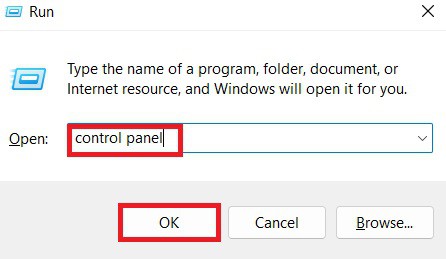
- Click on View network status and tasks under Network and Internet.
- Click on Change adapter settings.
- Right-click on the Ethernet option.
- Click on Properties.
- Click on Configure.
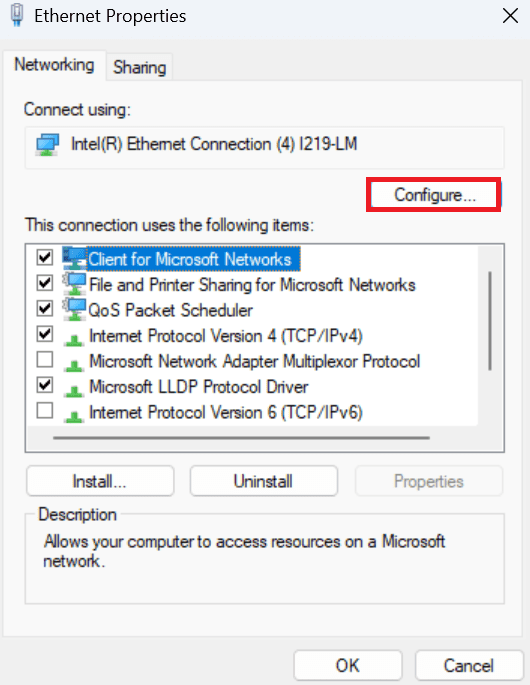
8. Navigate to the Driver tab and then click on Update driver. 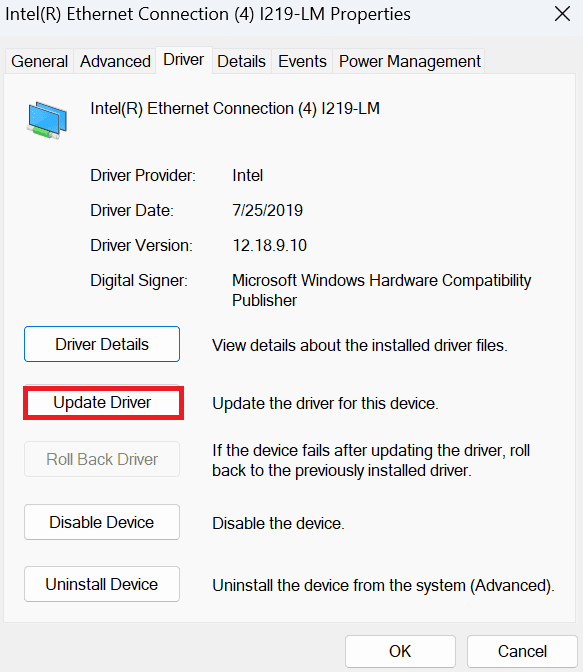
Diagnose Issues Using Network Troubleshooter
Operating systems are designed in such a way that they can find and fix problems by themselves. The feature is called troubleshooters.
You can leverage this feature to get your issues solved. To access the troubleshooter, follow these steps:
- Press the Windows + R to open Run. Type
Control Panelin the dialog box and hit Enter. - Click on View network status and tasks under Network and Internet.
- Click on Change adapter settings.
- Right-click on the Ethernet option and then choose the Diagnose option.
 This will detect any possible problems with the ethernet. This will take a few minutes so wait until the process finishes.
Disable Parental Controls
To disable parental controls on a router, you will need to access the router’s web-based setup page. Here are the general steps you can follow:
- Open a web browser and enter the router’s IP address into the address bar. The IP address is usually located on a sticker on the router or in the documentation that came with the router.
- Enter the router’s login credentials when prompted. These credentials are also usually located on a sticker on the router or in the documentation.
- Once you are logged in, navigate to the parental controls or access controls settings page. This page may be labeled differently depending on the router, but it is usually found in a section labeled “security,” “advanced,” or “access controls.”
- Follow the prompts to disable or turn off the parental controls. You may need to enter a password or passcode to confirm that you have permission to make these changes.
- Save your changes and exit the router’s settings page.
If you are unable to access the router’s settings or do not know the login credentials, you may need to contact ISP support for assistance.