Does your laptop constantly warms up and shuts down or keep making weird noises when trying to run heavy applications?
Then it is time to replace its thermal paste! Sounds confusing?
The thermal paste helps heat dissipation in the laptop components, which may require reapplying every few years.
Once done, your laptop’s heat dissipation will work like a new device.
Read on to find DIY tips for removing and replacing thermal paste at home and things to avoid.
Table of Contents Show
Should I Replace Thermal Paste On Laptop?
Before starting, here is what you need to know about thermal paste.
Thermal paste, also called thermal grease or compound, is a sticky substance applied on a laptop’s core processor and heat sinks to dissipate heat, which may require replacing every few years.
If you are wondering how applying some paste would dissipate heat, here is the answer:
Therefore, thermal paste plays a pivotal role in keeping your laptop cool.
Otherwise, your laptop will heat up after a few minutes or during intensive processing tasks such as video and photo editing.
How Often To Replace Thermal Paste In Laptop?
Generally, it would help if you replaced the thermal paste every 2 to 4 years when it naturally wears out.
You can suspect the thermal paste needs replacement when the following symptoms occur.
- CPU temperature keeps rising
- The cooling fan makes weird noises
- The laptop keeps shutting down.
- When the cooling system or processor is replaced
However, some laptops can last for years without needing thermal paste replacement.
It all comes down to how often you use your laptop and clean the insides, including the cooling vent, which would affect the thermal paste’s performance.
You can physically clean your laptop with a cloth, brush, or compressed air.
Sometimes, internal damage and overheating CPU can quickly wear out the thermal paste, requiring immediate replacement.
How To Replace Thermal Paste In Laptop?
One of the quickest ways to replace thermal paste is to take it to the technician.
Alternatively, you can attempt to replace the thermal paste using DIY, saving you some money.
However, when applying it, you must understand the implications of thermal paste runoff.
Tools & Equipment Required To Replace Thermal Paste
Here are the tools required to replace the thermal paste in the laptop.
| Tools | Specification |
|---|---|
| Artic Silver ArtiClean | A two-part cleaner dissolves thermal paste to purify surface |
| Artic Silver Thermal Paste | Two-part thermal paste for application on heat sinks and processors |
| Lint free cloth | High-quality cleaning cloth that does not produce lints |
| Spudger | A tool with wide flat-head screwdriver to open pressure-fit plastic components |
| Isopropyl Alcohol | 70% isopropyl alcohol to clean and disinfect the surface |
Step-By-Step Guide To Replace Thermal Paste In Laptop
Here is the step-by-step instruction for replacing the thermal paste within 10-20 minutes.
Step 1: Check The Laptop
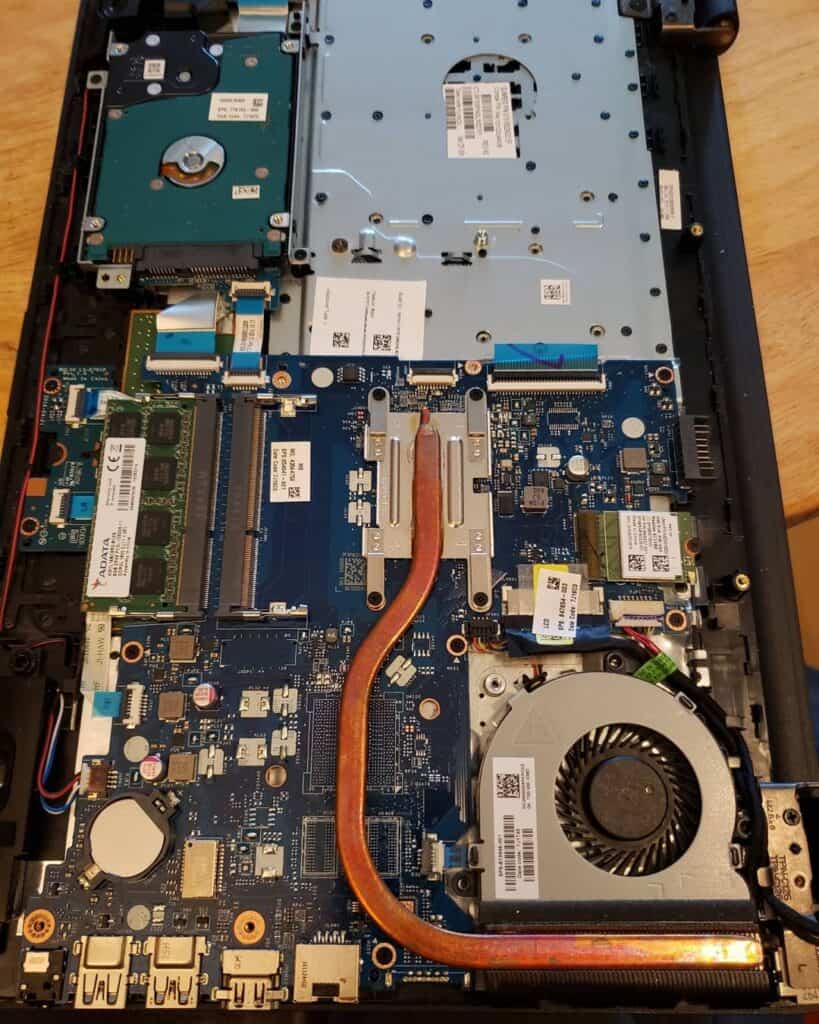
- Proceed with opening the bottom lid of the laptop to access the heat sink and processors using the appropriate screwdriver.
- Check the state of the thermal paste to determine the damage; usually, a separate heat sink and processor would need a thermal paste replacement.
- Use an appropriate screwdriver to remove the smaller screws that connect the heat sink to the processor.
Step 2: Scrape Off The Paste
- The next step is thoroughly removing the thermal paste from the heat sink and processor.
- Using the flat end of a spudger, scrape off as much solid thermal paste from the copper core.
- Proceed with removing solidified thermal paste from the processor chip as well.
Step 3: Remove Excess Paste
- Apply a few drops of Arcticean Thermal material remover on the link-free cloth and smudge the copper core and processor.
- Apply gently throughout the surface to remove the entire excess residue.
- Give a nice wipe using a few drops of isopropyl alcohol to disinfect the copper core.
- Keep it aside for a few minutes to dry completely.
Step 4: Apply The Thermal Paste
- Wipe the processor surface with a lint-free cloth and apply the thermal paste.
- Wear protective plastic gloves before applying the thermal paste.
- You can apply it vertically, horizontally, dotted, or even on all surfaces. (Read the application method)
- The manual spatula is the best method to reapply thermal paste, which spreads evenly to all corners.
- Remember to only a few drops and dispense them throughout the surface.
- Do not touch the heat sink or chip; any dust particle or fingerprint may hinder the thermal paste transfer on the chip.
- No need to apply thermal paste on the heat sink.
- Attach the heat sink to the processor and wait a while before returning the lid.
Do’s/Dont’s While Replacing Thermal Paste In Laptop
Here are some guidelines to follow while applying the thermal paste.
| Do's | Dont's |
|---|---|
| Clean the necessary parts using a soft brush and isopropyl alcohol to remove the dirt. | Do not use water or any other commercial cleaner to clean the laptop parts as it contains water. |
| Use non-conductive type thermal paste containing silicone and zinc. | Avoid using conductive thermal paste containing silver, copper, and aluminum. |
| Use lint free cloth or carbon-fiber to clean the surface as it leaves zero residue. | Avoid using ordinary cleaning cloth that leaves lint and fiber residue. |
| Apply only a small amount of thermal paste, usually the size of a pea or a grain of rice. | Do not over apply thermal paste which can run off to other parts and affects the efficacy. |
| Follow the instruction to apply correct amount and layer of thermal paste to avoid creating rifts and air bubbles. | Do not seal the heat sink and processor if the thermal paste application has not been correct. Air bubbles can do more damage than good. |
Conclusion
Depending on many factors, every laptop would need thermal paste replacement after a while.
Check whether your laptop warms up, shuts down abruptly, or makes weird noises when trying to run heavy applications.
It may be the early giveaway that your laptop needs a thermal paste replacement.
Frequently Asked Questions
How Does Applying Thermal Paste Help With Heat Dissipation?
Each part is tightly fixed inside the laptop, and the heat generated from the components may fail to dissipate effectively.
Using thermal paste on such components helps transfer the heat towards the air cooling vent, which escapes through the fan.
Why Should You Apply Thermal Paste On Heat Sink And Processor?
Although the CPU cooler’s metal base and the CPU’s IHS (Integrated Heat Spreader) may look smooth, microscopic imperfections prevent complete contact between the two components.
Thermal paste will help bridge this gap by removing air bubbles and holes and helping dissipate heat.
You would not need to apply thermal paste to each laptop component, although it needs to use a thermal paste.
Unlike the heat sink and processor, the thermal paste is already applied to these components and may rarely see wear and tear.
If you try seeing between these components, you will notice the solid silvery paste and thermal grease.
Should I Reapply the Thermal Paste Over Another Layer?
Never reapply a thermal paste over an existing layer because it can lead to severe damage as heat fails to dissipate.
Always scrub the residue from the heat sink and processor before applying a new layer of thermal paste to increase its efficacy.
Can I Use Toothpaste as Thermal Paste?
No, you should never use toothpaste as a thermal paste because it doesn’t have the cooling properties of a thermal paste.
Does Replacing Thermal Paste Void Laptop’s Warranty?
Maintaining the laptop and replacing the thermal paste won’t void the user’s warranty.
However, damaging the internal components while replacing the thermal paste will void the warranty.