Venus AI reverse proxy is very helpful in delivering optimized content and protects the users and server from malicious requests.
But is using the reverse proxy safe? How can you use the Hugging Face website to connect to the Venus AI if it is safe?
In this article, you will learn if the reverse proxy method to access the API is safe and how to connect with the reverse proxy in Venus AI.
Table of Contents Show
What Is Reverse Proxy?
Venus AI is an NSFW (Not Safe For Work) AI chatbot where you can connect to the API using reverse proxy.
A reverse proxy is a friendly mediator between the users and a web server.
Furthermore, when users try to access any website, the access request goes through the reverse proxy.
The reverse proxy then checks whether the user can access the website and protects the server from malicious traffic.
Why Should You Use Reverse Proxy in Venus AI?
The reverse proxy is helpful in Venus AI for both users and servers for different reasons.
- Using the reverse proxy, you can filter out restrictions like message limit, response time, and content filter implemented by OpenAI.
- It prevents malicious requests, cyber-attacks and unauthorized access to the web server.
- It optimizes content delivery by caching frequently accessed files and decreases server loading time.
- It ensures security, manages access and makes the website efficient.
Many users are trying to access Venus AI using the reverse proxy without an API Key of OpenAI.
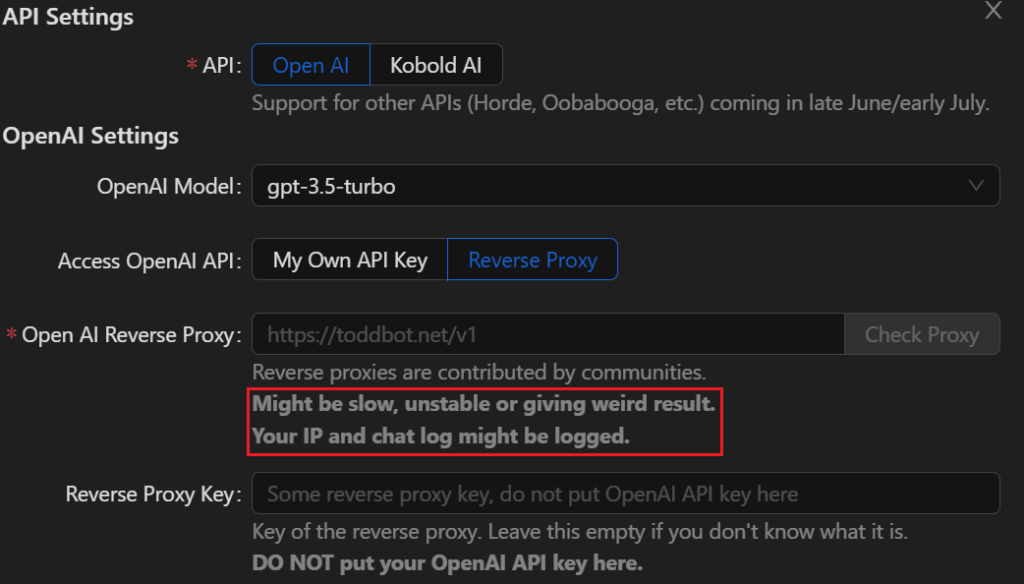
However, this method is not recommended, as using the reverse proxy can be slow and unstable.
In addition, your IP and chat log might be logged using the reverse proxy method.
Making Reverse Proxy For Venus AI
In the API section of Venus AI, you can find two options, OpenAI and Kobold AI.
You can find the reverse proxy option in the OpenAI API, so you must use the OpenAI platform.
Furthermore, here is how to set reverse proxy.
- Go to the Hugging Face website and signup there.
- Click on “+New” and select Space.
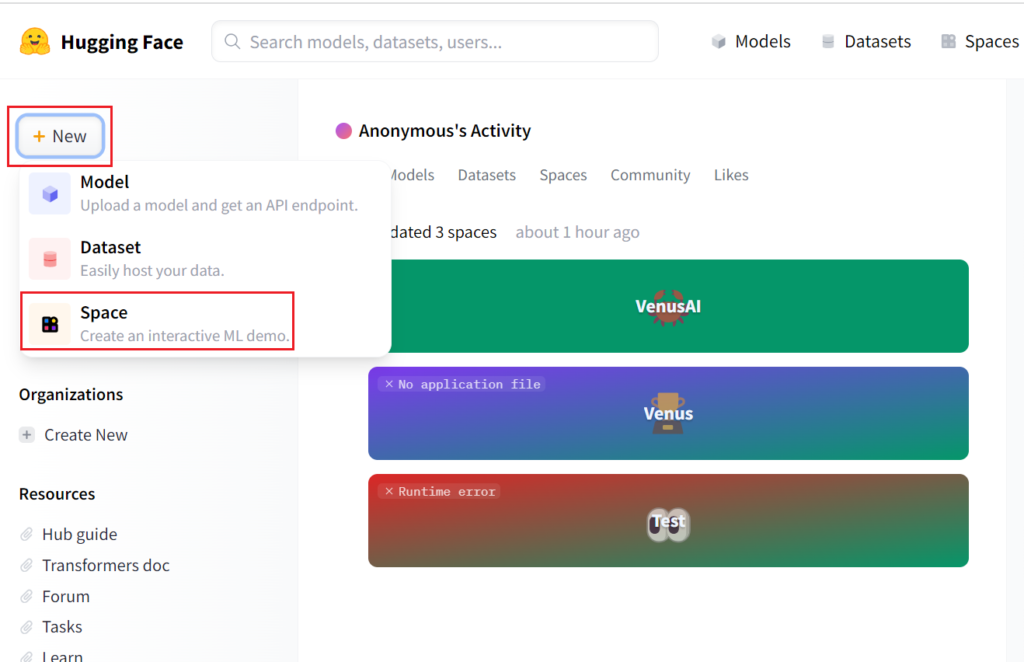
- Now enter a space name, select “Docker,” and click Create Space.
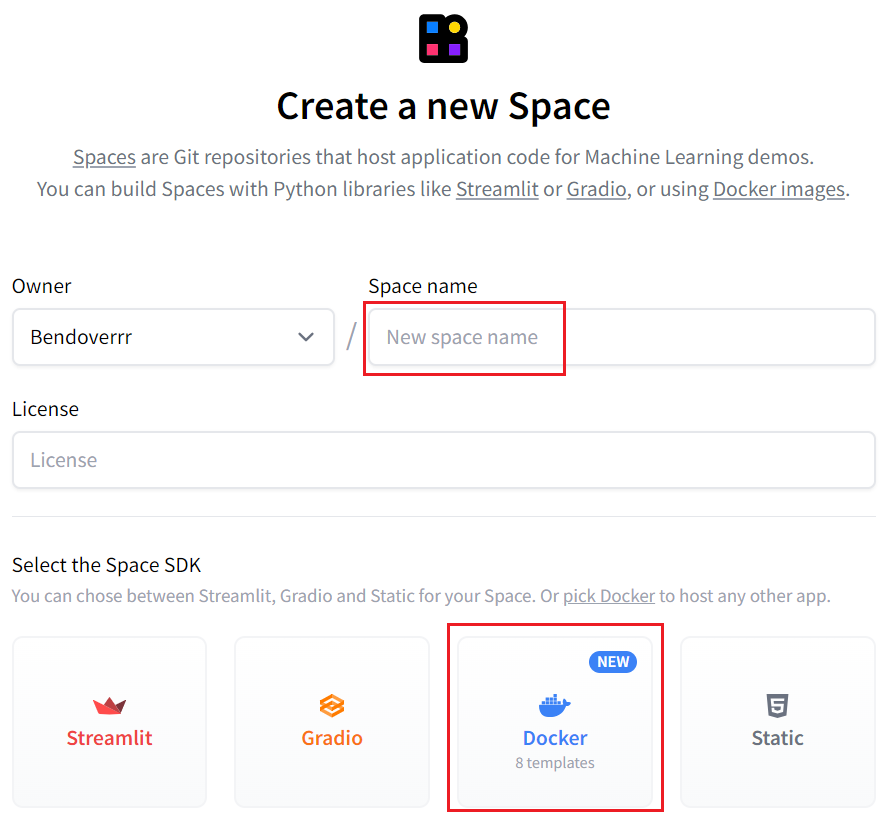
- Now, scroll down and click “Create the docker file.”
- Copy the code below and paste it into the “Edit” box showing 1.
FROM node:18-bullseye-slim
RUN apt-get update && \
apt-get install -y git
RUN git clone https://gitgud.io/khanon/oai-reverse-proxy.git /app
WORKDIR /app
RUN npm install
COPY Dockerfile greeting.md* .env* ./
RUN npm run build
EXPOSE 7860
ENV NODE_ENV=production
CMD [ "npm", "start" ]
- After pasting the code, scroll down and click the “Commit changes to main” button.
- Now go to settings in the top-left corner and scroll down to “Repository Secrets.”
- Click on “New Secret,” make sure to enter “OPENAI_KEY” in the name and place the OpenAI API key in the secret value.

- Go to Files and create a new file.
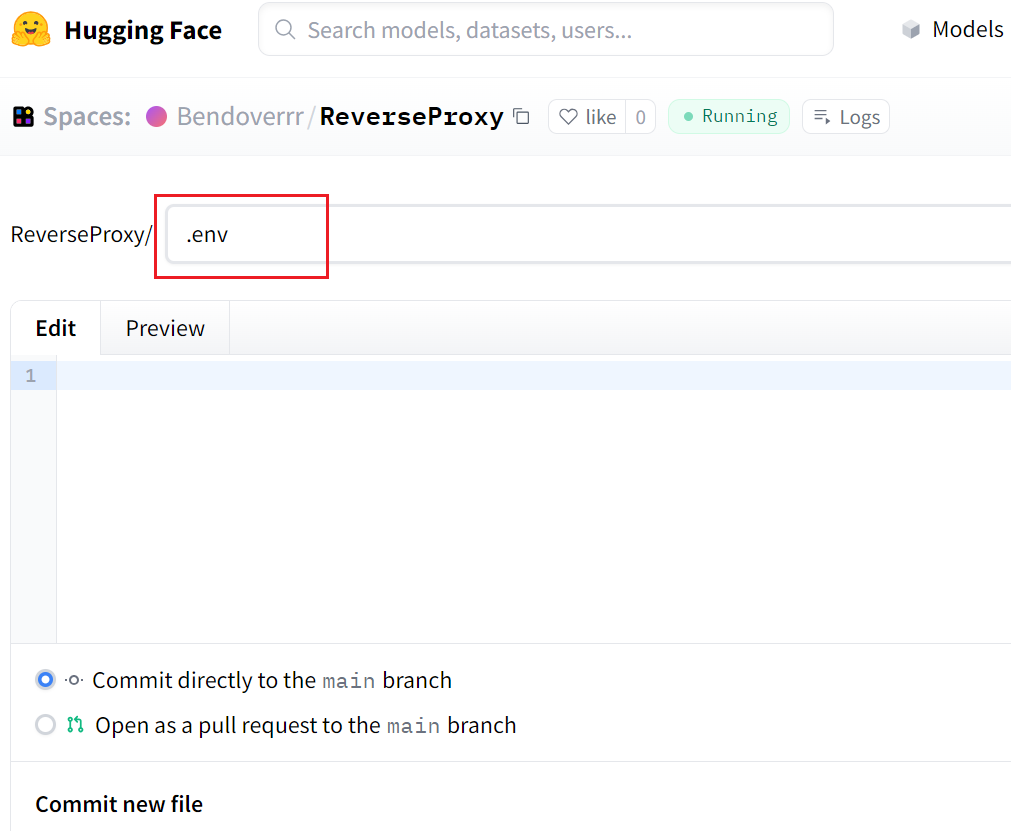
- Set the name for the file as “.env” and place the below code in the Edit box.
PORT=7860
MODEL_RATE_LIMIT=10
MAX_OUTPUT_TOKENS=410
LOG_LEVEL=info
REJECT_DISALLOWED=false
REJECT_MESSAGE="insertwhatever here, its a rejection message."
REJECT_SAMPLE_RATE=0.2
CHECK_KEYS=false
QUOTA_DISPLAY_MODE=full
QUEUE_MODE=fair
PROMPT_LOGGING=false
Furthermore, you will see “Running” in the top center of the website if you follow the steps correctly.
You must press the file button, and Hugging Face will provide you with the reverse proxy.

Therefore, copy the reverse proxy and paste it into the Venus AI, then the API will connect with OpenAI.
The Bottom Line
You can connect with the OpenAI API in Venus AI using the API keys provided by the platform.
However, users are trying to connect with the API using the reverse proxy, which can be complicated but achievable.
You can use the Hugging Face to create different docker files, OpenAI API Keys and “.env” files to finally get the reverse proxy of OpenAI API.
