My PC kept heating up immensely without a sign of cooling down. I later found out that the filter (fan) had accumulated a lot of dust inside, preventing the PC from cooling down.
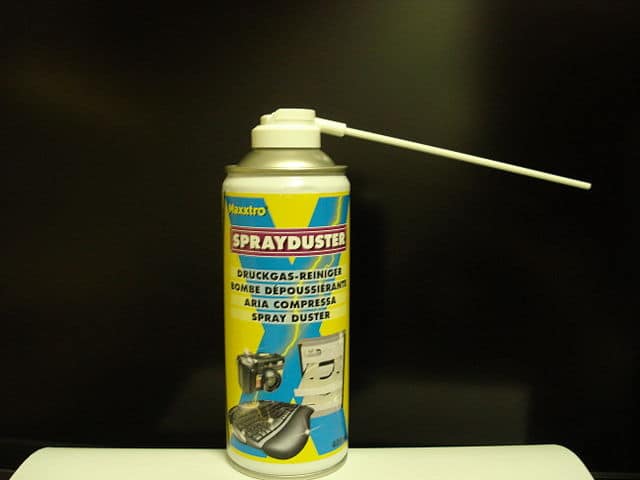
I took my friend’s advice and used the compressed air to clean my PC, but I ended up doing more damage than good.
The moisture left by the compressed air created significant humidity inside my PC, leading to corrosion of fan blades.
Since then, I switched to cleaning my PC the old-fashioned way, and you should too.
Scrub your PC using the old toothbrush and rinse with a cotton swab dipped in Rubbing Alcohol to remove dust particles. Alternatively, use a mini vacuum cleaner or air blower to dislodge and remove dust particles.
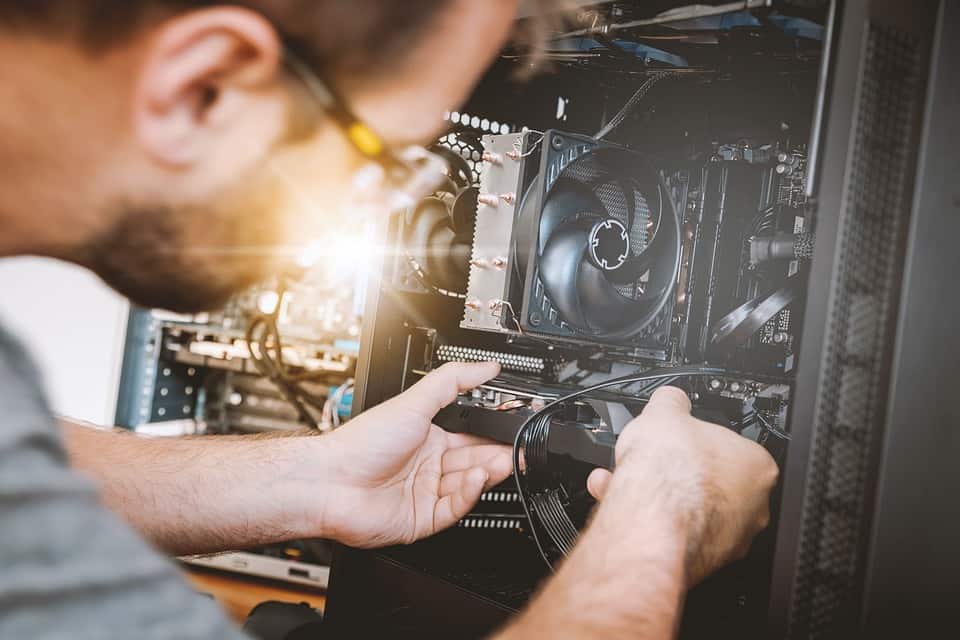
However, cleaning the PC and laptop innards is often tricky and requires utmost care and precautions.
Here is a guide about a different method of cleaning the PC and laptop without the use of compressed air.
Table of Contents Show
Is Compressed Air Safe for Cleaning PC and Laptop?
There is no doubt about the need to regularly clean your computer and laptop because dust buildup is often the culprit for slowed PC.
Moreover, a clean computer and work desk contributes to the home office aesthetics.
Using compressed air may come in handy because you can easily buy a can of compressed air from the computer store and use it anytime.
Although many experts claim it to be entirely safe for cleaning computer parts, it is not free from trouble.
Using compressed air has its own set of pros and cons. Let us take a look.
Pros of Using Compressed Air
The advantages of using compressed air for cleaning PC and laptops are as follows.
1. It is Accessible and Saves time
Canned air is most accessible when it comes to cleaning the PC or laptop.
You could buy one from the computer and office supply stores, break the seal, and quickly use it.
Unlike other cleaning tools, using canned air for cleaning is entirely effortless and a time saver.
You would not need to assemble many different cleaning items, nor would you spend a lot of time cleaning the PC.
Instead, spray the canned air on the dust particle to blow it away.
2. It Cleanses Nooks and Corner
There are many tiny corners and gaps in computer and laptop parts that are otherwise harder to reach by hand.
Therefore, canned air with its thin, long nozzle can effortlessly reach small corners and gaps to remove dust.
3. It Protects the Components
Canned air is a liquid refrigerant that protects the electronic components from overheating and shorting out.
Using canned air also minimizes scratches on delicate components that will likely occur when cleaning by hand.
Cons of Using Compressed Air
The disadvantages of using compressed air for cleaning PC and laptops are as follows.
1. It Leaves Excess Moisture
The canned air may leave some moisture on the computer parts that may eventually rust them.
The air that does not evaporate quickly may sit on delicate electronic parts for longer, causing damages.
Misusing canned air will spray frot-liquid that leads to water buildup in the circuit boards.
2. It Causes Static Damage
The moisture created by canned air can result in static damage caused by the sudden discharge of static electricity.
This is more prevalent in computers and laptops that employ integrated circuits and computer chips vulnerable to slight voltage changes.
Newer CMOS chips or complementary metal-oxide-semiconductor (CMOS) chips are more vulnerable to electrostatic discharge than older chips.
Therefore, static discharge as low as 400 volts can cause severe damage to your computer’s CMOS chips.
3. It Causes Respiratory Irritation
Canned air is essentially toxic air that is not meant to be inhaled.
According to a study, inhaling canned air can cause permanent brain damage and other irreversible neurological damages in the long term.
Many users are unaware of safety measures such as wearing masks and eyewear when using canned air.
Therefore, they end up inhaling a significant amount of toxic air when trying to clean their PC.
4. It Contributes to Environmental Damage
Most cans use greenhouse gas (GHG) into the solution or when packing the canister, which indirectly contributes to ozone layer depletion.
According to a governmental report, most compressed air duster cans sold in the U.S. use a particular class of GHGs, referred to as hydrofluorocarbons, and fuels like HFC-134a (1,1,1,2 tetrafluoroethylene).

Could You Clean PC and Laptop without Compressed Air?
Indeed, you can clean your computer and laptop without using compressed air.
Cleaning without the use of compressed air proves to be more beneficial and cost-friendly.
Using canned air can be challenging for your pocket because cleaning a single PC may require multiple cans.
In an average 400 ml can of compressed air, you will get approximately two hundred 2-second blasts.
Although a single can should be enough for cleaning a laptop, cleaning an entire computer case will require at least two cans.
Therefore, you can save your money that would rather be spent on buying compressed air cans.
Instead, you can rely on simple home tools to clean your computer and laptop.
Best Methods to Clean Dusty PC without Compressed Air
Here are a few methods to clean your dusty pc without using compressed air.
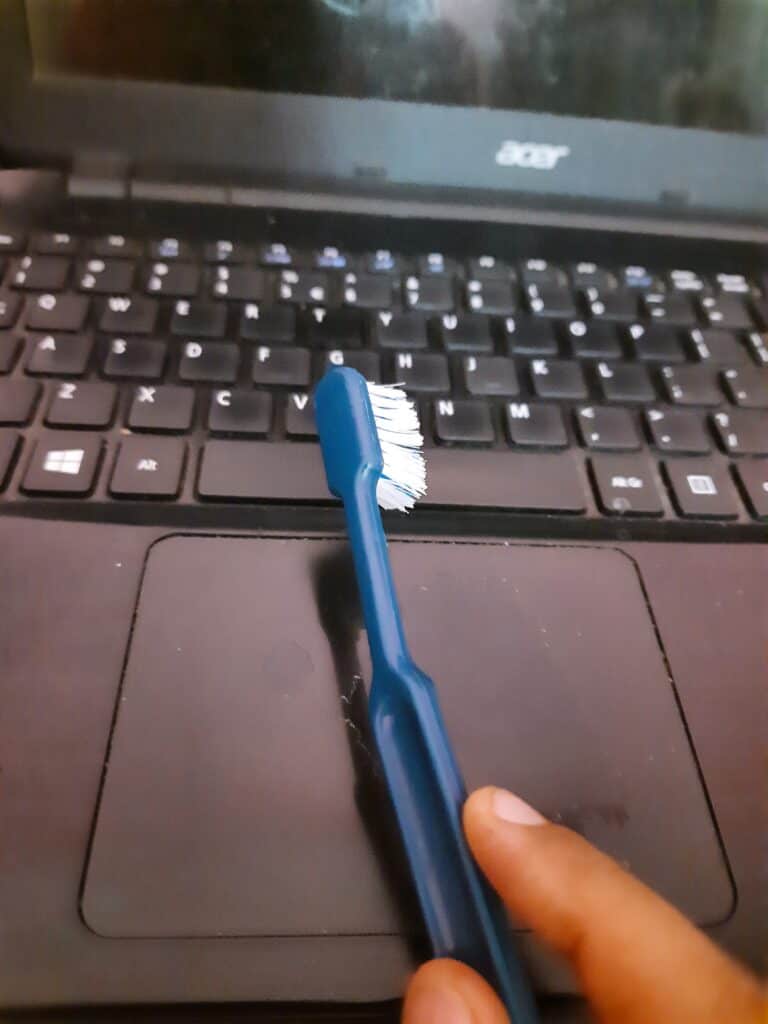
1. Use Old Toothbrush and Rubbing Alcohol
Using an old toothbrush or paintbrush and rubbing alcohol to clean the PC is the best alternative to compressed air.
Why rubbing alcohol, you may ask –Rubbing alcohol (Isopropyl alcohol) is a disinfectant very effective in removing dirt and germs from the surface.
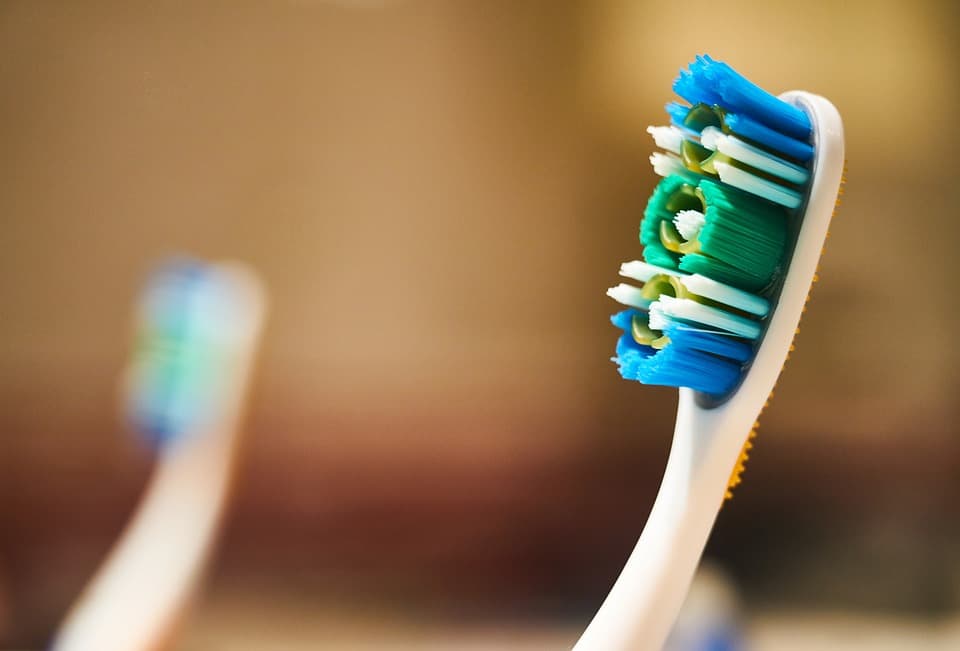
Using a toothbrush allows you to clean delicate objects without touching them by hand.
However, you may need additional items such as cotton swabs, microfiber cloth, and screwdriver.
Here is a Step-By-Step guide to cleaning the PC.
Step 1: Unplug and Dissemble your PC or Laptop
- Start with unplugging the unit. Next, open the unit using a screwdriver with an appropriate head.
- Opening the Computer unit with the power supply still on can cause a sudden surge in voltage in hard drives and microchips, causing fatal damage.
- For a laptop, remove the charging plug and battery, then the bottom case.
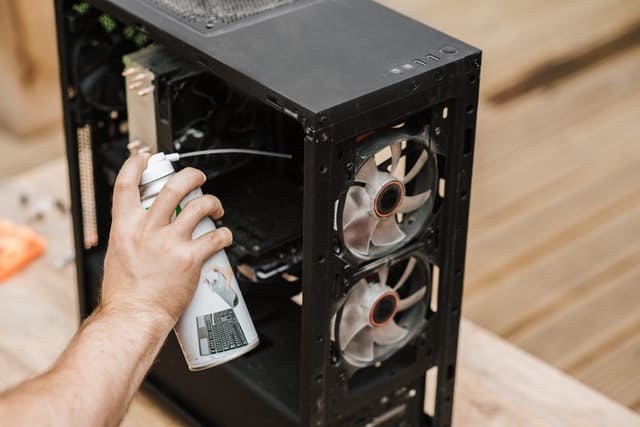
Step 2: Clean the Case and Filter
Before moving inside, consider cleaning the case and parts not integral to the central system.
The inside of the case must have accumulated hard residue from the dirt.
- Use the brush to scrub it off and apply a cotton swab in rubbing alcohol to rinse the surface clean.
- Cleaning the filter or fan can be tricky because some computer panels are attached to the fan while others can be taken out.
- Scrub the filter using the brush to dislodge the dust and residue.
- For the laptop, consider using a brush with small bristles so it can reach inside the fan.
- Next, dip the cotton swab in alcohol to wipe hard residue on fan blades.
- The blades can be hard to reach by fingers; therefore, you can tie the cotton swab to the end-tip of the brush and scrub the blade instead.
- Once done, do not forget to wipe the entire surface with a microfiber cloth. A microfiber cloth is very effective in absorbing even the slightest amount of liquid from the surface.
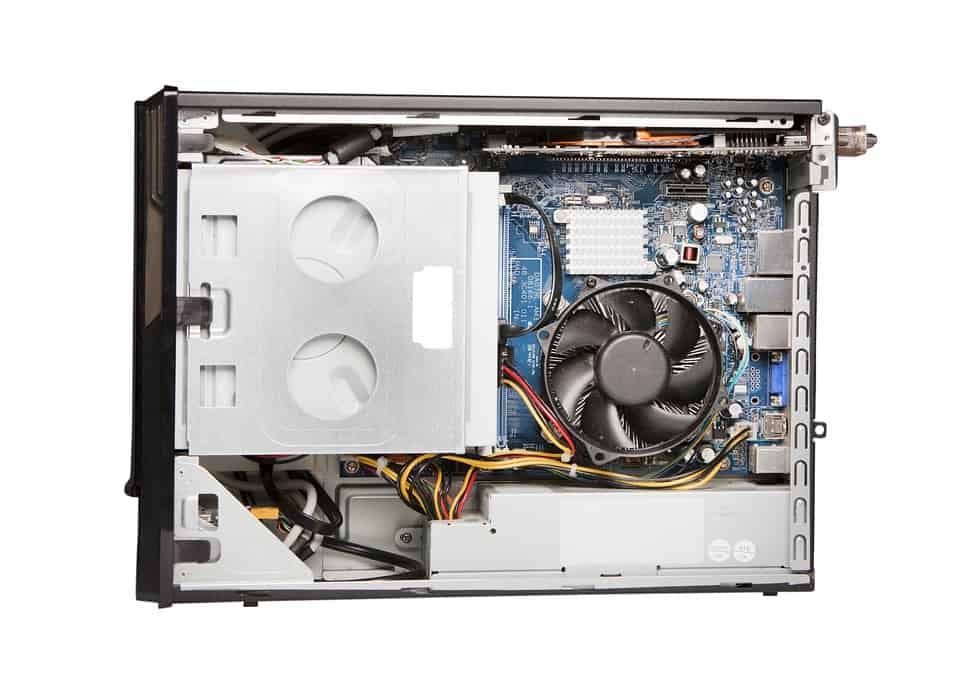
Step 3: Clean the Internal Parts
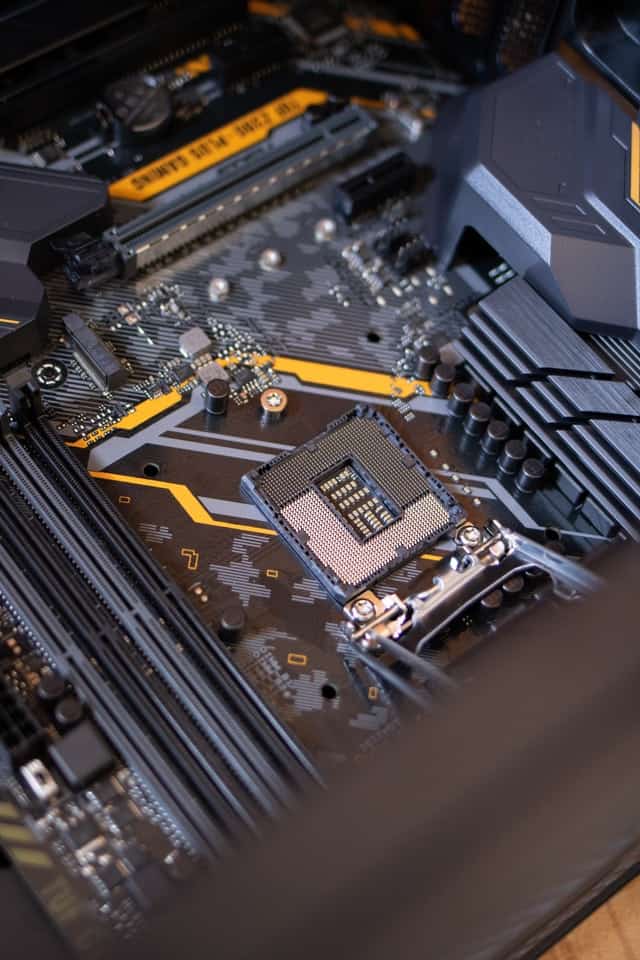
The most crucial step to cleaning the PC is to clean the internal parts like CPU, Graphics card, and motherboard.
Here is a brief guide to cleaning the internal parts.
CPU -The CPU does not need much cleaning, but the cooler and sockets usually have a dust buildup.
Scrub the fins of the heat sink to dislodge the residue. Next, dip the cotton swab in alcohol and wipe the surface to remove any remaining dust.
Lastly, do not forget to wipe it off with a microfiber cloth to absorb any remaining moisture and dust particle.
Graphic Card -Remove the graphic card from the case and gently wipe it with a cotton swab dipped in alcohol. Let it sit to dry.
Motherboard -Scrub the surface and RAM slots with a brush to remove the dust. Give it a gentle wipe with rubbing alcohol, then let it sit until it dries.
Related article: How to Clean the Motherboard?
Power Supply -Lastly, do not forget to clean the power supply as the tiny port often retains a lot of unseen dust.
Use an earbud to clean the power supply port, then apply a thin cotton swab in alcohol and give it a nice wipe. Let it sit until it completely dries.
Tips for Cleaning the Laptop with Toothbrush
In the case of a laptop, you need not remove any vital parts unless it is significantly dirty.
- Open the case and let the laptop sit upside down.
- Using the correct screwdriver, unscrew the fan to expose the fan-blades for a thorough cleaning.
- Use a brush with gentle bristles to scrub the fan blades to dislodge the dust.
- Next, wipe it off with a cotton swab dipped in alcohol. You can also use earbuds to reach the tiny blade corners.
- Use the same brush to scrub the hard drive, power supply, and other non-delicate parts to remove the dust.
- Lastly, use a manual dust blower or mini-fan to blow out the remaining dust and let it rest before enclosing the case.
Related Article: How to clean a Laptop webcam?
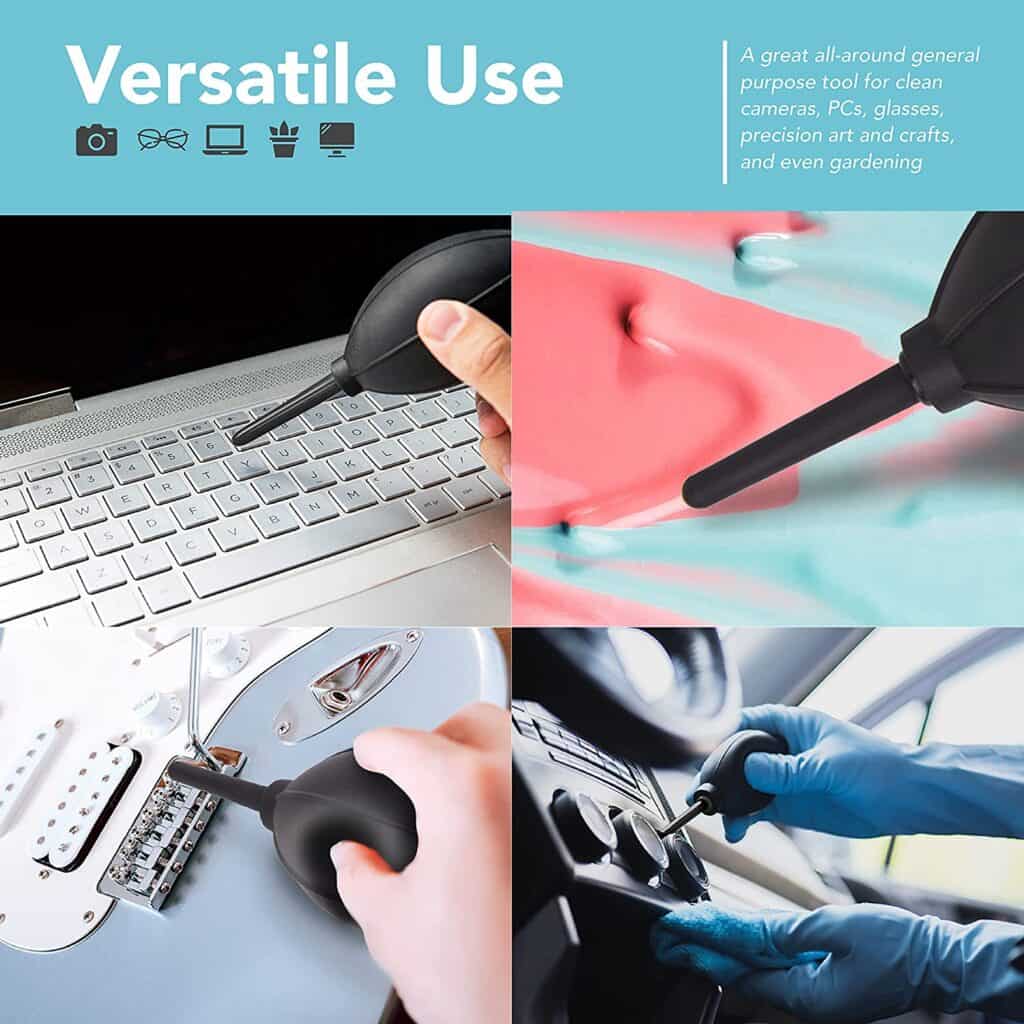
2. Use Rubber Dust Blower
A rubber dust blower, also known as a manual dust blower, works precisely as a compressed air can but without any liquid refrigerant.
Moreover, it is way cheaper than using canned air.
Instead of pressing the sprayer like canned air, you should press the silicone container on the manual dust blower to dislodge the dust particles.
- Start with dissembling computer and laptop cases and detachable computer parts like a filter.
- Apply required pressure to the silicone container to blow the air out and dislodge dust particles.
- Alternatively, you can scrub the parts with a toothbrush before blowing them out with a dust blower to loosen the dirt.
Manual dust blowers may not be as effective as the canned air for removing hard residues because it exerts less air pressure.
However, it proves to be a very effective tool when used along with a toothbrush.
Read more: What to use to clean Laptop/Computer screen?
3. Use Mini Vacuum Cleaner
By vacuum cleaner, we did not mean the vacuum cleaner that you use for cleaning the house.
Mini vacuum cleaners are explicitly made for use on PC. They are equipped with low suction pressure and anti-static technology to prevent damages.
Using your regular vacuum cleaner for a PC may not be wise as it creates static electricity that can damage the system.
Moreover, the extreme suction pressure will easily dislodge and suck up tiny parts.

A typical vacuum cleaner employs a suction of 20 kPa, while a mini vacuum cleaner with at most 4.3 kPa.
It can easily dislodge and blow out dust particles.
However, be extra cautious while using it because it can still dislodge tiny screws, thin wires, and motherboard parts when used at a close distance.
Note: Keeping the mini-vacuum at least 5-6 inches away may easily prevent these minor accidents.
4. Electric Air Blower or Hairdryer
Electric air blowers work like manual dust blowers but without the need for pumping the silicone container.
Using one can do your job quickly, but beware of the extreme pressure.
Choose electric air blowers with a maximum of 5.5 kPa that is appropriate for cleaning small parts.
Using a hairdryer that blows scorching air can melt delicate plastic parts and wire coverings.
Therefore choose a hairdryer with the “Cool” setting. Otherwise, stick to using an air blower.
Note: Beware of using it too close to the surface as it can dislodge small parts. Keeping it at least 5-6 inches away from the surface will prevent the problem.
5. Using a Straw to Blow Out Air or Mini-fan
While using a straw to blow out air for cleaning dust particles from tiny areas works quite well, it may lead to inhalation of dust particles.
Therefore, it is instead a good idea to avoid using a straw to clean your PC altogether
.Using a mini-fan to blow out dust particles may work to a certain extent, but it may lack enough airspeed to dislodge hard residues.
Be careful about using a regular fan to clean your PC because it often exerts high air pressure. Instead, you can keep it to a low or medium speed before using it.

Some Precautions to Take Before Cleaning PC and Laptop
Cleaning the PC and Laptop can become a fun affair, but only when it is done with enough precaution.
Manhandling the PC and laptop hardware when trying to clean them may cause significant and sometimes irreversible damages.
Other times, small mistakes like forgetting to switch the power off or disconnecting the wires could also invite damages.
Here is the list of precautions that you can take when cleaning your PC and Laptop.
- Before cleaning the device, always turn the power off, including disconnecting the charging port and dislodging the laptop battery.
- Use anti-static wristbands or tools with anti-static technology to prevent sudden fluctuations in voltage.
- Never disassemble and clean computer and laptop parts on a carpet or rug that can increase static buildup.
- Tile or wood floor can be the best alternative to carpet or rug surfaces. Alternatively, you can use the anti-static mat for computer repair and cleaning.
- Never spray liquids directly onto the delicate computer part. Instead, you can apply the solution on a cotton swab and rinse the surface.
- When using rubbing alcohol, use one with 90% or more Isopropyl content.
- Wear protective gloves that keep sudden electric charges generated by your palm away from hard drives and circuit boards.
- Be wary about using canned air for cleaning the PC. Never use it upside down or angled as it can spray out the liquid.
- Let the computer and laptop parts dry out well before enclosing them in a case to prevent moisture damage.
- Please do not attempt to clean inside the computer monitor as it retains a high voltage even when unplugged. Please leave it to the professional.
Final Verdict
Cleaning your PC or laptop can become a fun affair when you have all the required tools and insights in handy.
Moreover, you can protect your devices from unforeseeable damages when you know how to clean them properly.
Experts advise cleaning your PC and laptop every six months to prevent the overheating system from dust buildup.
However, if you live in a dusty surrounding with a lot of smoke, consider cleaning it out every 2-3 months.
Related Article: How often should you clean your computer?