Almost every one of us is well-known about the most unwanted Blue Screen of Death(BSOD)error. But the Orange Screen of Death is a rare error as compared to the “Blue” error.
Sometimes you may get an Orange screen of Death which immediately shuts down your PC.
You can experience this error while using an external monitor or some might have this issue with Bitlocker. This screen death issue is not as fatal as other screens of death but the crash creates a critical problem.
If you experience this problem, you do not need to be computer savvy to solve it. We have discussed some methods to fix this screen death issue.
Table of Contents Show
Causes of Orange Screen of Death on Windows
Various factors cause the orange screen of death. You can experience this problem anytime while watching youtube, playing games, or waking the PC from sleep mode.
We have discussed some of the predominant causes.
- Outdated Graphic Card: It is important to keep your graphic card updated to prevent poor resolution and also to be safe from the orange screen of death.
- Outdated device driver: Outdated driver not only impact PC performance but also cause this screen death error.
- Networking Error: The most common cause of this error on windows is the networking error. You can easily solve this with safe-mode networking.
- Issues with External devices: It can also occur due to external devices, such as printers and webcams.
- Overclocking of PC: If you are facing this problem while gaming, it might be due to PC overclocking.
How to Fix “Orange Screen of Death” on Windows?
It doesn’t matter what causes the orange screen of death on Windows.
You may find the proper solution to the problem here. Check the solution below to get rid of this problem.
Safe Mode Networking
This is the very first procedure to fix the orange screen of death issue in your window. You can follow the given steps that will help you with safe mode networking.
- Turn off your PC completely and then turn it on again or long-press the power button on your PC to turn it off.
- You will see ‘Preparing Automatic Repair’ on your windows screen.
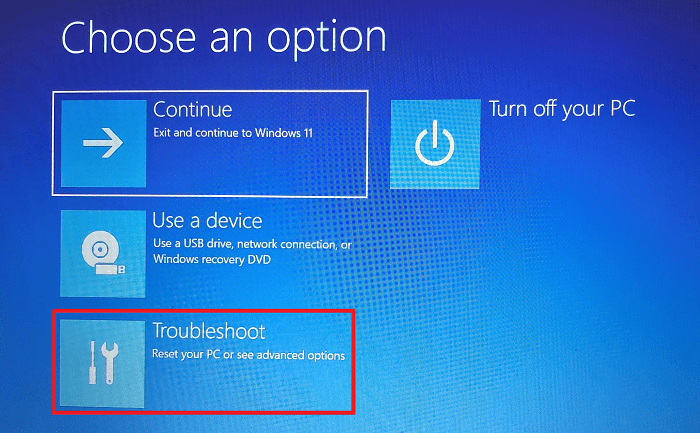
- Wait for the process to complete and you will get an ‘Option’, click it.
- Click ‘Troubleshoot’.
 5. Proceed to the ‘Advanced options ‘.
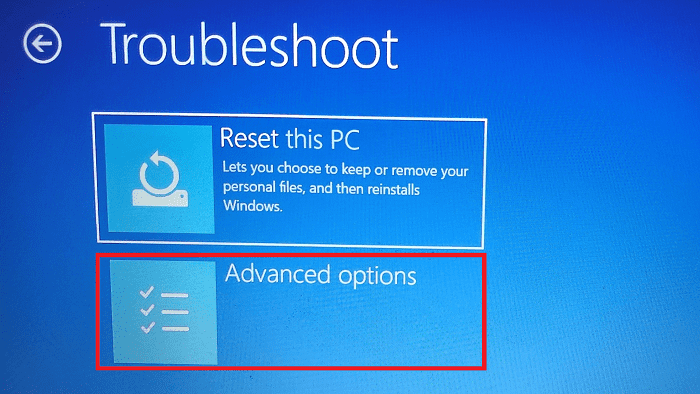
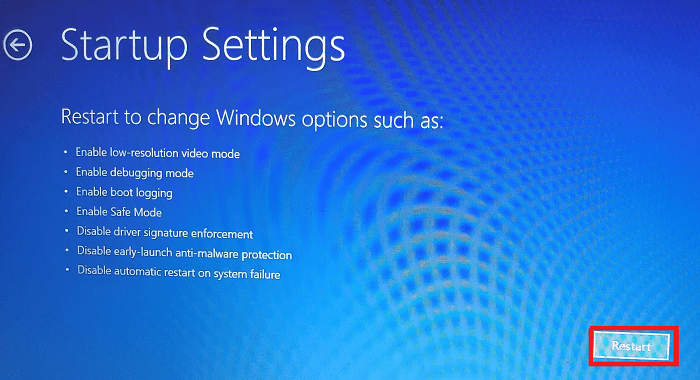
6. Head to ‘Startup settings ‘.

7. Then, Click ‘Restart’.
8. You will find a few options, select ‘Enable Safe Mode with Networking ’.
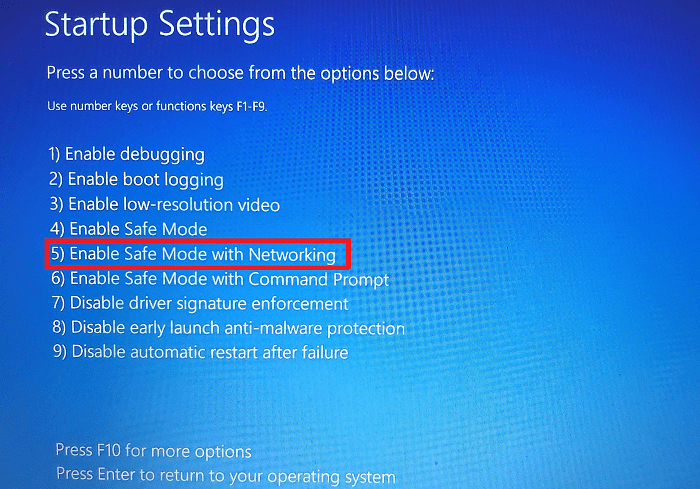
You will find your PC in safe mode networking after following the above steps to resolve the issue.
Restart Your PC
Unlike other errors, this error also gets resolved simply by restarting your PC. Restart your PC and check if this simple action solved the problem.
If you can’t find the shutdown screen, just press the power button until your PC turns off completely.
Update Your Graphics Driver
This issue usually occurs due to an outdated graphics driver. You can update the driver manually with the steps given below.
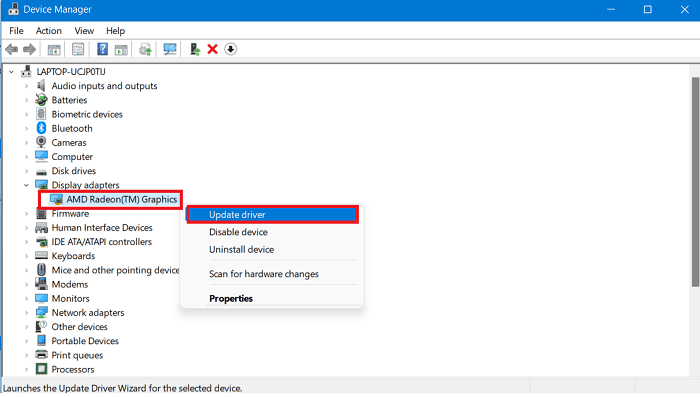
- Right-click the Start button, and select Device manager from the list.
2. Expand Display adapters. Then right-click your Graphics card, and choose Update driver.
3. Choose Search for an updated driver on Windows Update.
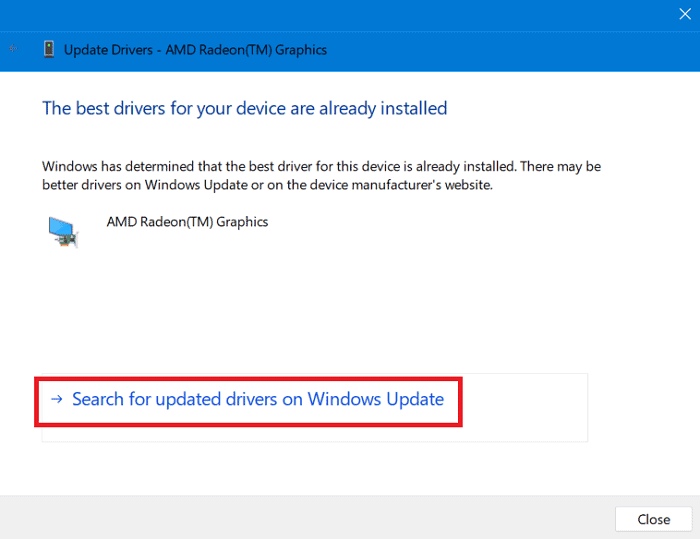
4. Then, install any available updates. Or you can see ‘The best drivers for your device are already installed on the screen if your graphics driver is already updated.
This process will take some time, then restart your PC and check for errors.
Remove Multimedia Devices
You can find this error if you have too many multimedia devices. You can follow the steps given below to remove multimedia devices to overcome this issue.
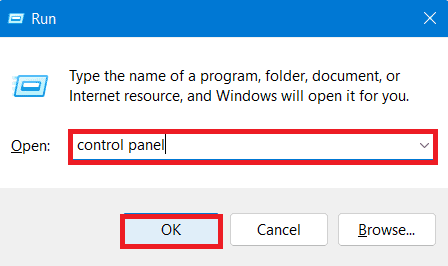
- Press Windows+R, type
control panel, and hit the OK button.
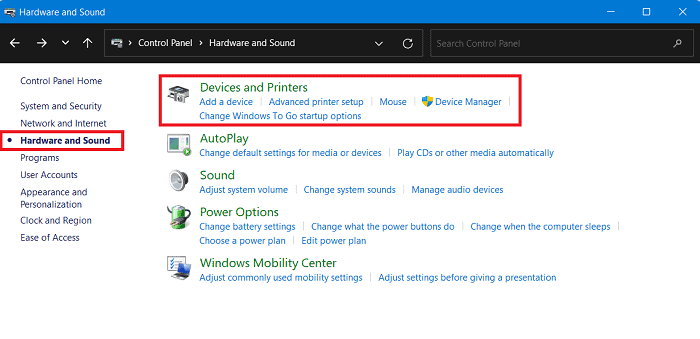
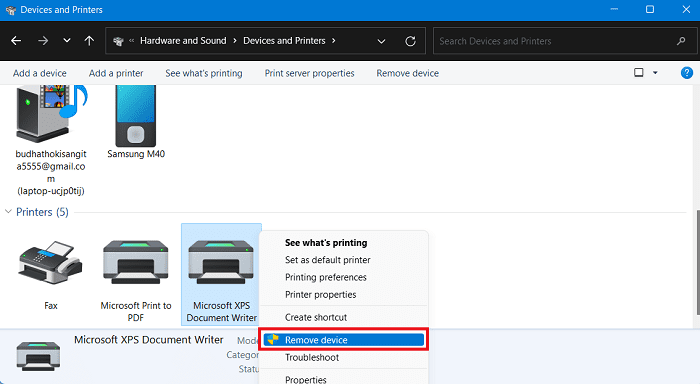
2. Choose the Hardware and Sound option.
3. Click the Devices and Printers option.
4. Right-click on any devices shown, and select the Remove device option.
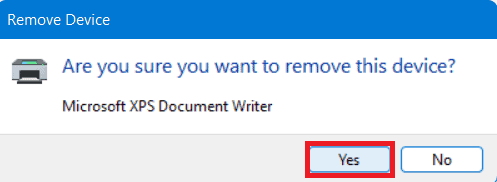
5. Click Yes to confirm the action.
After completing the above steps, restart your PC and check for the error.
Uninstall SoftOSD Software
The SoftOSD.exe is an application that might cause an orange screen of death on the window.
You need to remove this software to fix this issue. Follow the steps to uninstall the application.
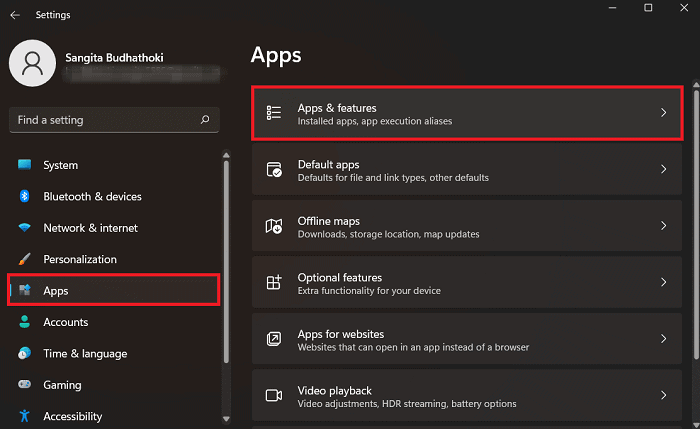
- Press Windows+I to open settings.
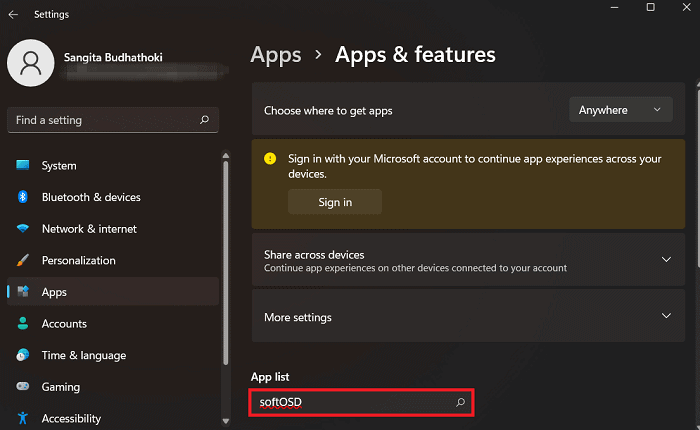
- Choose Apps. Then, click Apps & Features search for softOSD and click on it.
3. You’ll see the app. However, if you see ‘We couldn’t find anything to show here’, then you have no softOSD Software in your PC.
4. If you find any app, Click three vertical dots(⁝) on the right-hand side of that app and Uninstall button to remove this app.
If this does not work, uninstall the software using a third-party uninstaller. Start your PC again to apply changes and check for errors.
Update BIOS
If you haven’t updated BIOS for a long time then you need to know that BIOS is software and it needs to be regularly updated. Possibly, it’s what’s causing the orange screen.
Note: Before updating BIOS, make sure you have power backup, if your PC turns off during updating then your BIOS may get corrupted.
To update BIOS,
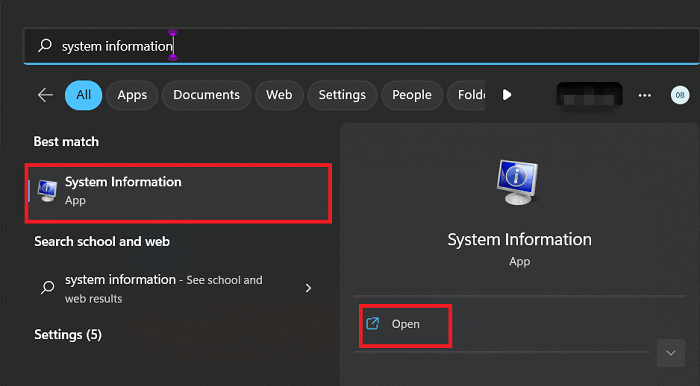
- Press the Window key, type System Information, and launch.
2. Go to Summary Area, you can see the BIOS version/date on the right-hand side.
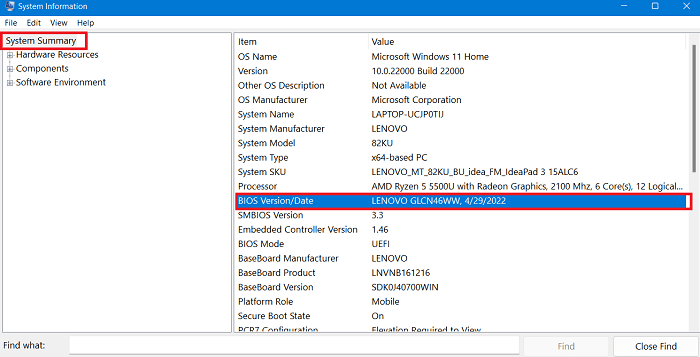
3. Write down the details shown in the BIOS version/date and visit your BIOS manufacturer’s website.
4. Look for the new compatible BIOS version, download it and unzip that file to a USB flash drive.
5. Restart Windows and enter BIOS mode. Steps to enter BIOS mode may differ according to the PC model.
6. Create a backup for the recent BIOS version and save it to the same flash drive.
7. Install the BIOS update and follow the on-screen steps.
8. Wait for a while until you finish the update.
After completing the process, restart your PC and check for errors.
Disable Overclocking
Many users overclock their PCs to get better performance which causes CPU overheating. It leads to serious problems and sometimes may display orange screen display errors.
If your PC has no well-equipped cooler system then you better disable overclocking. You can disable overclocking by adjusting the settings in the BIOS or using a software program.
You will be able to turn off CPU overclocking in Windows 10 easily by following some simple steps:
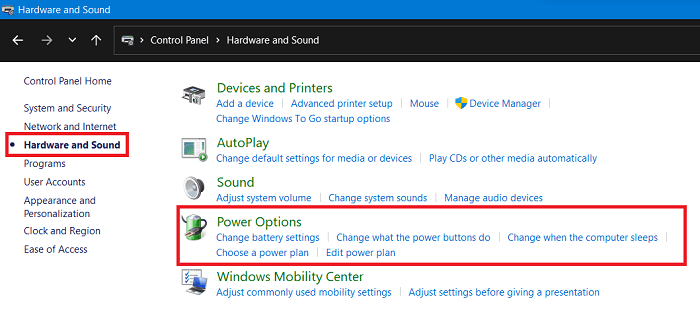
- Go to Control panel> Hardware and Sound.
2. Click Power option on your right-hand side.
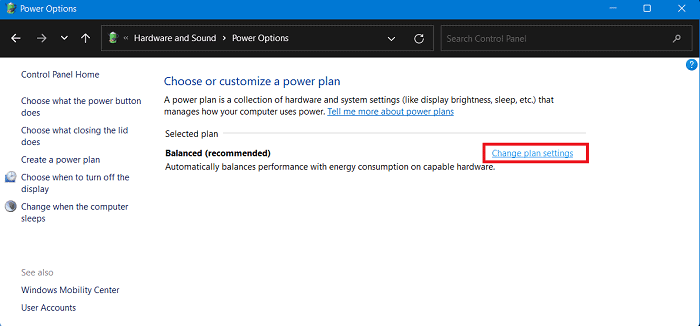
3. Click Edit/Change Plan Settings if you have already clicked High performance .
4. Click Change Advance Power Settings.
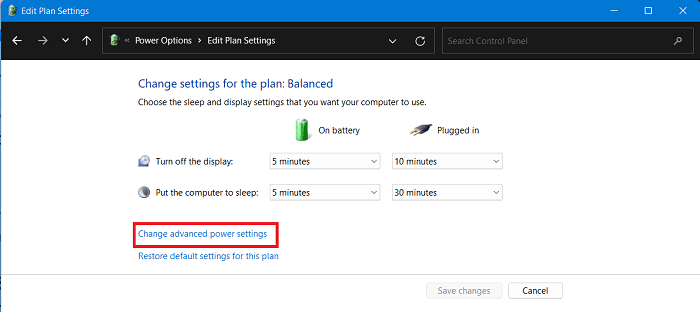
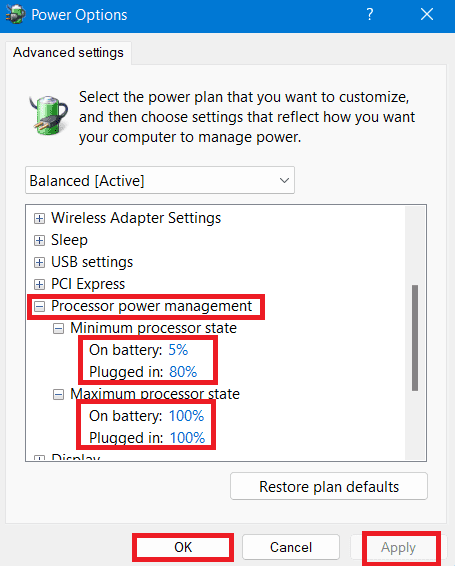
5. Extend Processor Power Management.
6. Lower the value of the min processor state and max processor state and check the performance in Task Manager.
7. Click Ok and Apply.
This is the easiest way to disable CPU overclocking in Windows 10 in a minute.
Use System Restore
When any failure occurs, system restoration can bring a system to working conditions. Restoring won’t affect your personal data but it will remove apps, drivers, etc. Performing a system restore can fix the orange Screen issue.
Steps to use system restore
- Press Window key+R, and type Control Panel and hit Enter.

- Go to Recovery.
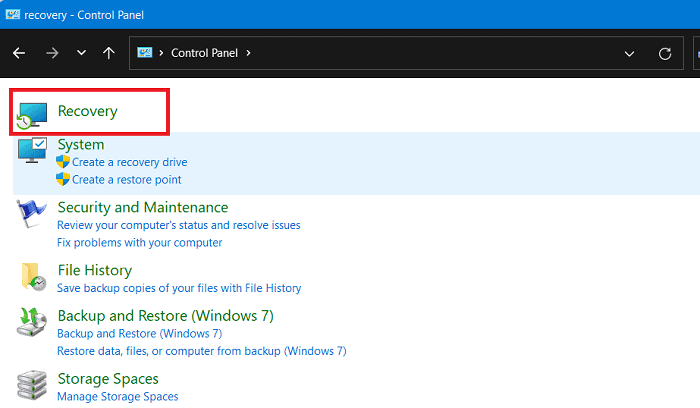
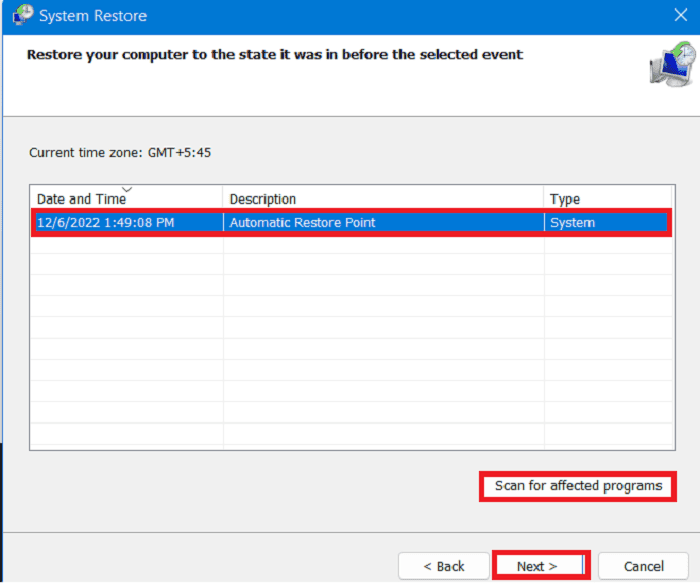
2. Click Open System Restore, Click Next.
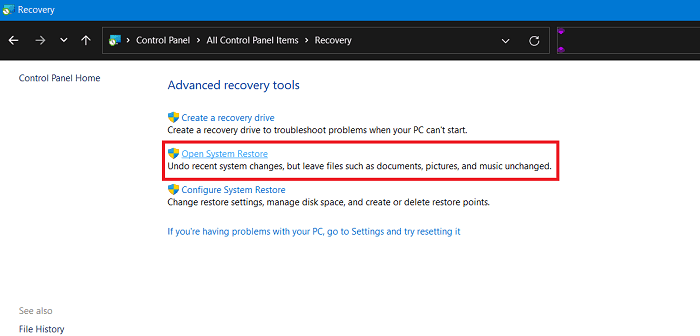
3. Select a restore point and click Scan for affected programs.
4. If no recent checkpoint is seen, select Show more restore points.
5. Select Next and click Finish.
6. Restart your PC and check for errors.
Reseat GPU and RAM
Orange Screen of Death can occur if RAM or GPU is not seated properly or due to malfunctioning of the RAM card. You can fix this issue by reinserting the hardware.
- Firstly, you need to power off the system and unplug all the power cables.
- Once that’s done, remove the screws from the side panel to get the motherboard. (If you are using a laptop then you need to unscrew the RAM compartment).
- Press the lock and remove the RAM and disconnect the GPU. (Take it out straight and parallel to the slot to prevent damage)
- Try cleaning the RAM and GPU properly.
- Use a single RAM at a time by changing the slot.(Check the RAM each time by providing the power)
- Reinstall the hardware carefully and assemble the side panel.
- Restart your computer and check for the error.
Run Startup Repair
Startup Repair is a tool built into windows that are used for troubleshooting when your PC doesn’t start. This tool also fixes corrupt files on your PC. Here is how you run startup repair.
- Press and hold the shift key on your keyboard.
- Keep pressing the shift key then click the restart from the power menu on your PC.
- When the PC restart, you can see a blue screen with Troubleshoot option.
- Release the shift key and click Troubleshoot button.
- Click on Advanced Options.
- Click on Startup Repair.
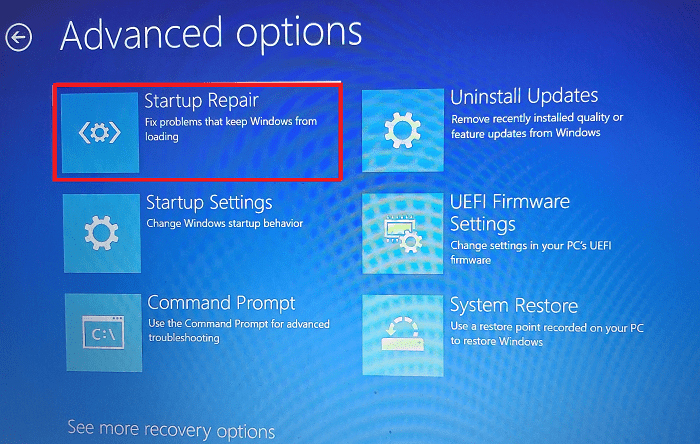
7. Wait a while for the startup repair scanning and check for the errors.

