Are you tired of the same old Outlook View? Do not worry; you can change your Outlook View effortlessly in seconds.
Many Outlook users do not realize that there are some cool features to get more productivity from Outlook.
One of Outlook’s features is the ability to customize your Outlook Views.
This article will show you how to change Outlook View with different methods.
Without further ado, let’s dive into the subject.
Table of Contents Show
How to Change Outlook View? [Step-By-Step Guide]
Outlook View means how items appear on your screen. You can modify the Outlook View settings and create a new interface.
Changing Views on Outlook increases the engaging and boosts productivity.
You can change the Outlook View easily with simple steps. Here, you can add, minimize and customize the email dashboard layout.
Let’s see how you can change Outlook View in detail.
1. Change Layout
You can customize the layout of Microsoft Outlook by increasing or decreasing the border size.
You can efficiently separate important data and information by changing the layout in Outlook.
This way, the client can see incoming messages and other information in one interface.
You can change the Outlook View by following the steps below.
- First, open Outlook on your device.
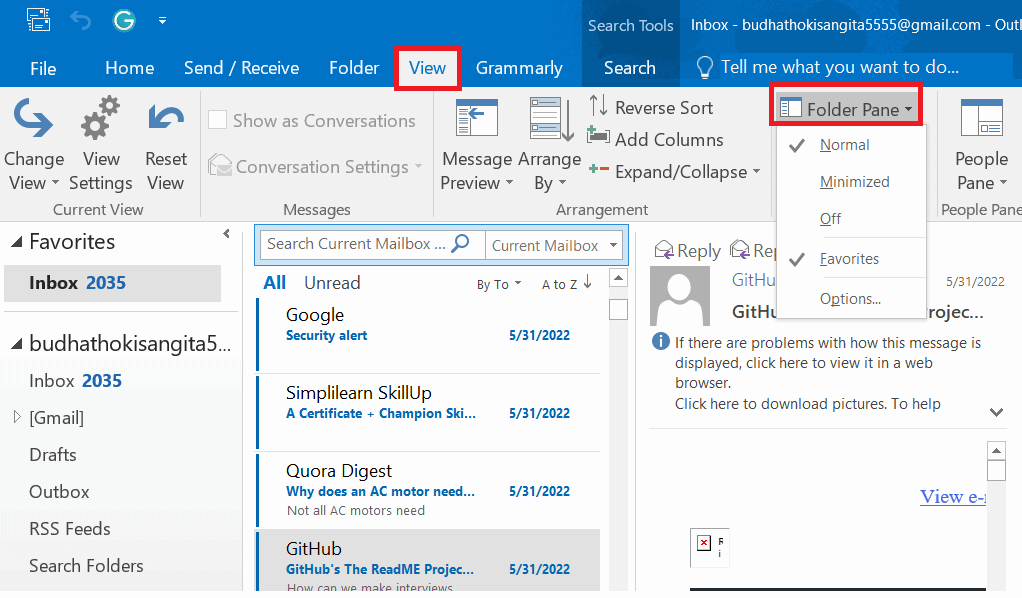
- Click on the View tab from the menu bar.
- Under the Layout option, click the drop-down arrow and select the Folder Pane option.
- You can choose the Normal option to keep it on the left side.
- For minimizing the panel, choose Minimized option.
- Also, you can dismiss it by selecting the Off option.
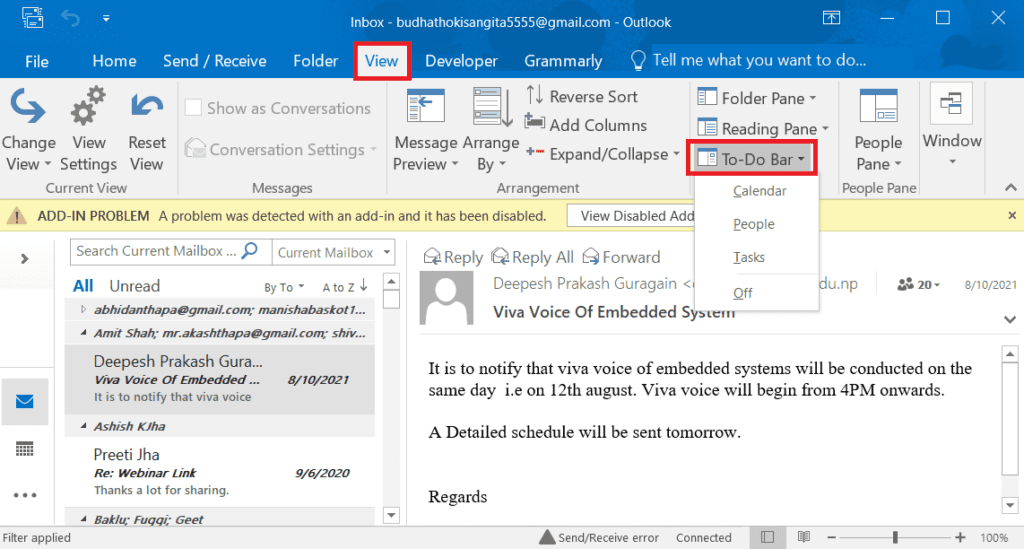
- Select the Reading Pane option.
- You can choose the Right and Bottom options to change the position of the pane.
- And also dismiss it by selecting the Off option.
- Select the To-Do-Bar option.
- You can select Calendar, People and Tasks on the viewing screen.
- You can remove this option by selecting the Off option.

2. Change the Font and Font Size for the Message List
Changing the font size and style is another way to change your Outlook View.
You can follow the steps for the font and font size for the message list below;
- First, open Microsoft Outlook on your computer.
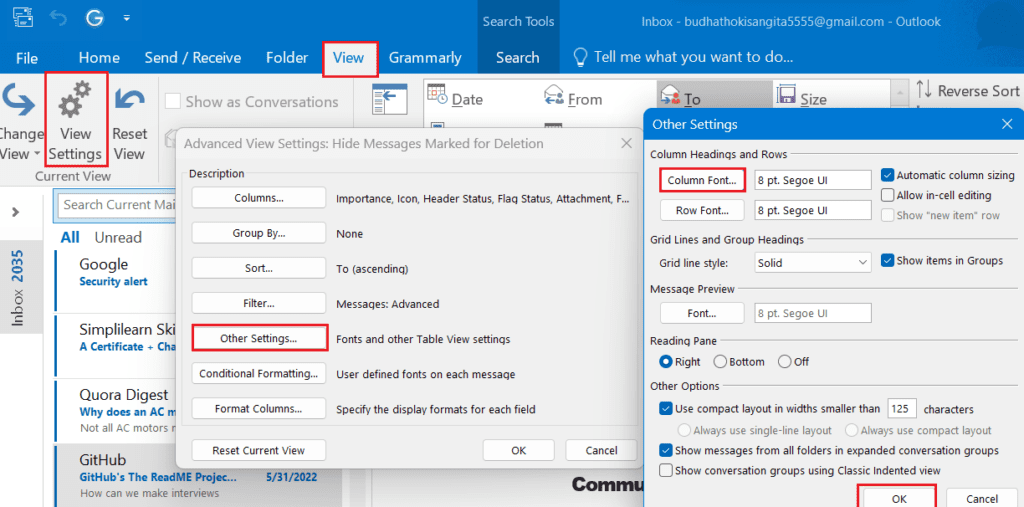
- Select the View option from the menu bar.
- Click on View Settings under the View toolbar menu.
- Then, click Other Settings from the Advanced View setting dialog box.
- Click the Row Font button >Ok.
- Then, select the font and font size and click the Ok button.
- Similarly, repeat changing the font for the column and message preview.

Change the Font and Font Size for Composing /Replying/ Forwarding
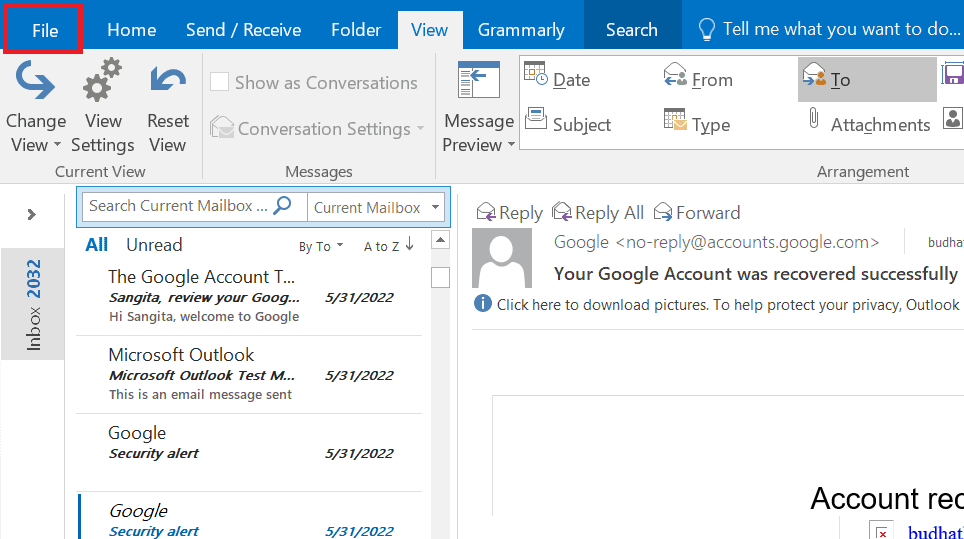
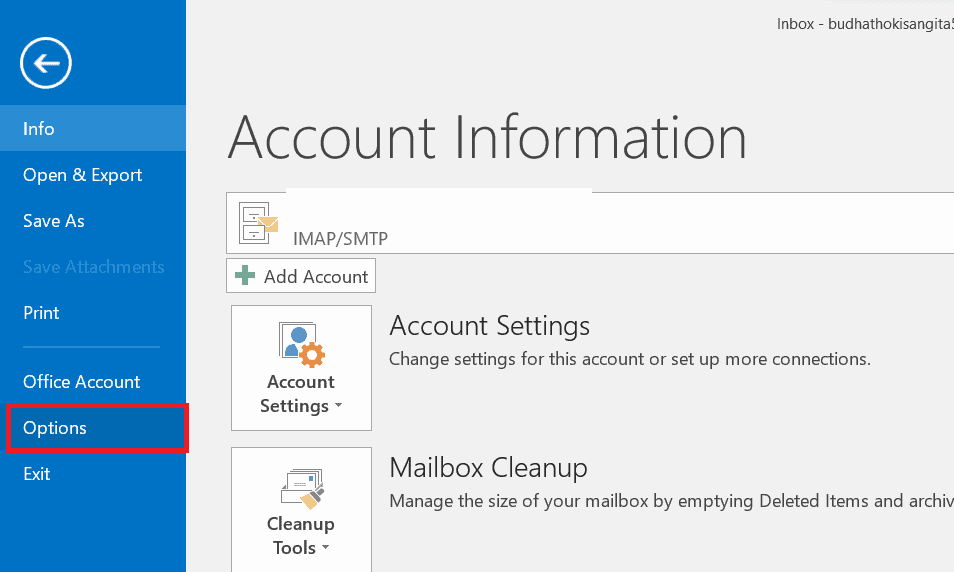
- First, go to the File option from the menu bar.
- Select Options from the bottom left corner.
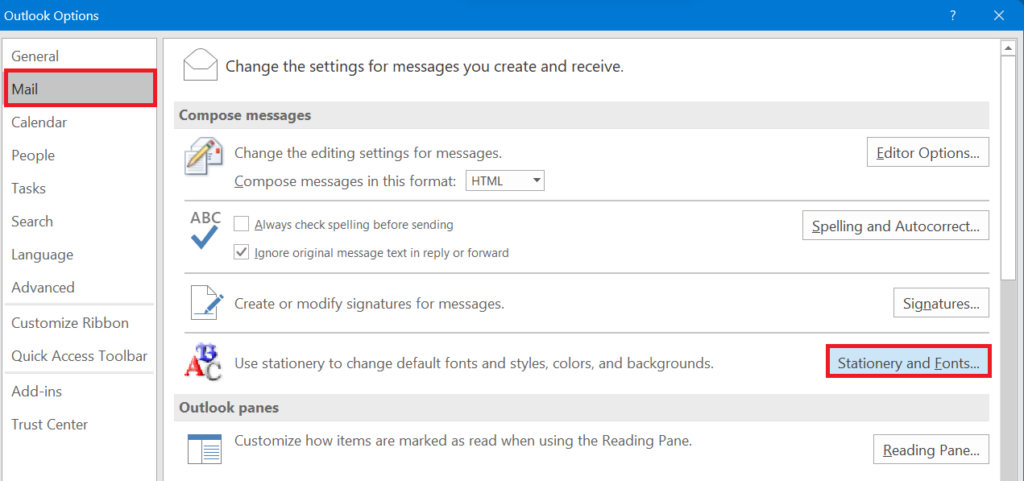
- Then click on the Mail option under Outlook Options.
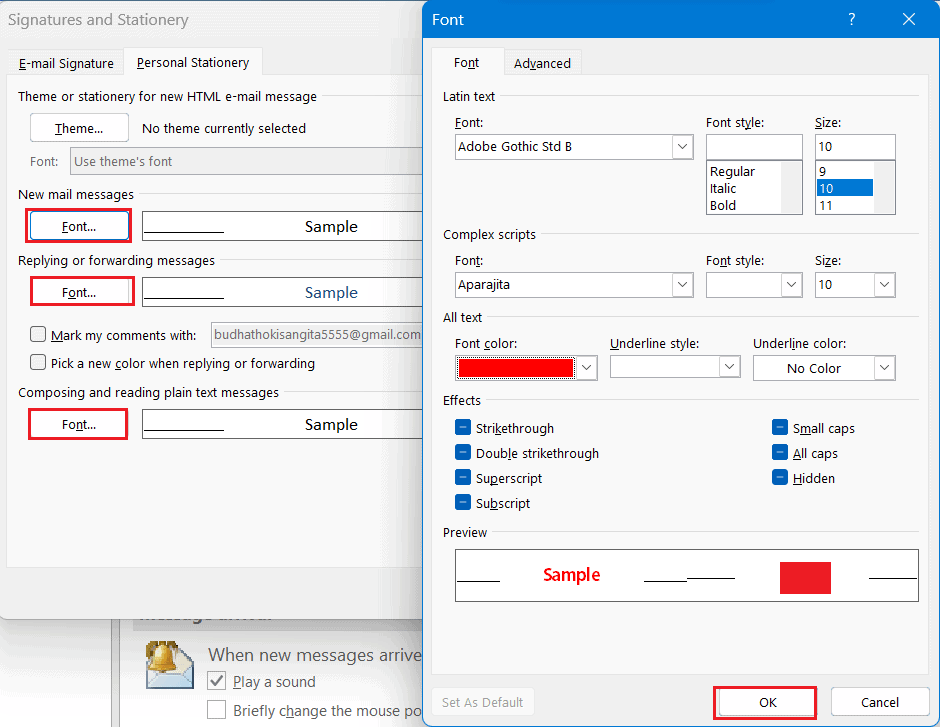
- Select the Stationary and Fonts button.
- You can easily change the font size, style and color from the Font tab and click Ok.
- Finally, click the Ok button again to confirm and save.
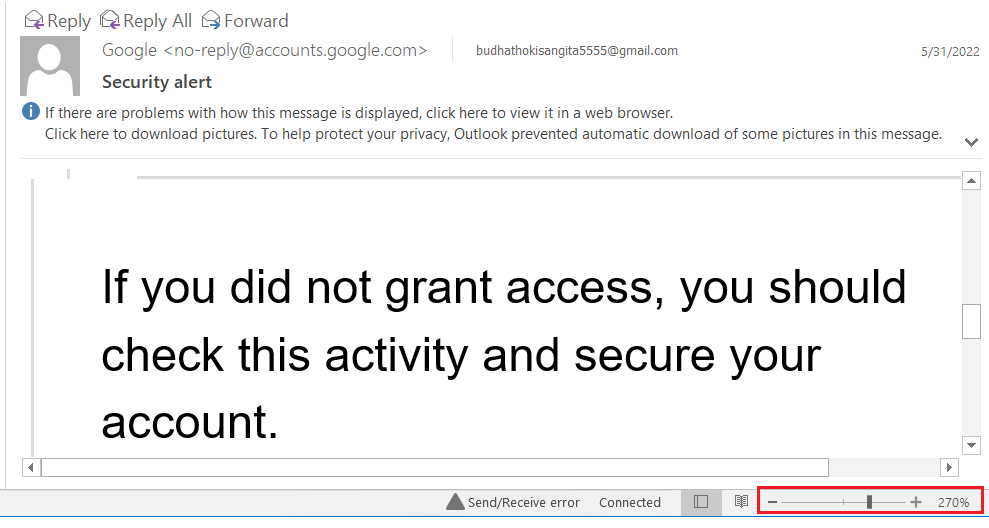
Change the Font Size in the Reading Pane
If you want to change the font size of the Reading Pane, you can use the zoom slider.
The zoom slider is set to 100% by default; slide right to increase the font size and left to decrease.
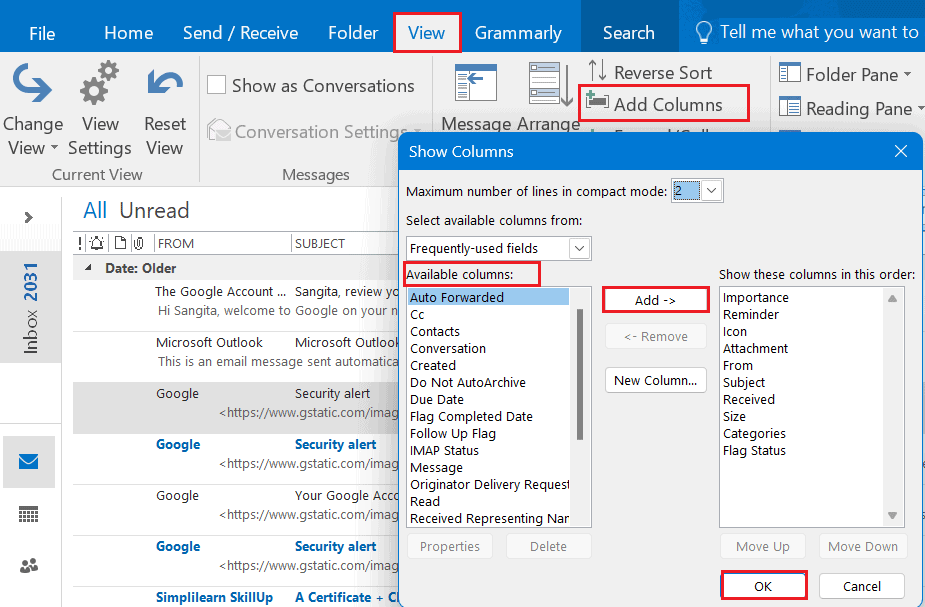
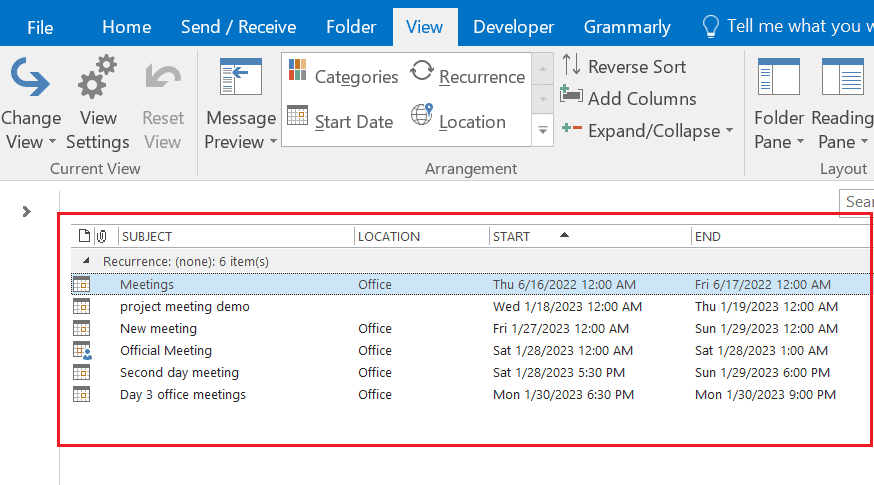
3. Add a Column in the Current View in Outlook
You can View columns on Outlook by default. If you want to add more columns, simply follow the steps below.
- Go to View > Add Columns.
- You can see two options; available columns and show these columns in this order.
- You can add the column and click on the Available columns button. Click on any button you need under Available Columns from the drop-down list, click Add-> and finally, Ok.
- You can see the final result after adding cc and contact in the column.

4. Change Calendar View in Outlook
There could be several sections for viewing and editing your Outlook Calendar.
These options are available on the ribbon in Outlook’s Calendar tab.
You can follow the steps to change the font, font color and font size of Calendar View in Outlook;
- First, open Microsoft Outlook on your computer and click the Calendar icon on the left-hand side bottom corner.
- Select View > View Settings.
- Then, click Other settings > Font in another pop-up window.
- You can easily change the font size, style and color from the Font tab and click Ok.
- Finally, click the Ok button again to confirm and save.
![]()
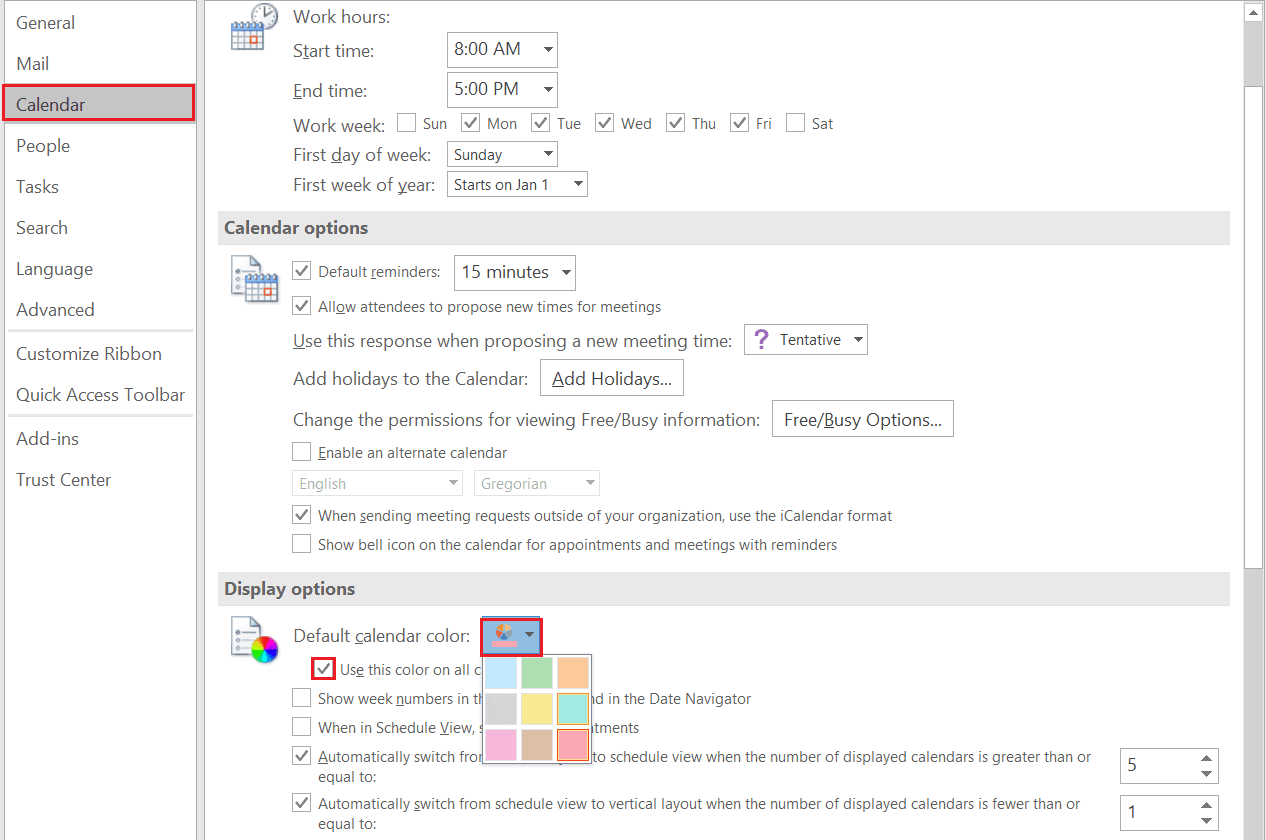
Here, you can also change the default background color for the Calendar.
Follow these steps to change the background color from default to other.
- Click File > Options > Calendar.
- Click the Default Calendar color small drop-down arrow under Display Options.
- Then, select any color you want and, finally, enable Use this color on all Calendar check box.
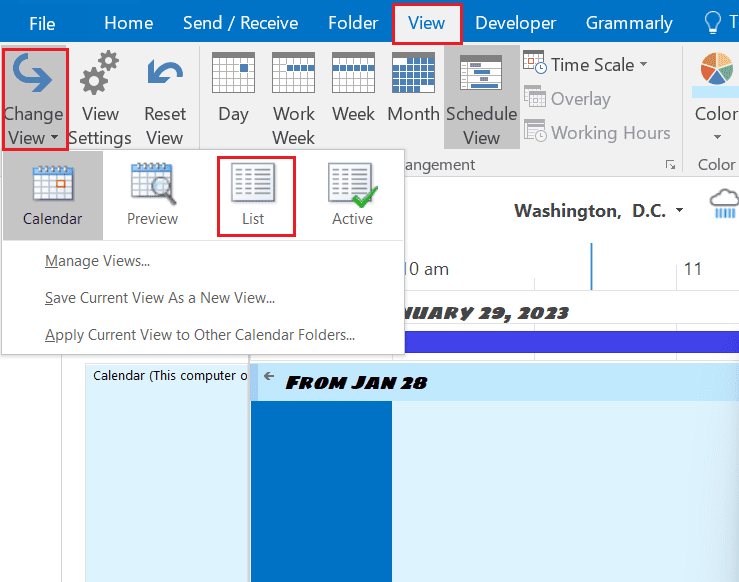
Changing Outlook Calendar View to Vertical List
If you have more than two Calendars with the month View, you can switch the View to vertical lists.
Here is how you can change the Calendar View to a vertical list;
- First, click View > Change View.
- Then, select List from the drop-down menu.
- This will display the Calendar in a vertical list layout, as shown below.
How to Create New View from Scratch in Outlook?
If none of the existing Views interest you, you can create your own in Outlook.
You can even specify the name and type of View that you want.
You can follow the process below to make a new View;
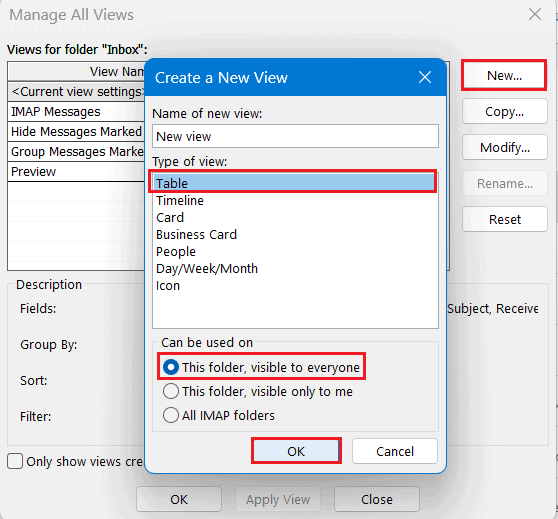
- First of all, launch the Outlook app on your device.
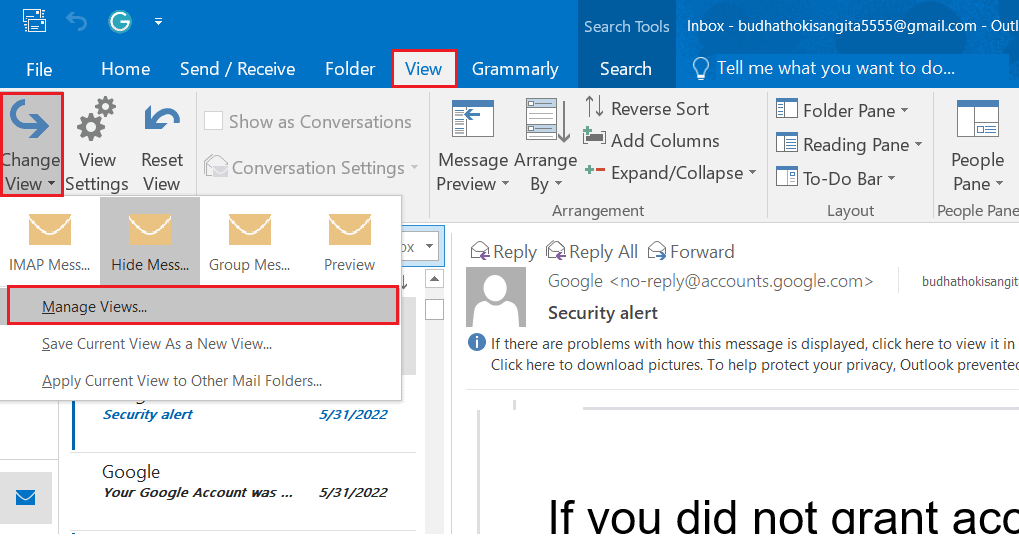
- Click View > Change View > Manage Views.
- Choose the New button.
- Write any text name in the name of the new View option and choose the View type from the list.
- Also, select the visibility of the folder and click Ok.
- You can also select your preferred settings. For this, go to Advanced View Settings and click Ok.
- To save the changes you made, click on the Apply View button.


How to Delete a Custom Outlook View?
Here are some steps for deleting the custom View you created in Outlook.
- First, open Microsoft Outlook on your computer.
- Select the View option from the menu bar.
- Click on the Change View under the toolbar and choose Manage Views from the drop-down menu.
- Select the Custom View you want to remove, and click the Delete button.
- Click Yes from the pop-up window, then click on Ok.

How to Change Outlook View to Default?
Sometimes, you might have difficulty with the new interface after changing the Outlook View.
Restoring the View settings may delete any custom View you created in Outlook but won’t delete any of your emails or data.
Here are two methods of changing the View to default in Outlook.
1. Using Microsoft Outlook App
If you want to restore the Outlook settings to default using the App, follow the steps below.
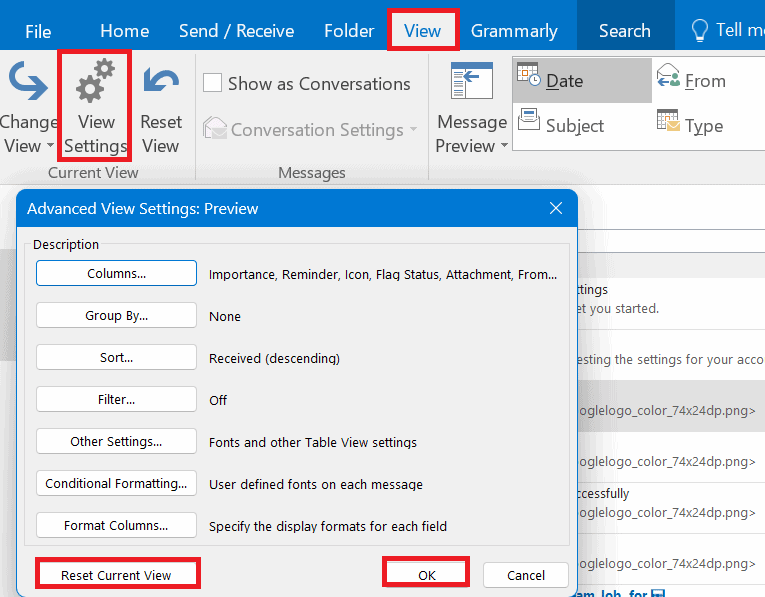
- Go to the View tab> View Settings > Advanced View Settings.
- Select the Reset Current View button, and click Ok.
2. Using Run Command
If you want to restore the Outlook settings to default using the Run Command, follow the steps below.
- Close the Outlook app completely and press Win +R shortcuts to launch Run Command.
- Type outlook.exe/cleanviews inside the box and then click OK.
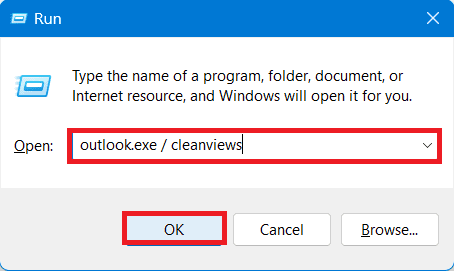
After that, Outlook will launch on your computer with the default Views.
The Bottom Line
Changing the View is a very simple and effective way to personalize your Outlook.
With the above-mentioned steps and little effort, you can customize your Outlook View as per your interest.
I hope you find this article very helpful and easy to follow. Try it out and boost your productivity with the amazing Outlook View.
Don’t settle for an outdated Outlook View; personalize it today.
Frequently Asked Questions
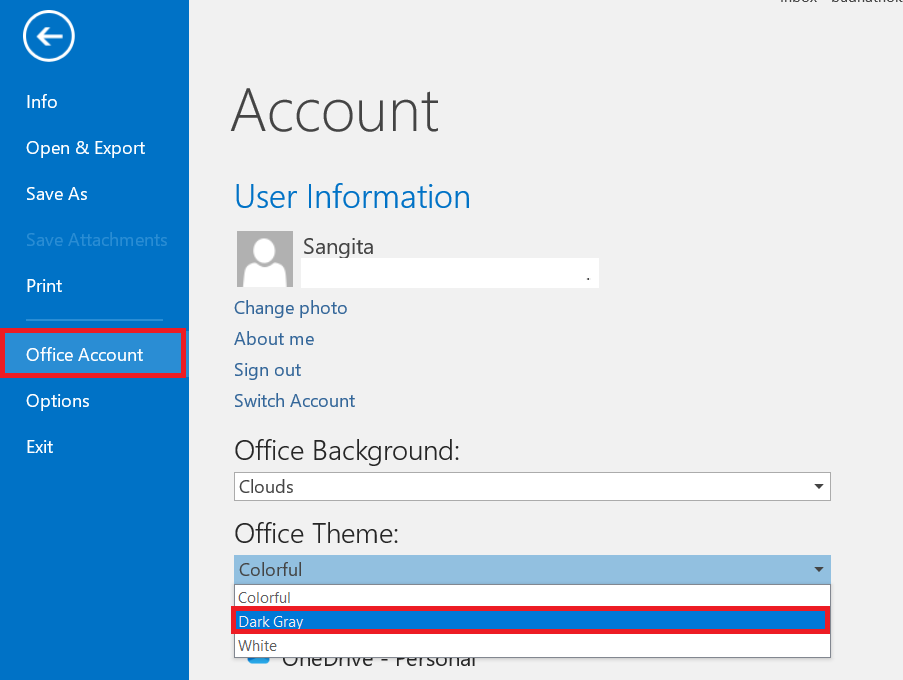
How to Change Microsoft Outlook View to Dark Mode?
Follow the steps below to enable dark mode on Microsoft Outlook;
- Go to File > Office Account.
- Select the Office theme as Dark Gray.
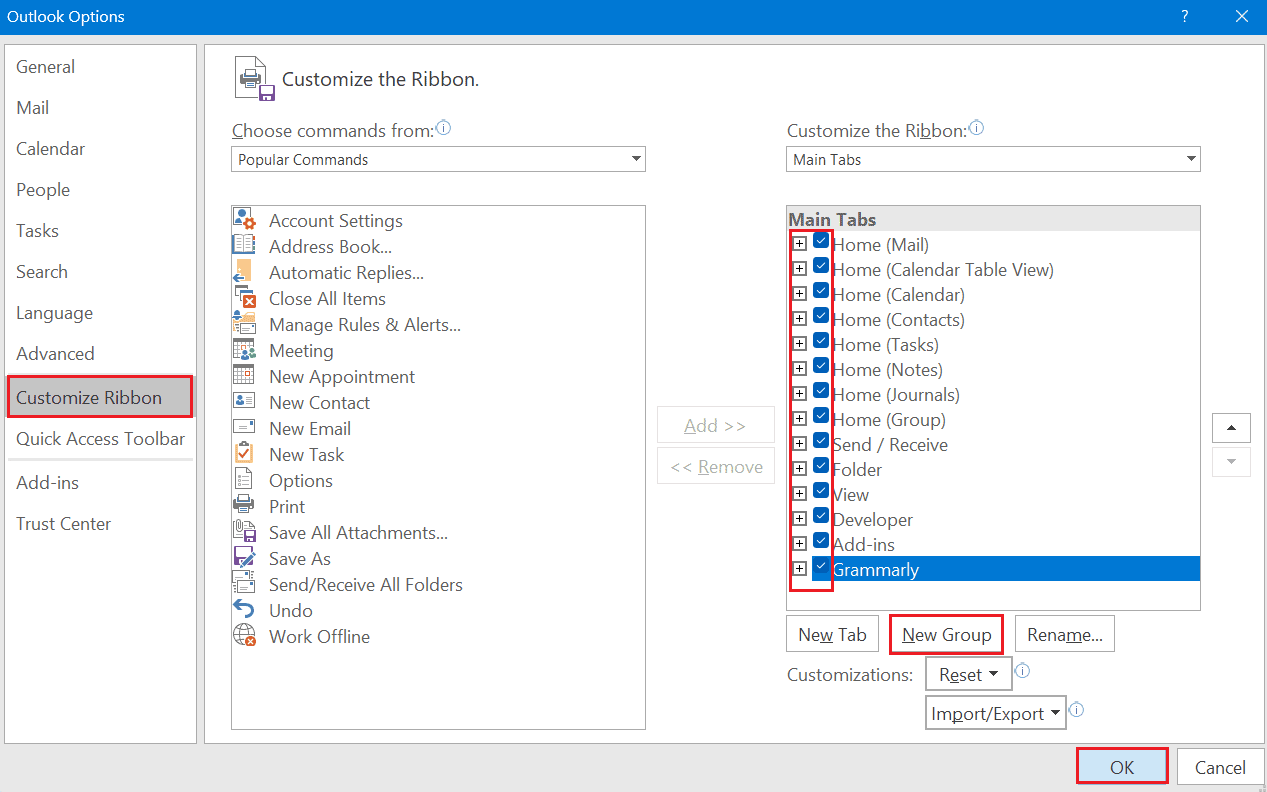
How do I Add Buttons to the Ribbon on Outlook?
You can customize the ribbon in your Microsoft Outlook. Follow these steps to add buttons;
- Go to File > Options > Customize Ribbon.
- Click on New Tab, and select the tab you want to add.
- Finally, select New Group> Ok.
Why is My Ribbon Greyed Out in Outlook?
The Outlook ribbon can grey out due to a hidden reading pane and when mail is not open.