A blurry webcam is not a unique issue, where one in every ten users may face it at one point, but it can become a real hassle when you cannot figure out the cause.
Most internal webcams come with auto-focus, while external webcams can easily be adjusted using a focus ring to solve blurry video issues.
However, some cases can be tricky, requiring further troubleshooting to find the exact problem.
There may be other problems with your webcam or device, but do not worry because they can be fixed quickly.
Read on to figure out how to fix your blurry webcam in no time to be prepared for your next Zoom session.
Table of Contents Show
Why is My Webcam Blurry and How to Fix it?
A blurry webcam can be frustrating, especially when trying to video chat with your friend or colleagues.
The reasons may range from severe issues like faulty software or hardware to slight problems like lens grease or grime.
A built-in webcam is affixed to a laptop, while external webcams are separately brought from the store.
However, the underlying issues for blurred video may be related to hardware and software failures.
Therefore, you should always troubleshoot the issue to find the exact problem.
Here are some probable situations causing a blurry webcam and proven solutions.
1. Out-of-Focus Webcam
An out-of-focus webcam is one of the most common reasons for blurry images prevalent in external webcams.
The manual focus ring usually found within the webcam frame may be adjusted at the wrong setting.

Although most webcams auto-adjust the image, some may require manual adjusting to fix focus wherever you are seated.
Therefore, manually adjusting the focus may help resolve this issue.
Solution
- When setting up a webcam, pay extra attention to manual settings, including checking the USB port, installing updated webcam drivers, and adjusting the focus.
- Access the focus ring of the webcam and gently turn it in both clock and anti-clock directions to find the proper focus.
- As you begin adjusting, the blurred image will gradually become sharper.
2. Poor Internet Connection
A poor internet connection is one of the major culprits for blurry images.
However, check for other probable signs, such as lagging or freezing images, to determine whether your internet connection is causing the blurry picture.
The video will get blurred when the video’s aspect ratio and refresh rate are in excess that the internet connection can support.
Solution
- Switch to an Ethernet connection using a wireless connection over the router.
- The Ethernet transfers internet packets at twice the speed of wi-fi.
- Otherwise, consider upgrading your internet connection by calling the internet service provider.
- A good internet speed is between 50 and 100 Mbps, allowing video streaming in HD or even 4K with lagging.
3. Outdated Video Card or Missing Drivers
A laptop with an outdated video card is prone to blurry videos that need upgrading, especially with a built-in webcam.
External webcams typically have higher-quality components and post-processing software supporting a better resolution and refresh rate.
However, a built-in webcam relies on the camera’s quality and graphics or video card to render a smoother video.
An outdated or low-grade video card may affect the rendering quality of HD and UHD images, causing blur.
Solution
Here is how to check the video card software status.
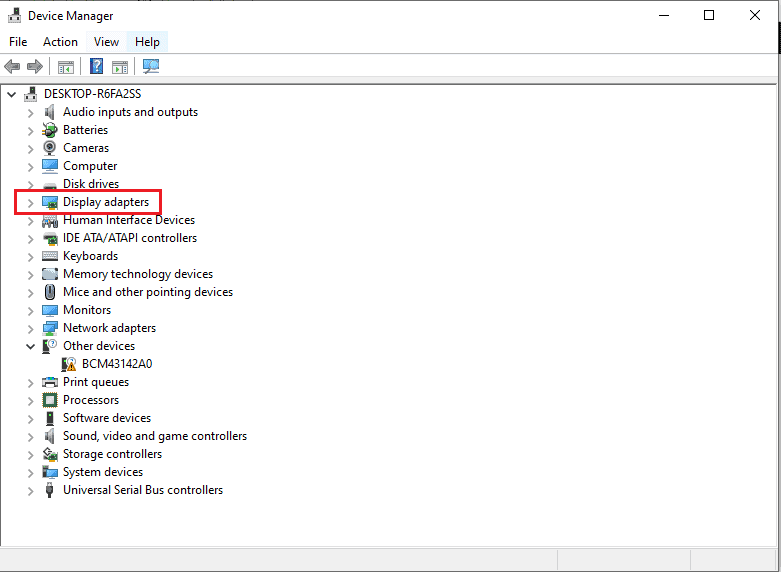
- Press Windows+R and enter “devmgmt.msc“.
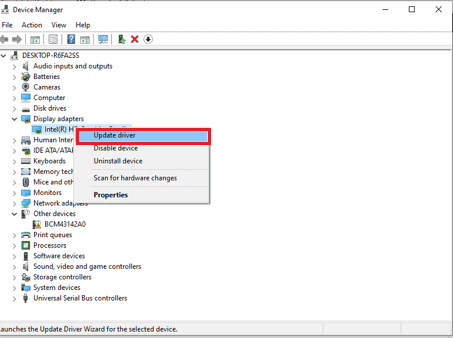
- Under Display Adapters, right-click on the video card to select “Properties.”
- Go to the Driver tab and click Update Driver.
- Then, follow the screen direction to update the software.
- Upgrading the video card or image processing firmware may help reduce the blur.
- Otherwise, consider upgrading the entire device with a built-in webcam that supports HD and UDH images.
You can also upgrade your video card to fix the blurry webcam.
4. Outdated Camera Driver
If the camera driver is outdated, it may not be optimized for the latest version of your operating system, which can cause blurry webcam issues.
Additionally, if the driver is not compatible with your webcam hardware, it can cause image quality problems.
Solution
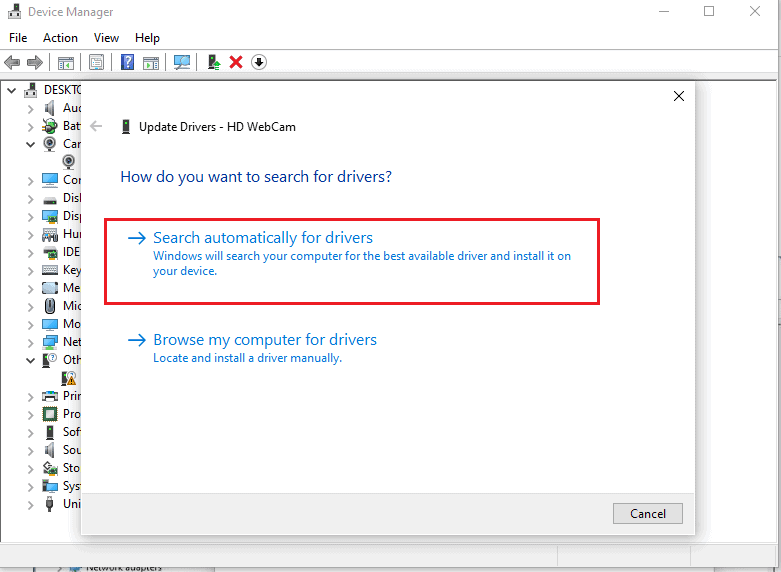
In such a case, you can always update your camera driver. To update the driver, follow the steps below;
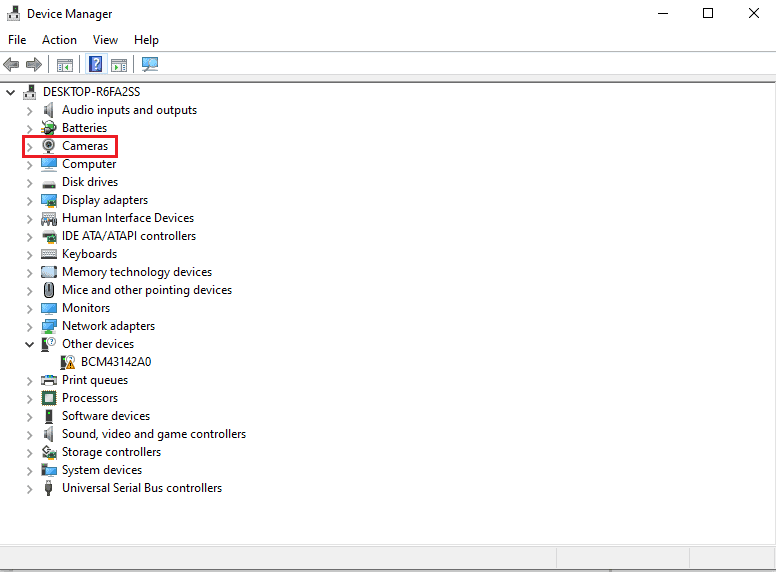
- Open the Device Manager and look in the list of devices for Cameras.
- Right-click the webcam and select Update Driver from the context menu. If there are multiple webcams listed, make sure you update the correct one.
- Follow the on-screen instructions to search for and install any available driver updates.
5. Run the Camera Troubleshooter
If the methods mentioned above didn’t work out, your next step would be to run the troubleshooter.
Running this troubleshooter will automatically detect issues and assist you in resolving your webcam issues.
Solution
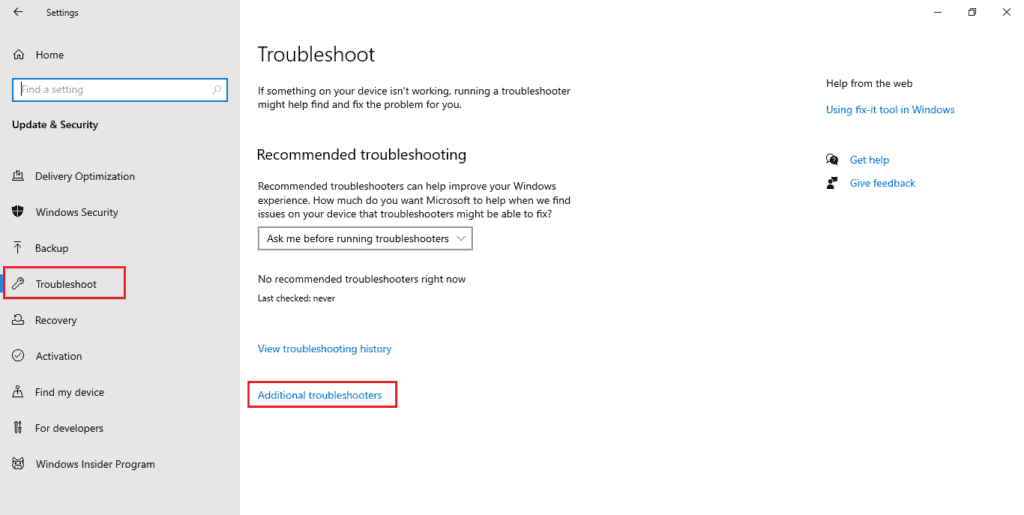
Follow the steps below to run the troubleshooter in your windows 10/11.
- Press the Windows key + I to open the Settings app.
- Click on System and navigate to Troubleshoot option.
- Next, click on Additional Troubleshooter and find the Camera in your app.
- Click on Run Troubleshooter and fix your webcam issues instantly.

6. Reset the Camera App
The outdated camera app may be causing the issue itself.
The camera app may contain outdated data that prevents it from working properly with your new or upgraded webcam.
In such a case, resetting the app may help solve the issue.
Solution
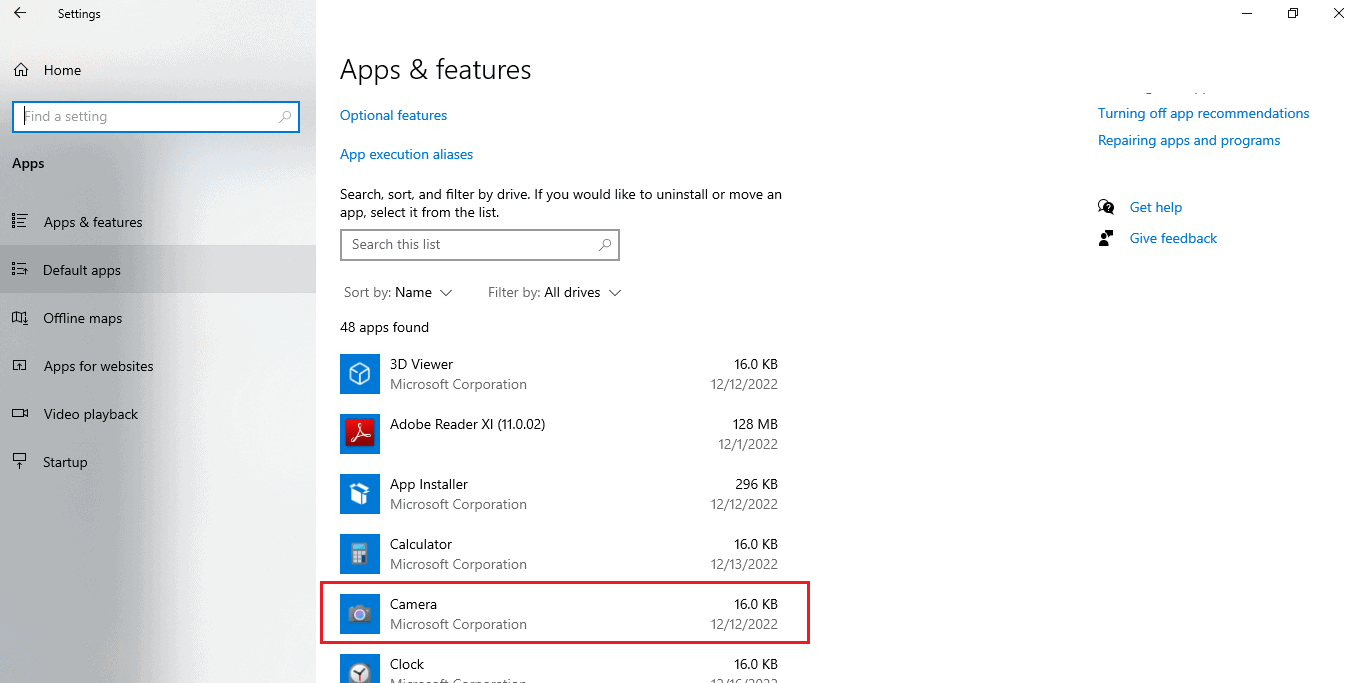
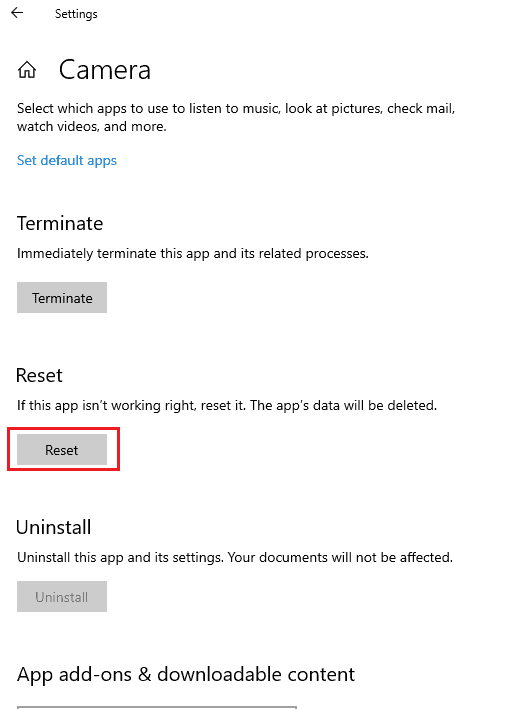
Follow the steps below to reset the Camera app.
- Click Win + I to navigate the settings.
- Click on the Apps section and navigate to Installed Apps.
- Please scroll down to find the Camera and click on it.
- Click on the Advanced option below and find the Reset button.
7. Background App Usage
The numerous apps running in the background may also prevent quality video streaming, causing blur and video lags.
Running numerous apps may use available Random Access Memory (RAM) to prevent the webcam from functioning smoothly.

It mainly occurs in a low-spec laptop with lesser 2Gb or 4Gb RAM.
However, you can solve the momentary blur issue by closing all the apps or just a few apps to free up the RAM for video streaming.
Lagging or freezing video may be more prevalent with a laptop running numerous applications.
Solution
- Close the apps to free up RAM.
- Restart the laptop and run the webcam only.
- Upgrade the RAM size of the laptop, at least 8GB, for smoother video streaming.
8. Antivirus Software
Sometimes, your antivirus software may prevent the webcam video, causing blur and lagging.
You should start by investigating whether your antivirus is preventing your camera.
Solutions
- Consider checking your antivirus settings to enable webcam video or disable it until you are using the webcam.
- Open the Windows Defender Settings and select Virus and threat protection to enable or disable the antivirus to fix the problem.
9. Protective Film Covering (Built-in webcam)
This may be true for a recently brought laptop.
The webcam is often covered with a protective film to prevent scratches, which may cause blurry, out-of-focus, or dark videos.
However, the flimsy designs are nearly impossible to notice without some close inspection.
Solution
- Scratch the sides with your fingernail to check whether the webcam is covered with a thin, transparent layer.
- The protective layer corners will gradually peel off.
- Pull it off once you peel it enough to grab it with two fingertips.
10. Scratches, Foggy, or Damage on the Webcam
Scratches, foggy, or damaged webcam lenses may also cause video blurs.
Foggy lens or lens condensation mainly occurs when the device is moved from a cold to a warm location.
On the other hand, scratches and internal damage may occur from mishandling the device or accidents.
Solution
- Take your webcam or laptop to a warm location or close to the heater, so the water vapor inside the lens can dry up.
- Alternatively, a hairdryer on low heat may also clean up the fog.
- Clean the minor scratches by applying the paste of baking soda or toothpaste and wiping with a clean cloth.
- However, significant scratches and internal damage may need replacing the webcam.
11. Lens Grease
Lens grease is a common culprit for blurred videos.
It is mainly caused by food grease, oil, creams, fingerprints, and residue that sticks to the webcam.
It would likely occur when you touch the webcam with dirty or sticky hands or objects, such as after handling food, oil-based tools, or home products.
The rarely cleaned laptop device or external webcam may also accumulate grease.
Solution
- Dab a dry cloth or cotton ball in 50/50 99% Isopropyl alcohol and water, and wipe the webcam until the grimes comes off.
- Apply commercial lens cleaner on the webcam and wipe it with a dry microfiber cloth.
- If the grimes seem complicated, let the cleaning agent sit for a while before wiping them off with a cloth.
The Bottom Line
A webcam is a quite in-handy tool useful in various cases, especially for organizing video meetings for work or fun.
Follow the guide above to troubleshoot blurry videos to find the correct solution.
However, ensure to clean it regularly and check whether it is functioning correctly to prevent blurry video issues in the future.