I brought a Webcam in the last lockdown and plugged it into running team video call sessions, but it kept flickering whenever I turned it on.
If you are experiencing the same issue whenever you turn on the Webcam, you are not alone.
However, your Webcam is not to be blamed!
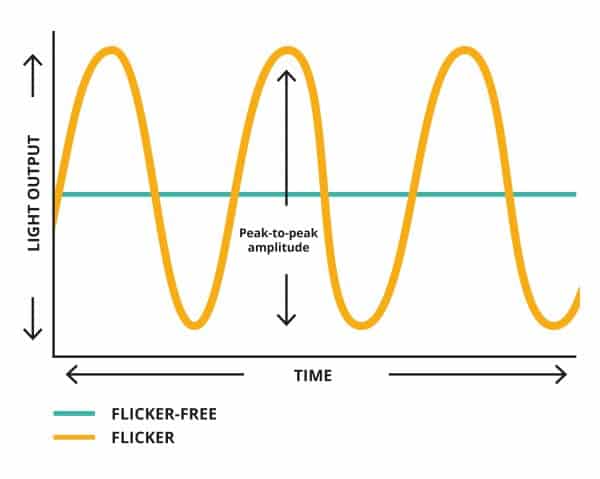
A light bulb receives pulses of power rather than a constant stream, creating constant flickers.
It happens way too quickly for human eyes to grasp, but it is a different story for a Webcam.
Read on to find out the causes of flickering Webcams and how to fix them without quickly calling a technician.
Table of Contents Show
What Causes Webcam Flicker?
A Webcam flickering is not a unique phenomenon. You may notice the same constant flickering if you point your cellphone toward the light bulb and turn on the video.
It occurs due to the interaction between the camera shutter speed (frames per second) and your room’s light frequency.
And here is a reason behind it.
Measured in hertz, it remains imperceptible by human eyes, but a video device like a Webcam is very good at observing this flicker.
A cycle of electrons in one second is known as hertz or Hz. In one hertz or cycle, the bulb turns off two times since the electron moves in and out.
This exact frequency of the oscillations varies between countries, such as electricity in the U.S. operating at 60 Hz and the rest of the world at 50 Hz.
In context, your light bulb turns on and off between 100-120 times per second.
The Webcam will flicker when the camera shutter speed moves too slow or too fast compared to the light’s frequency.
The higher the shutter speed, the more intense flickers will be. Hence, reducing the Webcam flickering intensity is one effective way to reduce the shutter speed.
For example, if your Webcam is running at a 60 Hz refresh rate, but the room light’s frequency is at 50 Hz, you can reduce the speed of the Webcam shutter to 50 Hz to align with the frequency of the room light.
The same goes for video camera devices set at different shutter speeds, such as DSLRs, cell phones, camcorders, built-in Webcams, etc.
How to Fix Webcam Flickering?
Webcam flickering can be annoying, but it does not have to ruin your perfect video meet.
Here are a few proven ways to reduce, if not eliminate, Webcam flickering to provide a seamless video experience.
1. Adjust the Refresh Rate of the Webcam
One of the quickest ways to reduce flickering is by adjusting the refresh rate via Webcam software.
Every Webcam can be accessed through software that adjusts various settings, including refresh rate.
For example: when using an external Logitech Webcam, open the Logitech Webcam app on your computer or cellphone and go to Advanced Settings.
Go to the Anti-Flicker section and change the refresh rate to either 60 Hz or 50 Hz, matching the light’s frequency.
Similarly, most laptops have a built-in Webcam and supporting software or application.
Simply open the Search Box and search for the camera to open the Video settings.
2. Adjust Flicker Reduction From Windows Settings
This option is readily available for a Webcam that is built-in to the device but external.
You can quickly fix the Webcam flickering issue by adjusting the flicker rate in the Windows camera settings.
To adjust the flicker reduction from window settings, follow these steps;
- Type “Win+S” or tap on the Search box at the bottom-right corner of Windows 10.
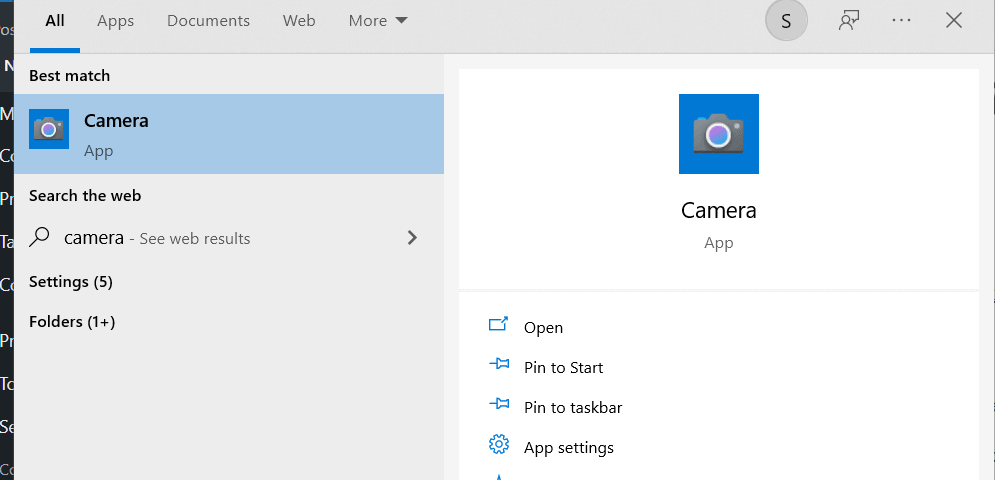
- Type Camera and open the camera application from the search results.
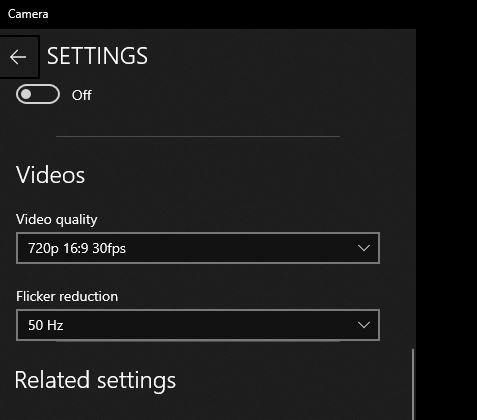
- Click on Settings and scroll below to find the Flicker reduction menu.
- Set the flicker reduction setting to 50 Hz, effectively solving the issue.
3. Adjust the Refresh Rate via Video Call App
It may be tricky because not all video call apps work the same.
Webcam flickering may happen in one video call app, but it works fine on the other. You would need to fix flickering through the video call app itself.
Consider checking the video call app manual, which you can easily find online.
If you are using Skype,
- Select your profile picture and tap on the settings icon.
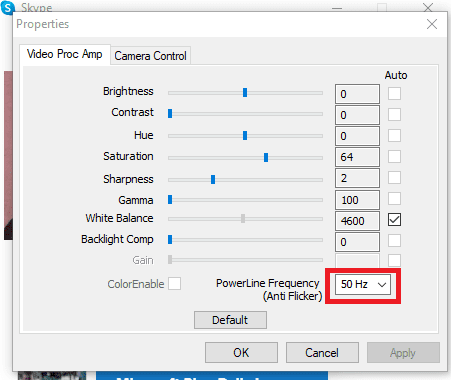
- Select Audio & Video and navigate to Webcam settings to customize the flickering.
- Adjust the flicker rate from 60 Hz to 50 Hz to eliminate flickering.
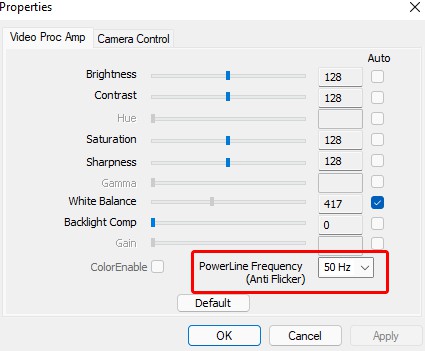
If you are using Microsoft Teams,
- Open Microsoft Teams and navigate to the top to find the three-dot menu.
- Click on Settings from the drop-down menu and navigate to Devices to open camera settings.
- Scroll down to the bottom right corner to find a drop-down labeled “Powerline frequency (Anti-flicker).”
- Next, change the frequency to a suitable level to eliminate flickers.
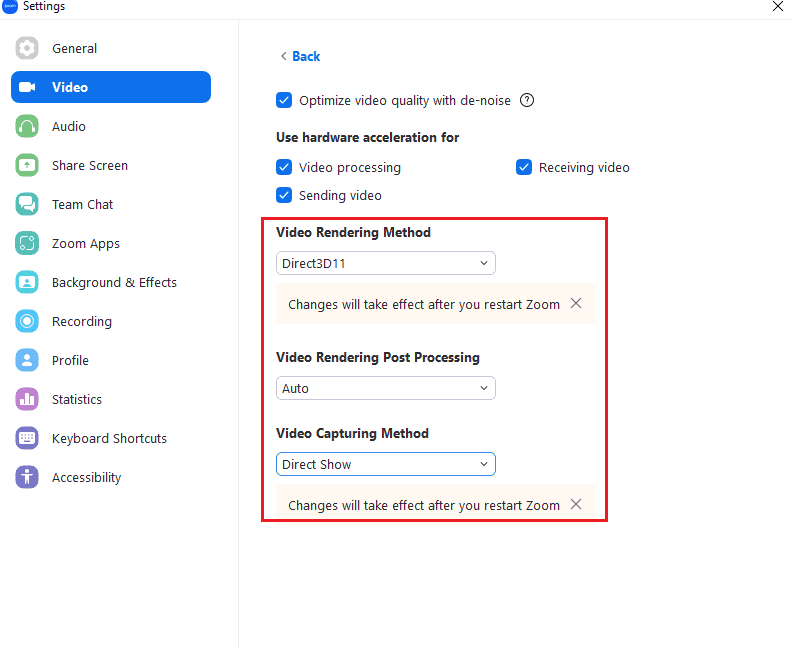
If you are using Zoom,
- Open the Zoom app and navigate to Settings.
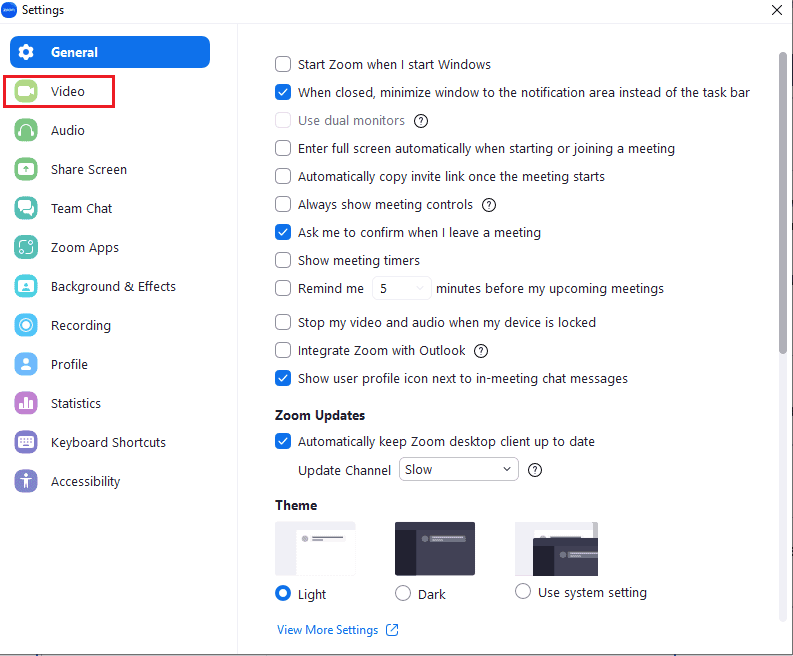
- Select Video and tap on Advanced.
- Next, change Video Rendering Method to Direct3D11.
4. Update the Webcam Drivers
An outdated Webcam driver on your laptop may also cause flickering.
When you use an outdated driver, it may not be optimized for your current operating system or may not support the latest features of your Webcam.
However, updating the driver to the latest version can help to resolve the issues.
Follow these steps to update your Webcam driver;
- Open the Device Manager and look in the list of devices for Cameras.
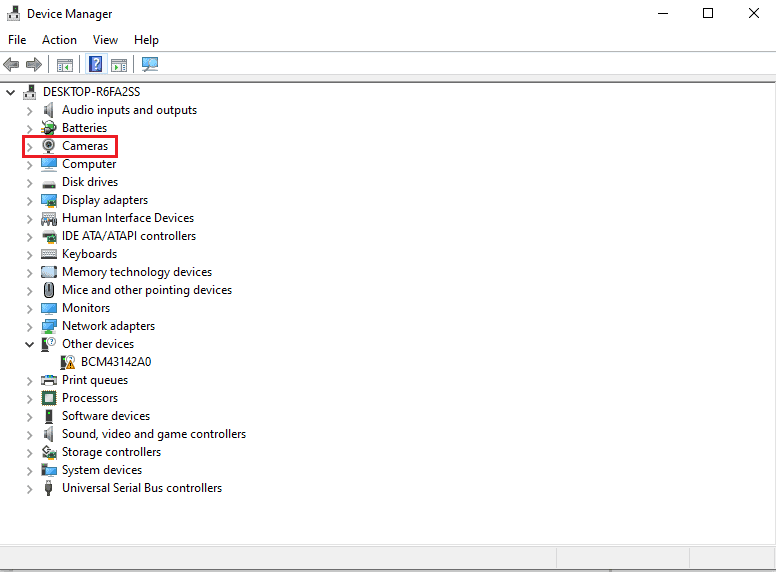
- Right-click the Webcam and select Update Driver from the context menu. If there are multiple Webcams listed, make sure you update the correct one.
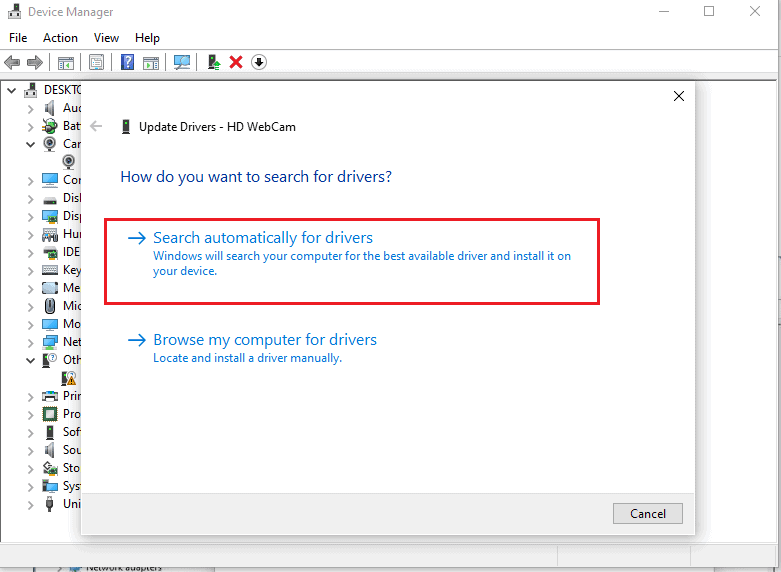
- Follow the on-screen instructions to search for and install any available driver updates.
5. Adjust the Light Source’s Brightness
Although rare, you can fix the flickering issue by adjusting the light source’s brightness.
However, it may only be possible when using external light fixtures with software or analog settings.
Instantly lower the brightness (lumens) to make it dull, which will have a less flickering effect.
Adjust the brightness settings of the camera to overcome the darker video frame.
Read on to discover more about choosing the best light for work and ergonomic lighting tips for the computer work.
6. Get Away From the Light Source
Alternatively, get away from the light source to eliminate flickering issues.
When you move out from the troubling light source, your Webcam will readily adjust to the natural light, reducing the flicker.
However, the video frame may appear dark due to a lack of light.
If possible, move close to the sunlight or vamp up the brightness setting in your device and video calling app.
If you think the USB is an issue, consider replacing it with a different one or getting a high-speed USB connection.
Conclusion
Now you know why your Webcam keeps flickering. Try the different methods given above to diagnose the issues and find a reliable solution.
In most cases, toning down the frequency from 60 HZ to 50 HZ would work.
For others cases, consider adjusting the light brightness to suit your Webcam’s shutter speed.