Do you want to plug one-to-many internet devices into your router but hate seeing an ugly, dense mass of cables lying around? Then, network jack is your solution.
However, you can save a few bucks by installing a network jack, which is surprisingly easy.
Read on to learn about installing an ethernet port on the wall and its pros and cons.
Table of Contents Show
What Does Ethernet Port on the Wall Look Like?
An Ethernet or LAN port in the wall is a socket connecting internet-enabled devices such as computers, game consoles, fax machines, etc.
Unlike plugging each device into the router, the Ethernet port will minimize the cables by providing one or more sockets on the wall for quick access.
If you look closely, the Ethernet wall port will look like a phone jack but with a slightly broader socket in a square shape and a couple of rigid areas at the bottom.
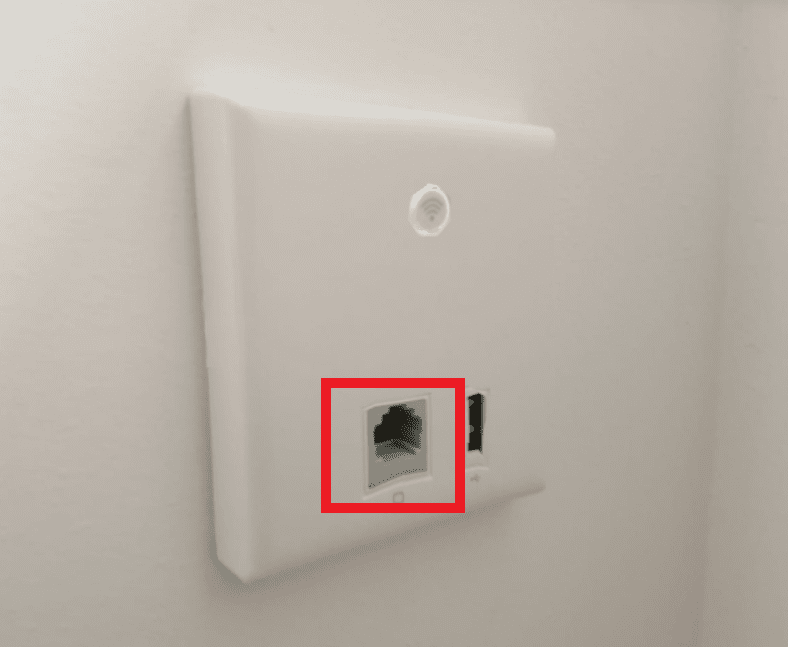
One end of the port connects directly to the route or modem, while the other remains open for plugging your device.
Depending on your requirement, the wall plate may have multiple Ethernet ports configured to connect one-to-many devices.
It is usually placed along the electrical wall sockets so the two wires can be placed nearby, saving wall space and unattractive wiring fixtures.
Pros and Cons of Ethernet Port in the Wall
Using the Ethernet port has many advantages, including greater speed because it is faster than Wi-Fi.
However, incorrectly configuring the Ethernet port or using the wrong LAN cable may invite many problems.
| Ethernet Port Pros | Ethernet Port Cons |
|---|---|
| It provides speedier internet with zero or nil loss of data | Using older cable like CAT 5 will limit the speed up to 100 Mbps |
| The radio and other short-range signals are less likely to interfere with it | It is prone to physical vulnerability such as breakage of wire and burn-out |
| You can attain greater rapidity, attaning up to 10 GBps of data unavailable with Wi-Fi | It has limited flexibility as you cannot stretch its outreach like the Wi-Fi |
| You can plug one or many Ethernet (LAN) cables to support multiple devices simulatneously | You must adjust the desk and computers based on the Ethernet port's location |
| Wired network provides an added security | The materials and labor cost is higher |
Ethernet Port in the Wall Vs. Phone Port
Many users confuse the Ethernet port in the wall with the phone port.
Simply put, these two are entirely different units with seeming dissimilarities.
Refer to the table below to learn about the differences between an Ethernet and a Phone port.
| Ethernet Port | Phone Port |
|---|---|
| The Ethernet cable is usually round and thicker. | The phone port is flat and small. |
| The Ethernet connector uses RJ45 with 8 pins that makes it look bulky . | The phone port uses RJ11/RJ12 connector that is comparatively smaller and has 4 to 6 pins. |
| The Ethernet port connects the cable to the router or modem. | The phone port connects to the local switchboard. |
| Ethernet port uses CAT5 cables. | Older phone port uses CAT3 cables. |
Can You Install Ethernet Port in the Wall?
Installing a network jack is very much possible and very straightforward.
If you are unfamiliar with the Ethernet wall port, imagine seeing a phone wall outlet but just bigger. The Ethernet wall port will work the same.
Similar to phone lines that connect to the switchboard, the Ethernet cable will connect to the router or modem.
However, the cost of installing an Ethernet port in the wall would depend on the difficulty of configuration, available space, and expertise.

How Much Does it Cost to Install Ethernet Port in the Wall?
The cost of installing the Ethernet port in the wall would depend on the level of difficulty, type of connection, and professional’s rate.
Installing the Ethernet port may not be more straightforward for users with zero technical knowledge; hence, hiring a professional becomes necessary.
The price indicates a new installation of 2,000 feet CAT-6 cable with up to eight connections.
However, setting up a short connection, for example, a home office and one or two rooms, would hardly cost a few hundred dollars.
Here is the cost breakdown of installing the Ethernet port on the wall.
| Items | Cost | Specification |
|---|---|---|
| Cables | Coaxial cable - $0.06-$0.17 Twisted pair - $0.10-$1.13 Fiber optic -$0.8-$4.6 | Purchasing cable could run from $100 to $2,000 based on the distance |
| Wall Plates | $10-$25 each | Choose number of ports available (1,2, or more) |
| Network Switch | $10-$100 | Access several different devices hooked to the same router |
| Ethernet Port | $10-$25 each | The jacks you will plug into |
| Modem | $50-$100 | You can buy or rent one |
| Router | $80-$120 | You can buy or rent one |
| Labor cost | $50-$100 per hour | It will depend on the number of workers and duration |
You can save hundreds of dollars for home installation by doing it yourself.
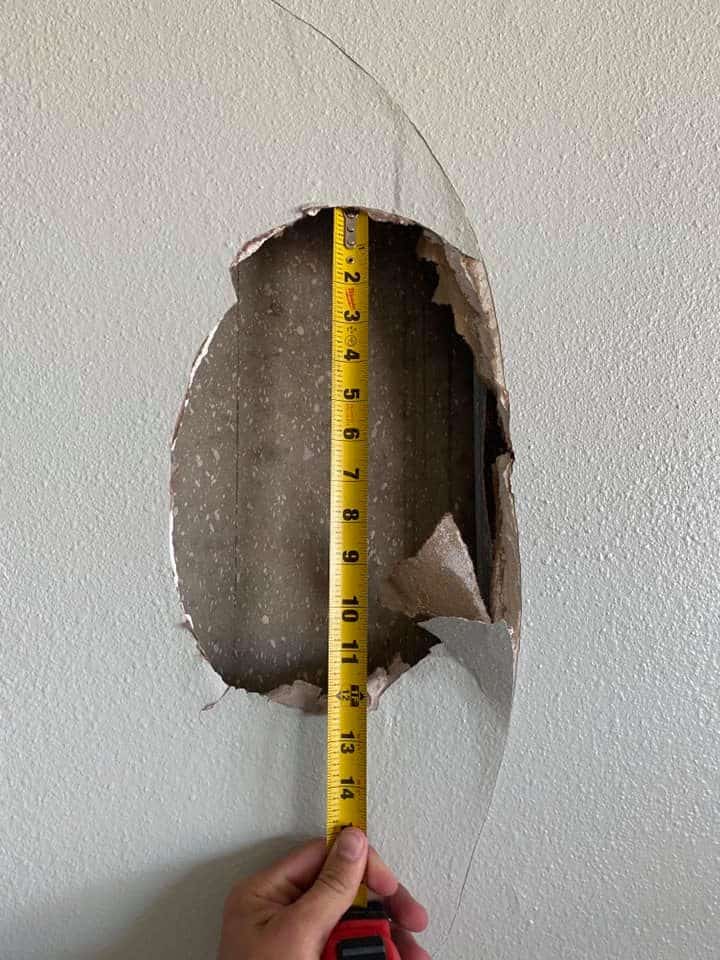
Besides, you must know about basic networking before installing the Ethernet port. The knowledge of renovation will come in handy when you accidentally damage the wall.
How to Install Ethernet Port on the Wall? [Easy DIY Steps]
Installing the Ethernet port to the wall is pretty straightforward.
Start with determining how many and the length of Ethernet cables you may require, the number of wall plates and jacks, whether the wall needs furnishing, and preexisting components.
If you already have a modem or router, you may not need to buy or rent one. Similarly, you can use the remaining LAN cables if it has an appropriate length.
Find an ideal spot to install the wall plate and jack.
- Consider the wall (drywall or concrete), the router and modem’s location, and the room’s layout.
- Find a section next to the electrical socket to create a uniform outlet.
- The drywall can easily be traced and cut to install the wall plate and cables.
- Cracking the concrete wall to fit the cables can be difficult, especially if you have zero knowledge about the renovation.
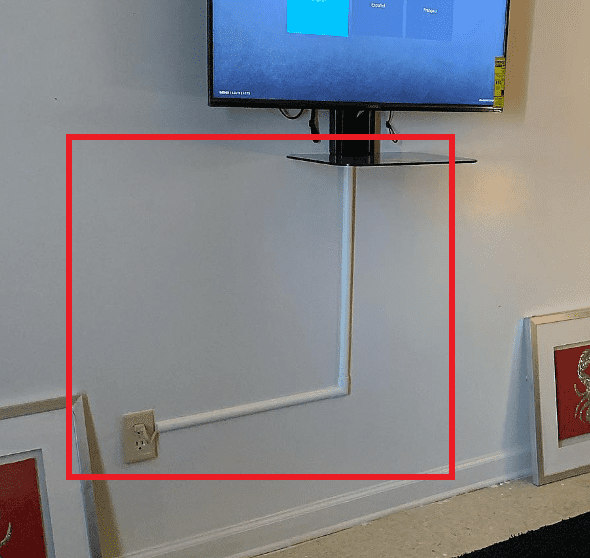
- Consider installing a cord hider or concealer that runs above the concrete surface for the concrete wall.
Here is the step-by-step instruction for installing a single Ethernet port on the drywall.
Step 1: Create and Cut the Outlet
- Outline the spot on the wall by measuring the wall mount against it.
- Using a pencil, draw the exterior outline of the wall mount.
- Line the wall plate evenly with the nearby electrical outlet to ensure uniformity.
- Alternatively, you can use the bubble level to check whether the top and bottom edges are perfectly parallel to the floor.
- Next, shut off the electricity of the wall outlet next to the Ethernet wall plate to minimize electrical shock.
- Take a utility knife with a serrated edge or drywall saw to cut along the highlighted outline.
- Gently score the outline to make your cutting neat and precise.
- Avoid cutting the hole too big. You can always go back and fix the small hole.
Step 2: Run Cable to the Jack
- This part is tricky as you would need to drill a hole in the ceiling, adjoining wall, or floor beneath to run the cable, depending on the router’s location.
- Use a power drill with a 1⁄2 in (1.3 cm) drill bit to bore a hole in the wall to route the cable from the router to the wall outlet.
- Next, run the Ethernet cable from the networking hardware to the outlet: the length of the CAT5 or CAT6 cable required will depend on the distance between the two.
- Feed the cable through the opening outlet (close to the router) and down into the wall socket. Keep it slightly longer to be able to work around it.
- Next, secure the mounting bracket on the wall and fasten the bracket by drilling the screws into the wall.
Step 3: Wire the Ethernet Cable
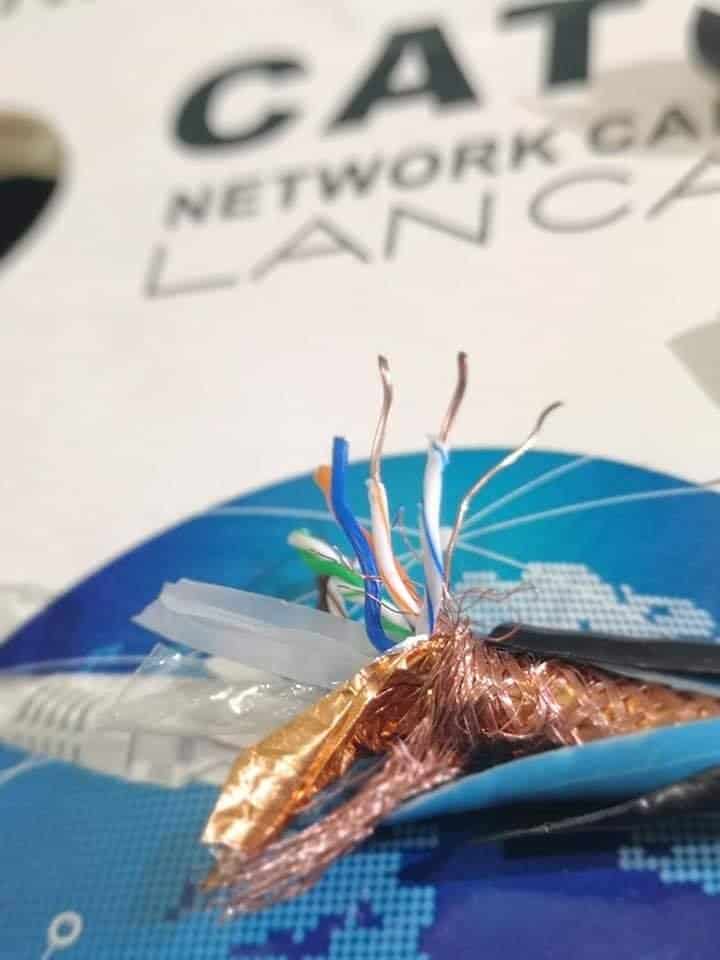
- Next, prepare the wire by striping the outer sheeting and dissecting the cables.
- Use a clamp tool and press it down around the cable to remove the sheeting.
- Using a cable stripper, remove the cable covers to expose the wires.
- Place the exposed wires into the color-coded slots on the keystone connector.
- Align each wire to its corresponding slot using T568A or T568B configurations.
- Lastly, plug the wired connector head into the wall plate.
Here is a video to help you with cutting the wire,
Step 4: Install the Wall Plate
- Next, fasten the wall plate over the mounting bracket to finish the installation.
- Drill or use a screwdriver to install screws into their respective holes.
- Do not forget to activate the Ethernet port by plugging it into the respective LAN switch on the router.
- You can check the LAN cable is working by checking the color on the router, where green indicates a good connection and yellow or red indicates signal problems.
- Now, you can turn on the power to the nearby electrical socket.
Why is My Ethernet Port in the Wall Not Working?
If your Ethernet port in the wall fails to work, it is likely due to a networking problem.
Simply put, the wiring has gone wrong, or encountered damage or the patch panel (connector) is not working well.
Here are a few ways to troubleshoot these problems.
- Start by checking whether the internet is working. Check the router to find the green light blinking.
- Ensure the Ethernet switch on the router is working. When connecting the LAN cable, it should blink.
- You will need to replace the Ethernet cable altogether if it is damaged.
- Remove the existing cable from the connector and the router switch. Replace it with a new CAT5 or CAT6 (whichever is applicable) cable.
- Sometimes, the Ethernet wires are not properly clamped into the connector, requiring you to clamp them again.
- Buy a network cable tester online and check the Ethernet connector before plugging it into the wall plate.
However, some problems are hard to diagnose or fix, requiring the expert’s assistance.
The Bottom Line
Ethernet ports in the wall for home and office will undoubtedly provide speedier internet.
However, be wary about the amount of work needed and the cost before drilling a hole in the wall.
Find a professional or use this guide to install the Ethernet port on the wall yourself.
Frequently Asked Questions
Why is My Ethernet Port in the Wall Small?
The Ethernet port in the wall is never small. You must be seeing the phone port instead.
The phone port is smaller than the Ethernet port but resembles the latter at first glance.
How Much Does Installing an Ethernet Port Cost for a Single Room?
Be prepared to pay between $100-$300 to acquire the necessary equipment and tools.
This estimate is keeping in mind you already own a router or modem and network cable testers.
Is Using a CAT6 Cable Better Than CAT5 for Wired Internet?
Using a CAT6 cable is always better than CAT5 regarding wired internet.
CAT6 cable can support higher data transfer, 250 MHz, compared to 100 MHz for CAT5.
Similarly, CAT6 can support higher bandwidth of up to 1 Gbps, whereas CAT5 can only support up to 100 Mbps.