Have your friends and colleagues recently complained about seeing the reversed image of you on a video call?
The chances are that you have freshly installed a Webcam on your computer or updated the Webcam driver, leading to the problem of mirrored images.
However, it is prevalent with many users where more than one or two issues may cause this problem.
Fortunately, these problems have an easy fix and may take only 5 to 10 minutes.
Read on to find out how to fix or enable the mirrored image on your Webcam.
Table of Contents Show
What Does it Mean by Mirrored Webcam?
Many users do not even know that the mirrored image in the Webcam is a problem; hence, they do not bother correcting it.
However, the Webcam is not supposed to mirror the image to ensure that the other person sees the correct picture.
If your Webcam image or video appears flipped horizontally or mirrored, you should know there is a problem.
If you write something on a plank or paper and show it to the Webcam, the user on the other end is supposed to read the text as they usually would, but the text seems reversed because of the flipped image.
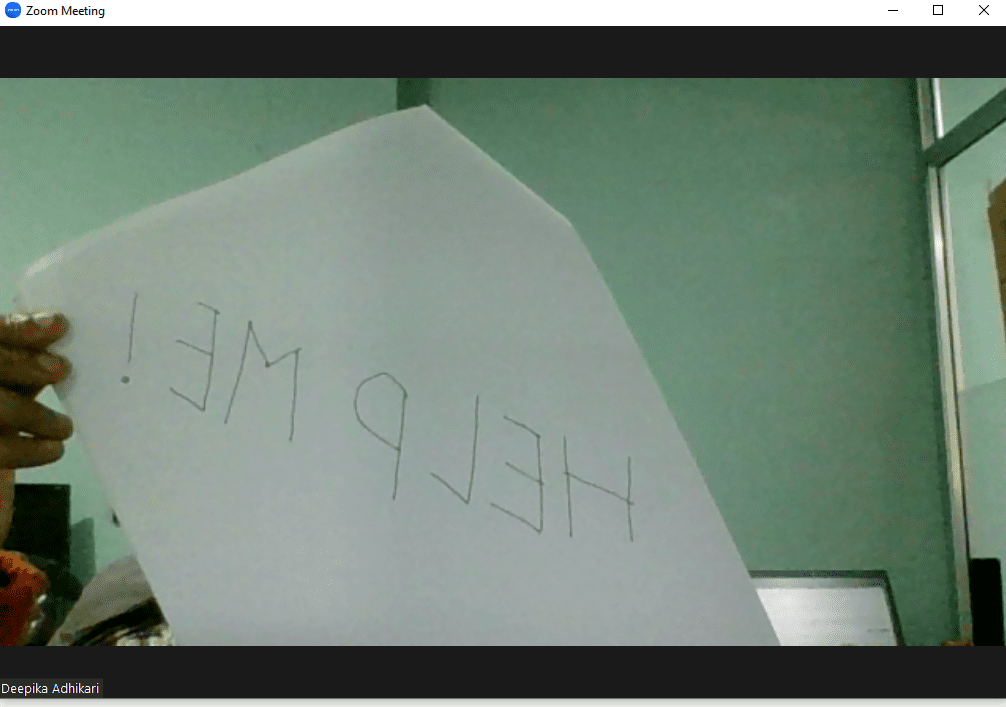
It may become a nuisance, especially when trying to give an online class or presentation on a whiteboard.
Why is My Webcam Always Mirrored?
There is more than one reason your Webcam video image is mirrored or reversed; some reasons include the following.
1. Enabled From the Video Calling Application
You would find the image is mirrored or flipped when the application’s setting is set to ‘mirrored.’
The video calling app only utilizes the Webcam but does not determine the orientation (reversed or flipped).
Therefore, begin with assessing other video calling applications to determine whether only one or all the apps are showing mirrored images.
The likely chance is that the image is set to ‘mirrored’ in the video calling app’s setting.
2. Enabled From the Webcam’s Software
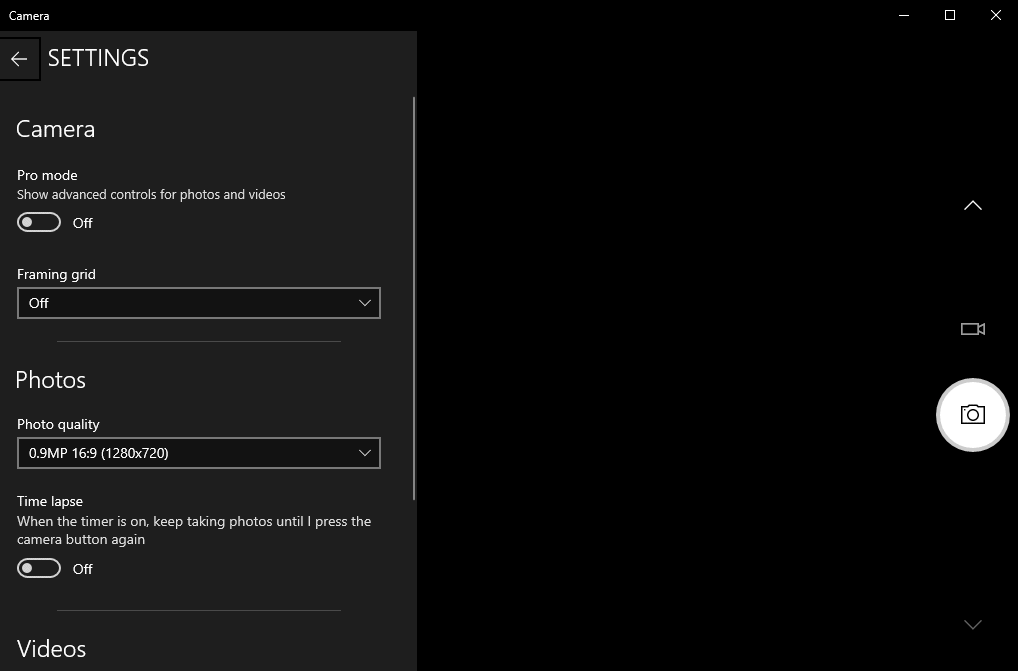
Another possibility is that you have enabled mirrored images in the Webcam’s software.
Changing the Webcam’s Camera setting to mirrored will render reversed images on all video-calling applications.
Some Webcams natively include rotating or flipping the image, creating a reversed image by default.
3. Third-Party Webcam Utility Software Enabled
Your Webcam’s flipped, or upside-down image is typically due to Webcam utility software installed on your device.
Installing the third-party software often alters the Camera setting, creating flipped images for both users.
Although removing the utility software may help solve the issue, you will lose the additional customization the third-party software offers.
4. The Webcam’s Driver is Outdated
Although rare, outdated Webcam drivers may create problems with the Webcam, creating mirrored images.
It will likely happen when you install a Webcam with a driver incompatible with your device’s operating system.

Additionally, updating the operating software without updating the Webcam’s driver will create the same problem.
Check whether the image is reversed or flipped on every video calling app, then check the driver’s status.
5. Bugs and Errors in the Webcam’s Driver Software
Your Webcam may encounter bugs or errors when updating the driver and the driver’s software.
Updates are significant for adding more features and functionalities, but sometimes the latest updates fail to comply with the software.
It will lead to Webcam software bugs, which may create errors, including producing reversed images.
How to Fix Mirrored Webcam on Windows?
Fortunately, all of the problems with the mirrored image can be fixed in a few easy steps.
Here are some proven tips to solve mirrored images.
1. Disable Mirrored Image Within the Application
Few users realize this but forget to disable the mirrored feature within the video calling applications, including Zoom, Skype, and Google Meet.
It is usual to forget about it when you use the application for the first time. Here is how you can solve the problem.
Here is an example to demonstrate the process.
- Open the Zoom app and click on the gear-shaped icon or ‘Setting’ at the top-right corner.
- From the menus on the left, select Video.
- Scroll down to find the ‘Mirror my video’ feature.
- Click on it to temporarily disable the feature.
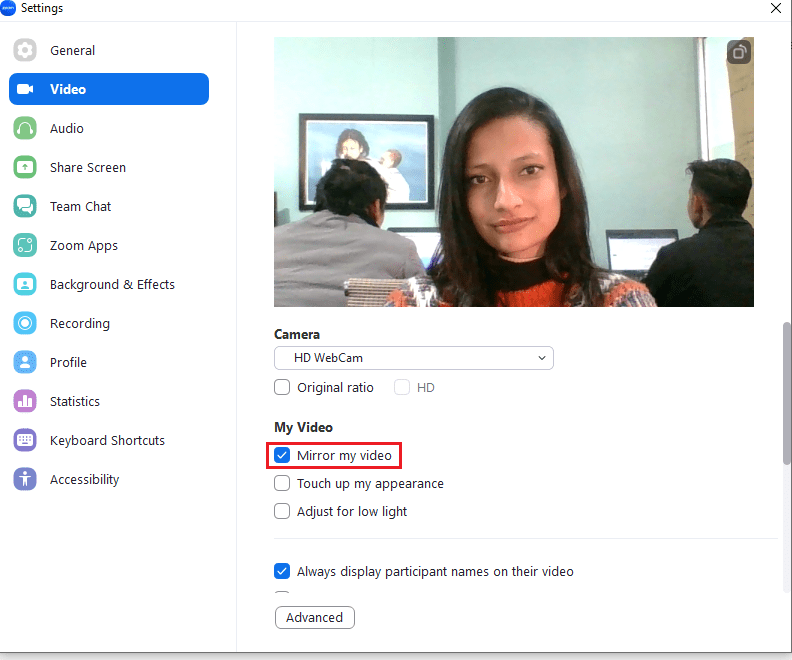
Some users demand un-mirrored Webcam videos so that the text in video calls can be read.
To have high-quality virtual interactions, many people need the ability to mirror their Webcam videos.
You can mirror your video by going to the same settings above.
2. Disable Mirrored Image Within the Webcam
Enabling the mirrored feature in a Webcam setting will cause mirrored images in all video-calling applications.
Some Webcams may come with this feature enabled, requiring you to change the setting.
Here is an example of a Logitech Webcam.
- Press Windows and type the name of the Webcam to find the setup utility. For example, “Logitech HD Webcam C270.”
- Press on the icon to open the setup utility.
- Go to Advanced Settings and find the Image Orientation.
- If ‘Mirrored‘ is already marked, unmark it by pressing the checkbox.
- Mark ‘Normal‘ and then save the setting.
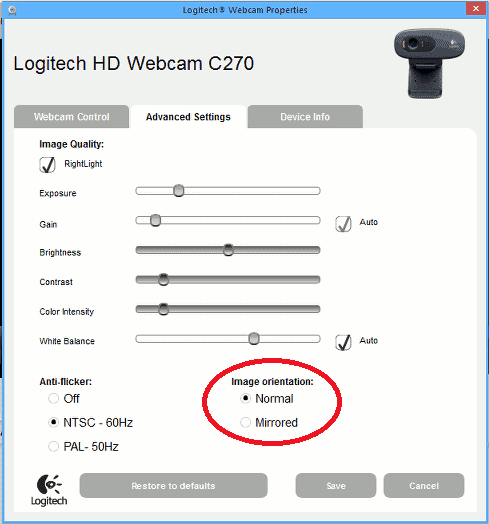
Voila! It should correct the image orientation.
3. Disable Third-Party Webcam Utility
Webcam utility is a quick solution to unlocking Webcam-like capabilities for the Camera, including DSLR.
However, the downside of using it may change the video orientation to reversed or flipped.
Therefore, the only solution is to remove or disable the Webcam utility software to fix the issue.
- Press the Windows logo and type ‘MSConfig‘ or ‘system configuration.’
- Press on Services and find the software from the list.
- Tick it and press ‘Disable.’
- Click Ok, then exit.
Otherwise, you can consider removing the software altogether.
- Press Windows Logo and type ‘Control Panel.’
- Once the Control Panel opens, navigate to ‘Programs’ and choose ‘Uninstall a Program.’
- Find the Webcam utility program from the list and press uninstall.
- Follow the procedure as mentioned in the dialog box.
4. Update Webcam’s Driver or Software
An outdated Webcam driver creates problems with mirrored images when updating the operating software.
Otherwise, installing an older version of the Webcam driver may also invite a similar problem.
Your only solution is to update the Webcam driver. Visit the manufacturer’s website and download the version to install.
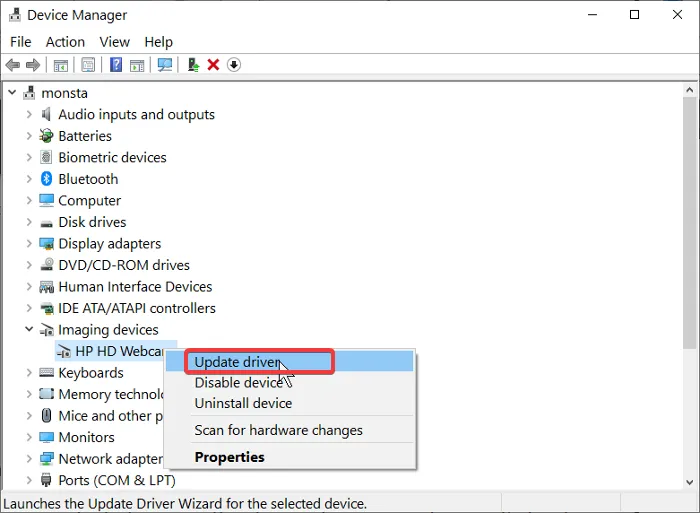
Otherwise, open Device Manager to update the driver.
- Right-click on the Windows logo and choose ‘Device Manager‘ from the list.
- Navigate to Cameras and choose the Webcam.
- Right-click on the Webcam and press Update Driver.
- The system will redirect you to the dialog box where you can search for new updates for installation.
Finish the installation and reboot (restart) your system to check whether it works.
5. Revert Webcam’s Driver Status
The fresh driver update is the culprit when the problem only begins after installing the latest driver update.
Reverting to the previous driver’s version may help fix this issue.
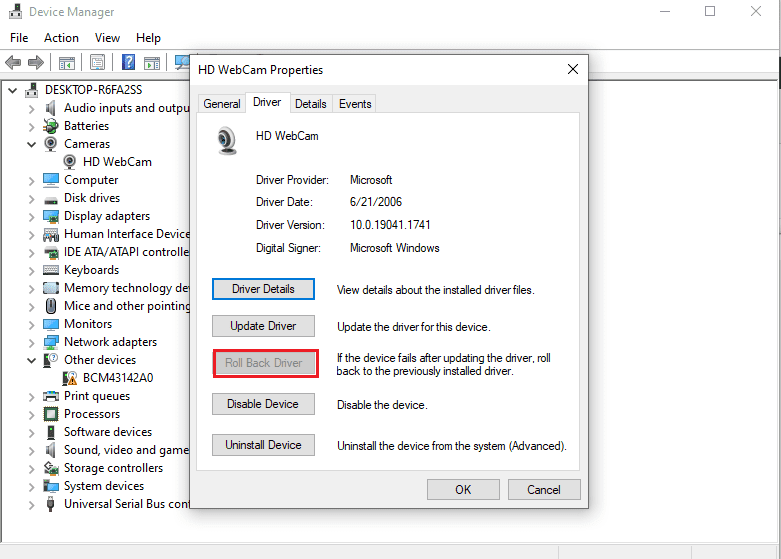
- Right-click on the Windows logo and choose Device Manager.
- Go to Camera and choose the Webcam.
- Right-click on to select Properties.
- Go to the Driver tab, navigate to ‘Roll Back Driver,’ and choose Yes.
- Once the rollback is complete, restart your system for the changes to take effect.
The Bottom Line
If you notice your Webcam mirroring yourself, you should know any of the problems mentioned above could be the cause.
Hence, start with finding the problem by diagnosing it and assessing the different issues using the guide above.
Luckily, most of these problems can be fixed within a few steps.
