Gaming desks in the market are way too limited in size and features, whereas most display standard sizes with limited outlets and storage units.
Therefore, creating your DIY gaming desk may be reasonable if you are fed up with your gaming desk.
Making a DIY gaming desk instead of buying it will help you save money and offer custom features.
You can choose from many desk designs. Being a custom desk, you can add many different features to it.
Read on to learn how to build a basic gaming desk at home on a minimal budget.
Table of Contents Show
4 Popular Gaming Desk Designs
No, not all gaming desks are built the same!
The gaming or PC desks usually come in different designs or shapes appropriate for a room with different layouts and personal preferences.
Generally, you would find gaming desks in four different designs, which are as follows:
| Desk Style | Features | Image |
|---|---|---|
| Standard Desk | A straight-forward desk design usable while seated. It is built in rectangular shape and comes in different dimensions. (For example; 50" x 28-30" x 25") | 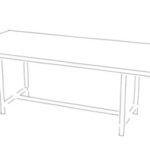 |
| Standing Desk | It follows the straight-forward design but instead of sitting it is intended for standing. It may come in different dimensions similar to standard desks. | 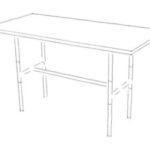 |
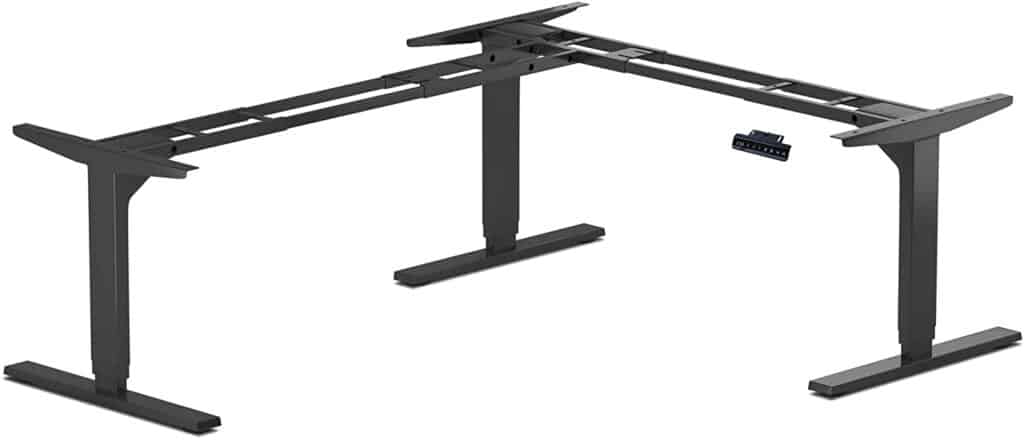
| L-Shaped Desk | L-shaped desks are great for rooms with empty corners. It offers extended work surface for multiple use and comes in different dimensions. (60-72" for longer side and 48-58" for shorter side) | 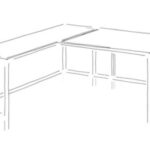 |
| U-Shaped Desk | It is an upgarde to L-shaped desk that surrounds the user in three different side and provides significant work surface. However, it may require additional floor space because of extensive dimensions. | 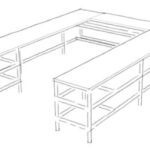 |
Designing standard, standing, and L-shaped desks are more feasible with DIY projects.
Most gamers use L-shaped gaming desks because they offer a more significant work surface than the traditional one.
Moreover, they are relatively straightforward to design and assemble with the right tools and materials.
Creating a U-shaped gaming desk can be too complicated and expensive for a DIY gaming desk project so, it is best to avoid it.
Why Should You Design a DIY Gaming Desk?
Designing a DIY gaming desk may sound like an arduous and lengthy affair, but if you think it over, there are more benefits.
You can choose your materials, features, storage, and budget while conceptualizing your preferred design.

Rest assured, you are not alone.
Many home users take up the challenge of building DIY gaming desks and even manage to create a functional unit.
Here are a few benefits to designing your gaming desk.
- They are expandable and customizable, allowing you to decide the size, layout, and custom features.
- Showcases your concept and hard work in the form of a functional gaming desk.
- It makes the best use of space by assembling a custom gaming desk that fits nooks and corners, which is less reliable for market brought desks.
- It fits your budget and even incorporates repurposed wood to create a new gaming desk unit.
- It offers the immense satisfaction of a DIY build and paves the way for unique learning experiences.
How to Build a DIY Gaming Desk: Step-by-Step Guide
There are many things to consider when building a custom gaming desk.
Along with choosing the gaming desk shape and size, you ought to find the right tools and materials to provide optimal support and structure.
Here is a complete guide to setting up a functional gaming desk.
Materials Required to Build a DIY Gaming Desk
Here is the list of tools required to build a custom gaming desk.
| Category | Items |
|---|---|
| Measurement | Measuring tape, circular, table, or miter saw, and spirit level |
| Power tools | Drill and screwdriver |
| Others | Pencil and paper, 80-120-grit sandpaper, wood glue, table clamps, paint, stain, lacquer, or varnish, leather desk mat, bolts, and hex key |
Step 1: Choose the Desk Surface
Let us begin with determining the desk surface, as it takes up a significant portion of any gaming desk.
Moreover, the type of desk surface material you choose will determine the overall cost of the DIY project.
Also known as a tabletop, you can choose from various sturdy materials.
- Most DIY crafts use reclaimed or repurposed wood to make desk surfaces. Old pallets, wood planks, and furniture will work great in obtaining reclaimed timber.
- You can order custom desk surfaces from Amazon or IKEA, usually made from MDF wood, glass, plastic, or steel.
- When using glass, ensure to use tempered glass with high tensile resistance to endure the weight of the PC and other peripherals.
- Plastic and steel desk surfaces may also work well and cost cheaper than wood.
However, measuring and cutting through the materials would require previous crafting skills to minimize the risk of mistakes.
Here is a video description to help you build a custom desk surface.
Step 2: Figure Out the Gaming Desk Size
The gaming desk size is the second and most crucial thing to decide on.
As you create your desk, you should be wary about choosing the size to determine the required material.
Start with determining the dimensions of your gaming desk; the more space it has, the more items you can fit.
The standard height of any desk is between 29″ and 30″, but finding the right size will depend on your height.
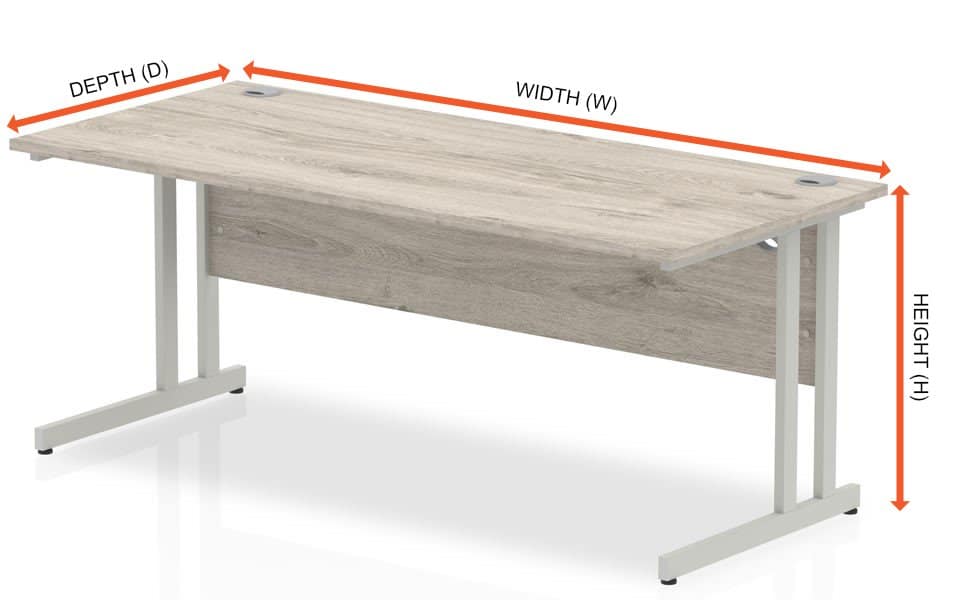
A desk height of 28″ (71.2 cm) will allow a user between 172 cm and 177 cm to sit comfortably.
On the other hand, a standing desk height should optimally measure 35″ – 36″ to maintain straight body stature.
Use a desk height calculator to find your custom desk height.
Similarly, look into the desk dimension: depth and length. A single desk would measure 20″ x 30″ but can be too small for multiple monitor setups.
Choose desk surface dimensions between 20″ x 36″ to 25″ to 55″ for a large desk surface.
On the other hand, an L-shaped gaming desk should boast an average dimension of 23″ x 60″ on the large side and 23″ x 36″ on the small side.
Moreover, the surface should be around 1″ to 1 ¾” to endure heavy gaming equipment and other items.
Step 3: Choose the Right Parts and Tools for the Desk Frame
Once you finalize the desk surface and dimensions, jump onto building the desk frame.
Start with choosing the right parts and materials for the desk frame, usually wood or metal tubes that will support the overall weight.
When choosing metal tubes, ensure to pick one with high tensile capability.
Metal tubes work great compared to wood to create flexible and robust frame designs, and you can bend them using a socket and outlet tee to create custom shapes.
Consider these items when creating a steel desk frame.
| Material | Specification |
|---|---|
| Tube 1000 mm (galv-ube-size7) | At least 4 to create a vertical frame |
| Tube 995 mm (galv-ube-size7) | At least one 2-3 to create a horizontal frame |
| Single socket tee | At least 4 to hold the vertical frame |
| 90° Side Outlet Tee | At least 4 to hold adjoining frames |
| 90° Elbow | At least 2-3 to bend the frames |
| Flange and panel Holder | Optional |
Optionally, you can buy quality desk legs, such as IKEA’s OLOV legs, at $15 a piece.
These would be enough to create a strong and versatile desk frame.
However, you can always make a dynamic structure, such as a monitor mount, by adding more metal tubes, sockets, or outlet tee.
Step 4: Assemble the Desk
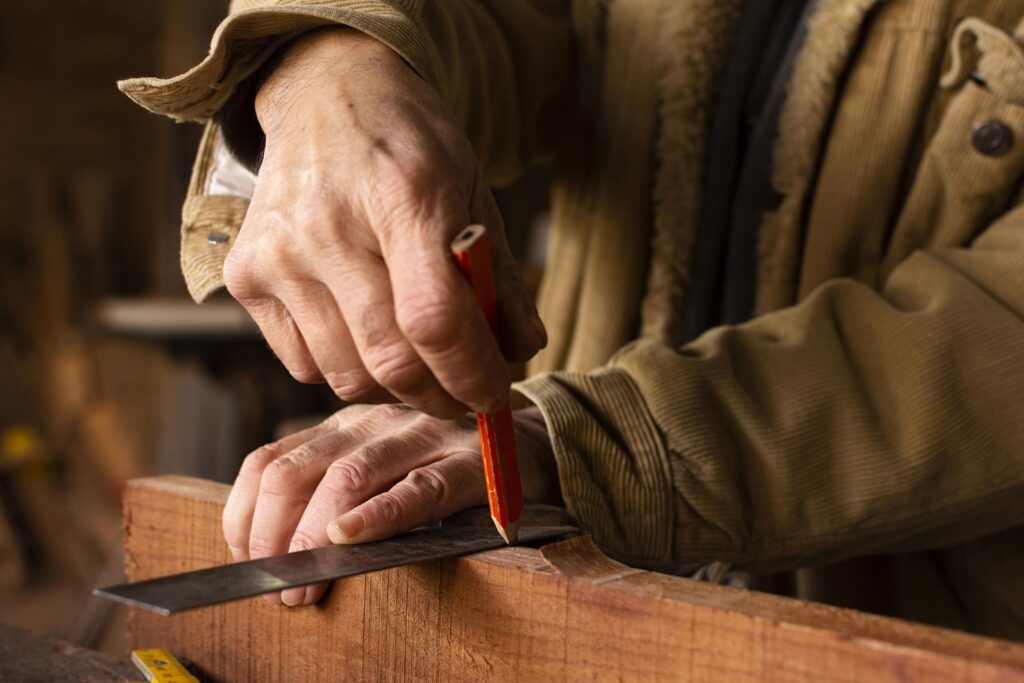
Start with preparing the surface. When dealing with wood surfaces, you should cut, sand, stain, and finish them.
This process may take a few hours and is quickly done if you have experience with furniture making.
- Run the sandpaper back and forth across the surface in a straight motion until the rough edges smoothen.
- Apply two coats of varnish or lacquer to complete it. Here is a video guide to help you with it.
- Otherwise, you can consider painting the desk surface to give it a colorful touch. Apply two layers of paint, base, and top, to create a thicker consistency.
- Next, start cutting the tubes for frames of appropriate height and assemble them, or you can order your precut frame tubes.
- The tube should measure about 28-29 inches for sitting desks, and the standing desks should have lines measuring 34-35 inches.
- Next, drill the top frame to fix it to the desktop using insert and bolt and create a 1 ½ or 2-inch diameter hole for the wire outlet.
- Start attaching each tube using a single socket tee and a 90° side outlet tee to create a frame structure and flange at the bottom of the frame for base support.
If you want to place your CPU under the desk, consider building a comfortable compartment using the tubes.
Step 5: Add Extra Features
A gaming desk would look incomplete without additional features such as drawers and mounts.
When using metal tubes as the desk frame, you can buy a few more cut tubes, socket tee, outlet tee, and flange to create a space just under the desk surface for a drawer.
Use the space to add a CPU or detachable drawers that you can easily buy on Amazon.
The final product will look something like this:
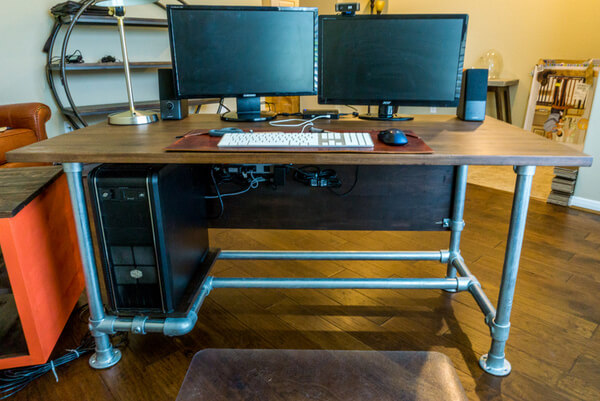
Voila! You have designed a basic DIY gaming desk.
Remember to add additional decoration to complete your gaming desks, such as RGB lighting stripes, a leather mousepad, and a desk lamp.
How Much does it Cost to Build a DIY Gaming Desk?
Building a DIY gaming desk would cost 200 to 300$, depending upon the size and materials used in the desk.
Remember, you need not pay anything if you use reclaimed wood unless you buy it from someone else.
On the other hand, finished wood desktops on Amazon and Walmart would cost about $48-$104.
The additional cost for sanding, staining, and finishing would cost about $3.36 to $7.46 per linear foot (professional’s rate).
Using IKEA’s OLOV legs will cost $60 for four frame tubes. Flange, side outlet tee, and single socket tee come at about $1-$7 apiece.
If you want to create additional support, such as monitor mount stands, prepare to pay a few more bucks for custom frame tubes, insert and bolt, side outlet, and single socket tee.
Otherwise, choose prebuilt mounts like a VIVO dual monitor desk charger for about $43.99 on Amazon.
Characteristics of an Ideal DIY Gaming Desk
It would help to keep certain aspects in mind when doing your gaming desk.
Make a checklist of these items to ensure you have an ergonomic gaming desk.
1. Keep it Large
Keep it large when doing a DIY gaming desk to overcome the challenge of limited desk space.
A gaming desk surface measuring 45″ to 55″ in width with 30″ depth should suffice
2. Affordable Project
The DIY gaming desk project is cheaper than the factory-made gaming desks on the market.
Building your gaming desk would cost $80 to $200 less than buying a new one.
Ensure to keep the material to a minimum and assembly more straightforward to save money.
3. Easy to Assemble
Choose simpler setups so you can quickly assemble all the items. Otherwise, you may hire a professional who charges $5 to $30 per hour.
4. Ergonomic Product
The final aspect of the DIY gaming desk project is ergonomics.
Never place style over comfort because you would spend countless hours gaming on that desk.
A gaming desk with an appropriate height and a typically larger surface is a better choice.
Final Verdict
Many users take up the challenge of creating their gaming desk; hence, creating your DIY gaming desk would be a great idea.
You will find many desk craft videos on YouTube that you can refer to when starting a DIY gaming desk project.
However, keep the cost minimal and never compromise on functionality and comfort over style to create a perfect gaming desk.
In the comment, let us know how much you spent on your DIY gaming desk project.